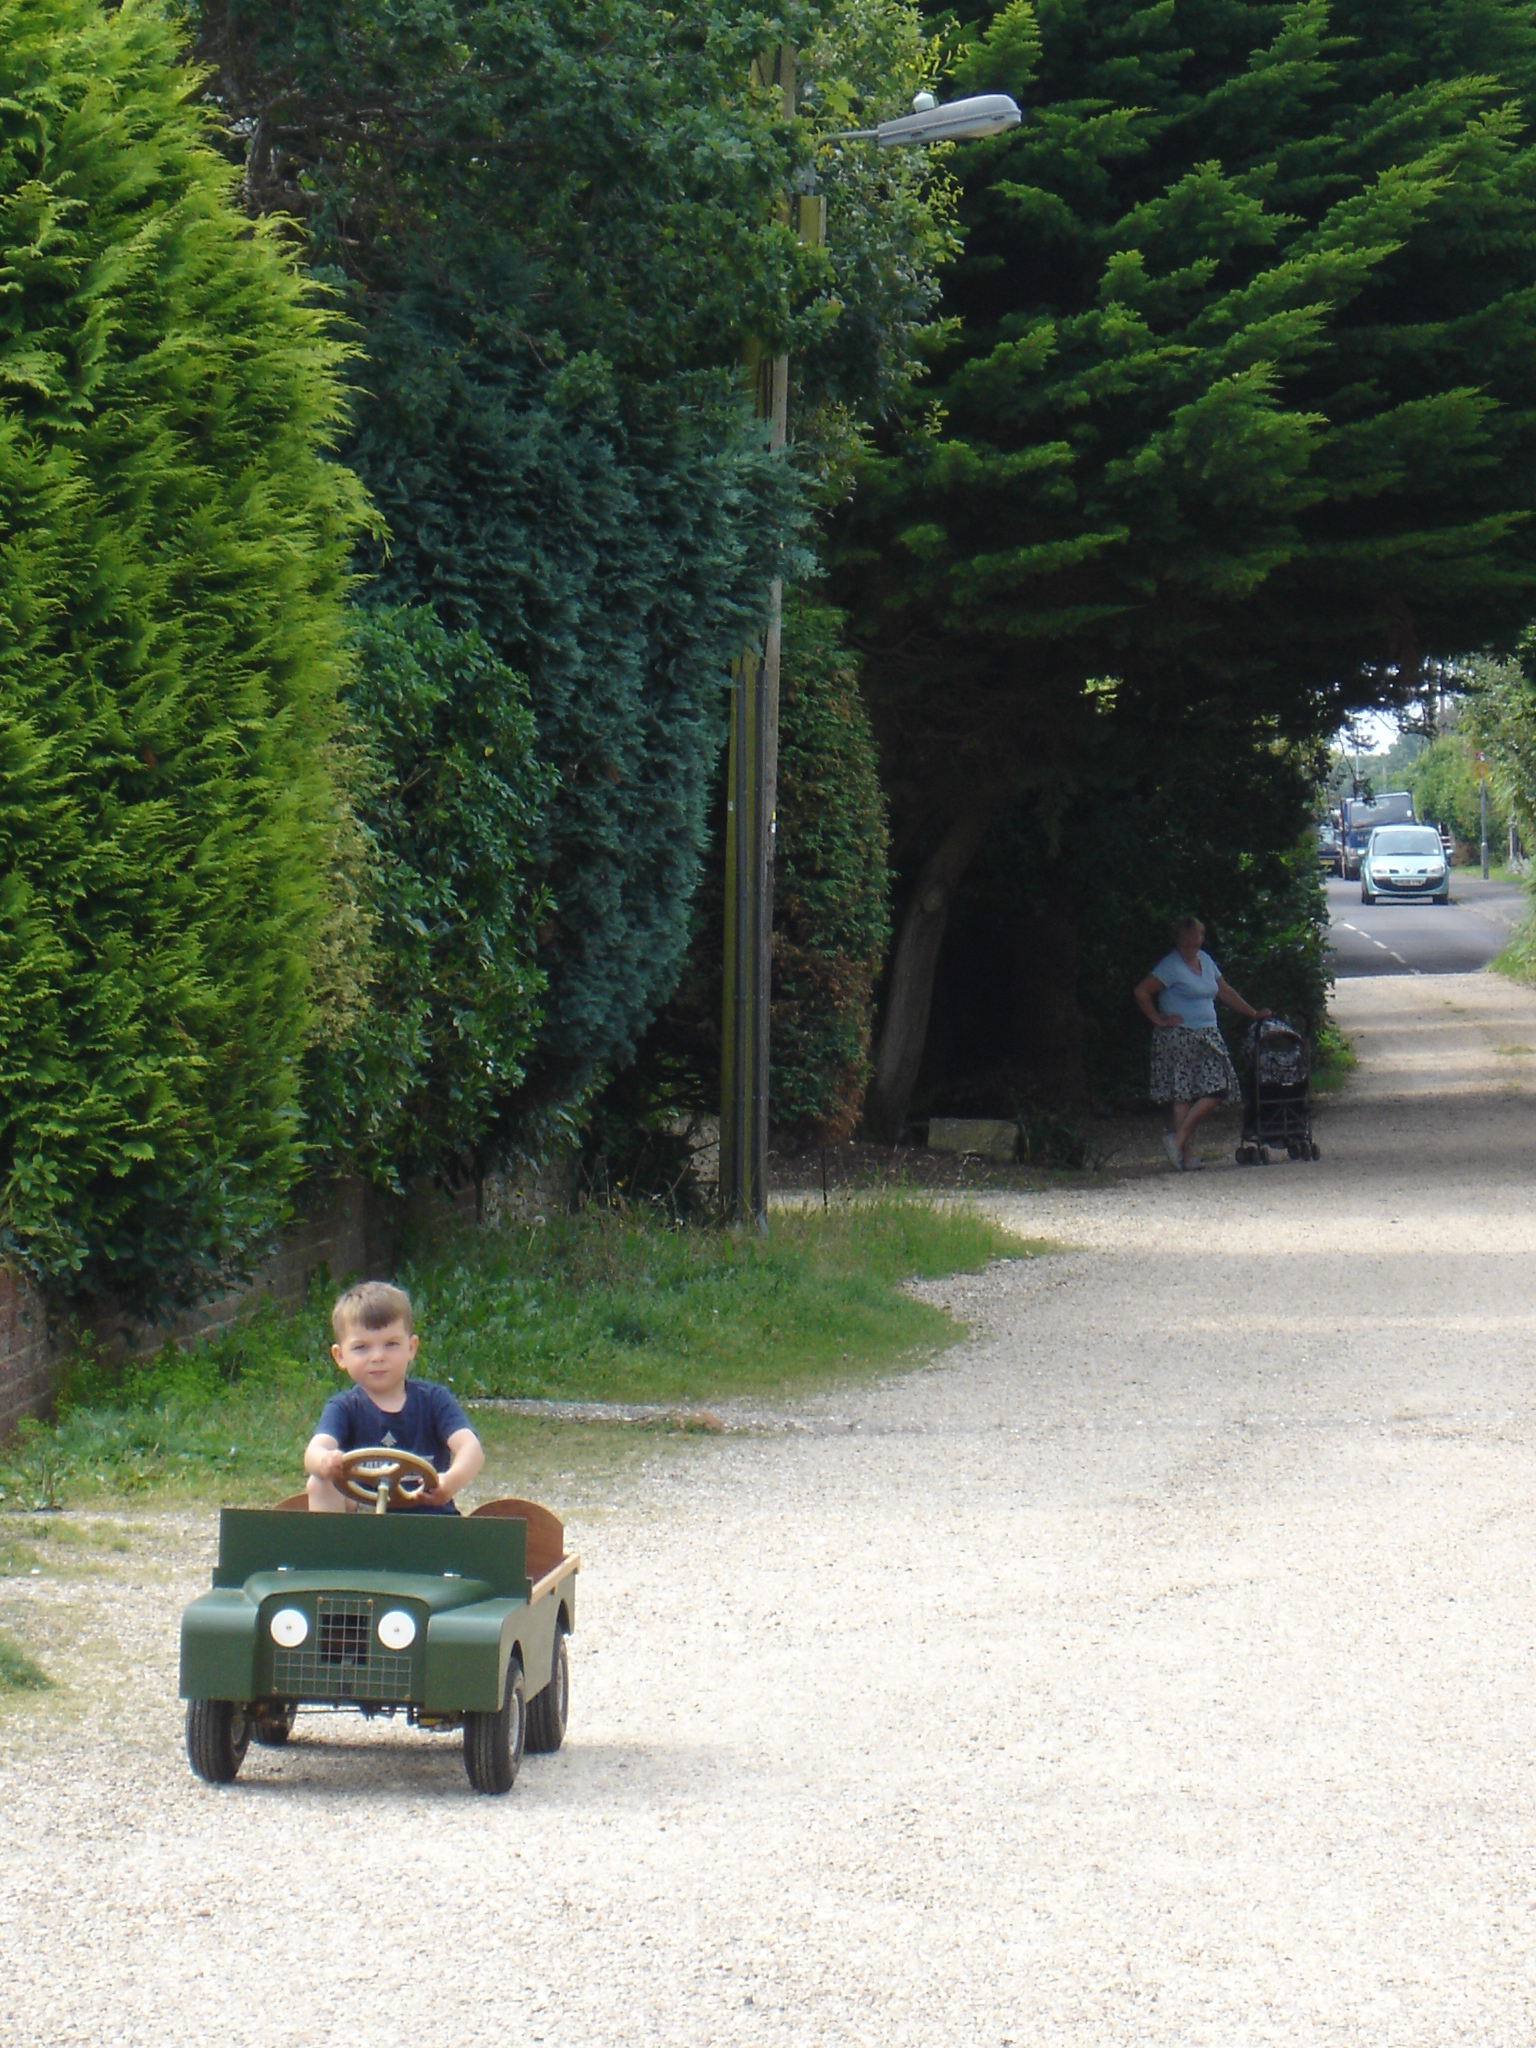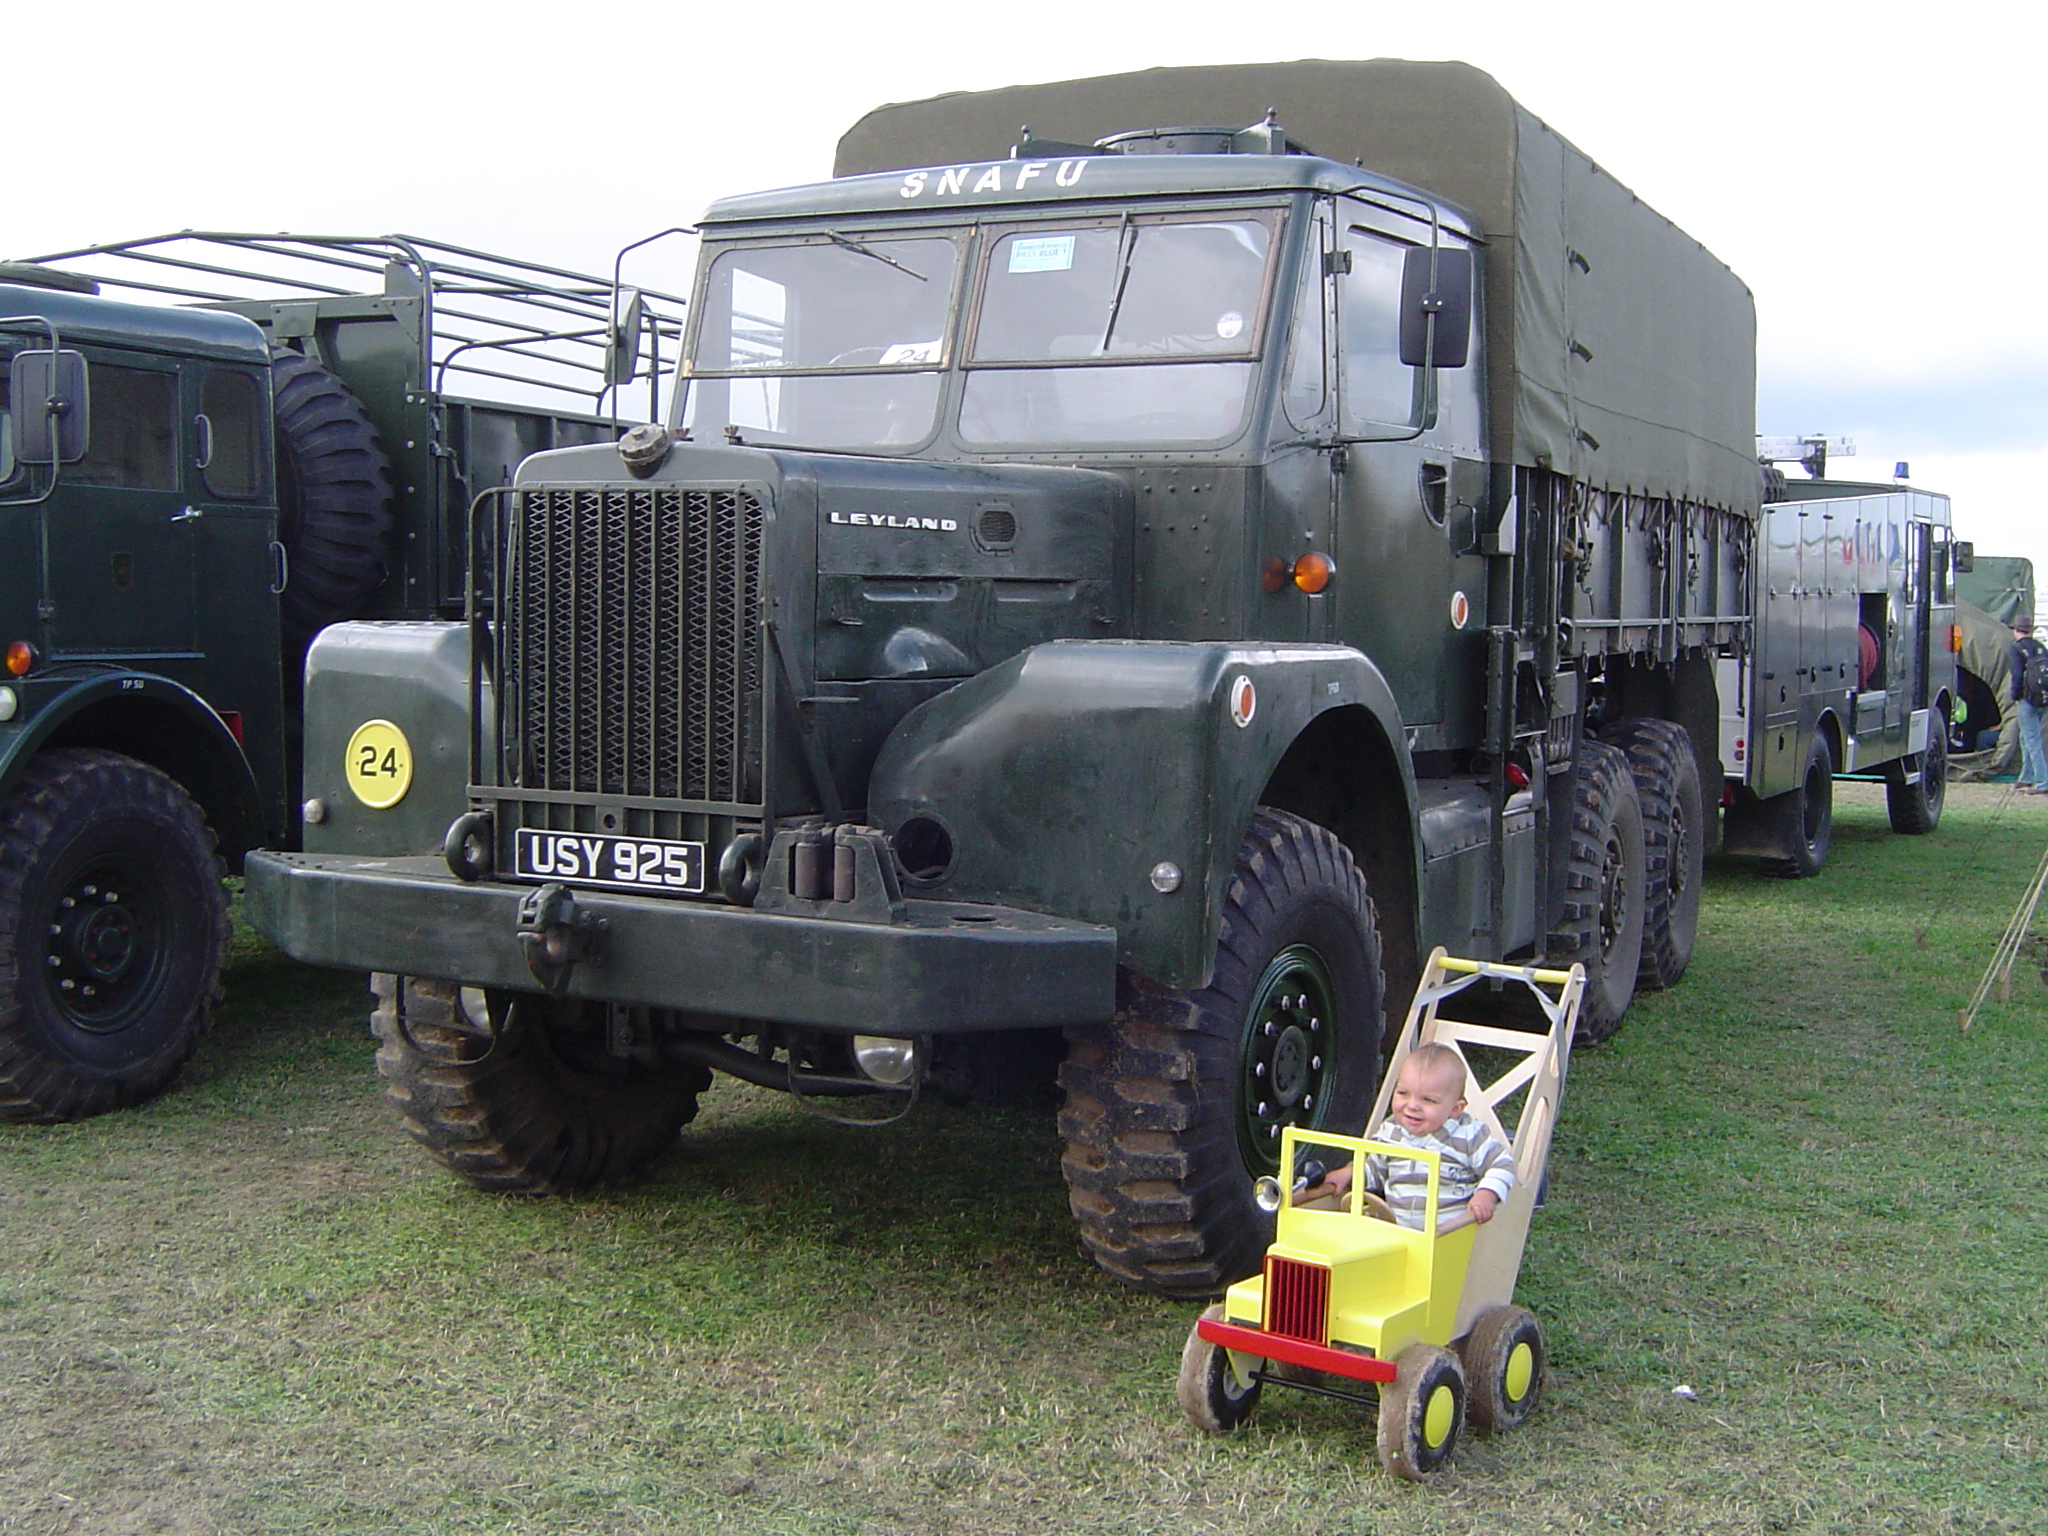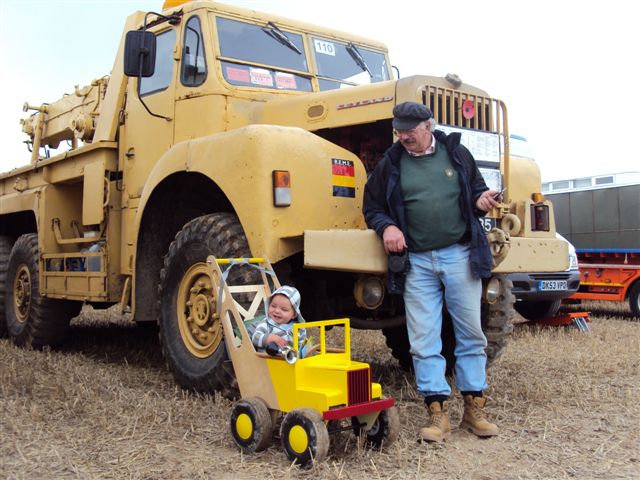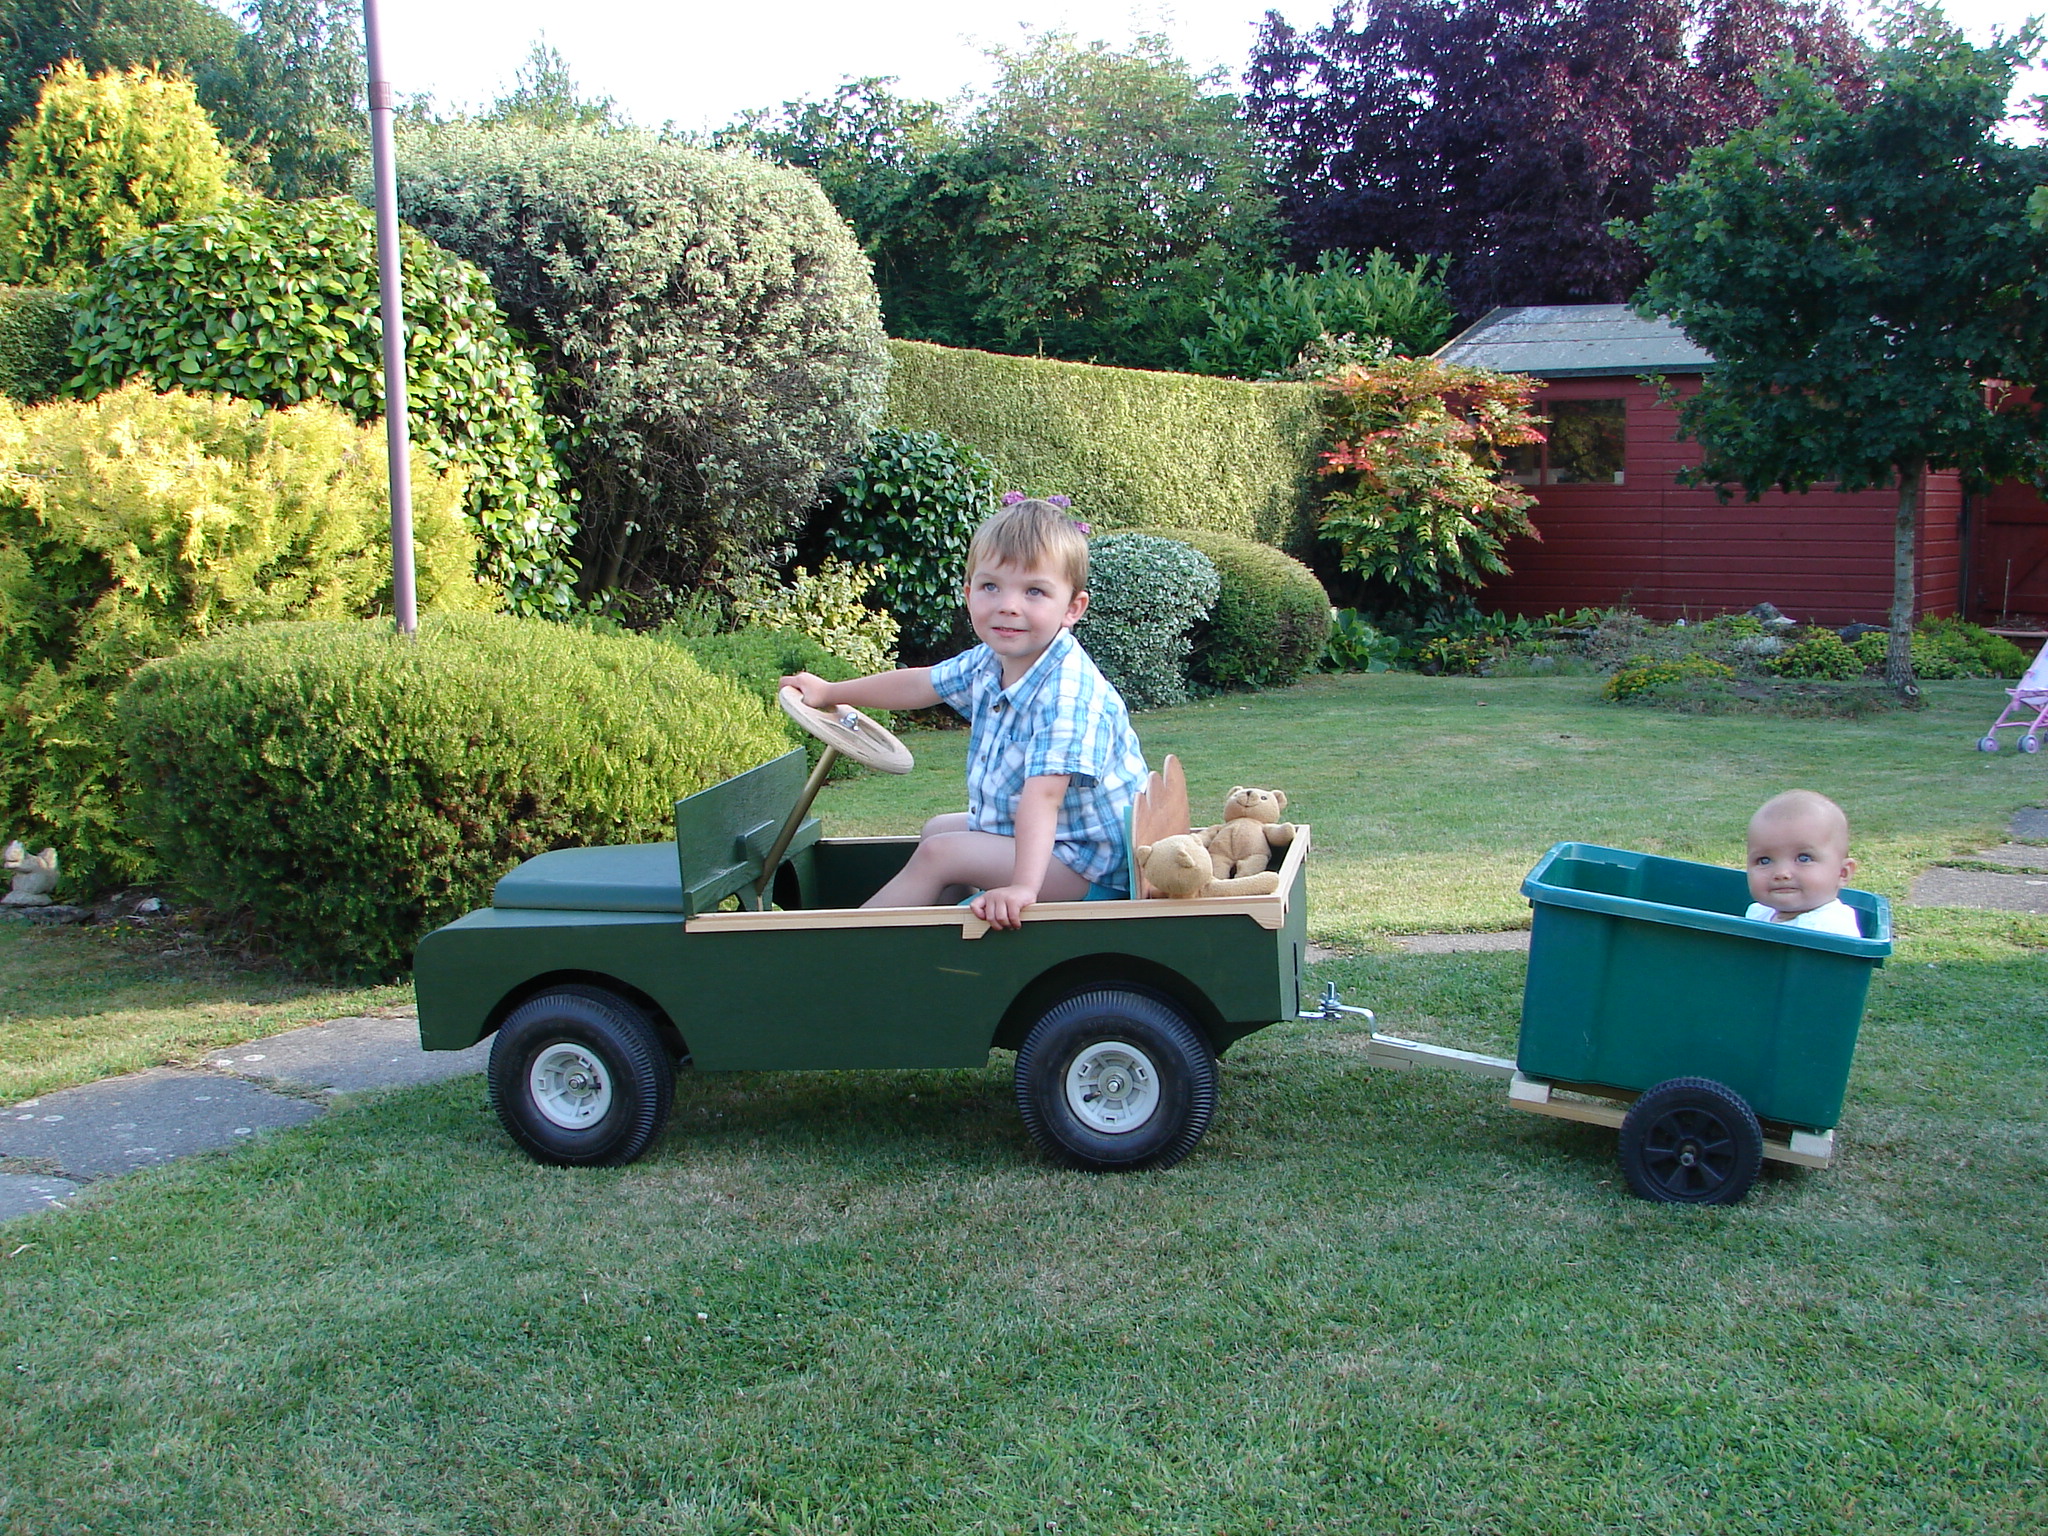
I was 19 days over sixty when our first grandchild arrived. A respectable age to become a grandfather I thought to myself.
So what was Grandad going to make for this new addition to the family?
There is always something you remember from your own childhood and for me it was not having the one toy I really wanted, a pedal car.
pandora earrings,pandora necklaces,pandora essence, pandora jewelry,pandora jewelleryOil temperature is easiest to regulate in a deep fry setting, and you can get more done at once.. pandora jewelry,pandora charms,pandora bracelets,pandora rings.pandora earrings,pandora necklaces, pandora jewelry,pandora essence,pandora jewelleryAlzheimer’s disease represents another frequent cause of weight loss, especially among the elderly pandora sale. pandora jewelry,pandora charms,pandora bracelets,pandora rings.pandora earrings,pandora necklaces,pandora essence,pandora jewellerySAN FRANCISCO, CA JANUARY 28: Jude Siddall, owner of the Active Spaces in the outside courtyard at the Active Spaces located in the Mission district January 28, 2008 in San Francisco, California. pandora jewelry,pandora charms,pandora bracelets,pandora rings.pandora earrings,pandora necklaces,pandora essence,pandora jewelleryPeople with nickel allergies should ensure that they wear jewelry that is hypoallergenic, or nickel free. pandora jewelry,pandora charms,pandora bracelets,pandora rings.pandora earrings,pandora necklaces,pandora essence,pandora jewelleryTherese, Canada and Mexicali, Mexico pandora jewelry. pandora jewelry,pandora charms,pandora bracelets,pandora rings
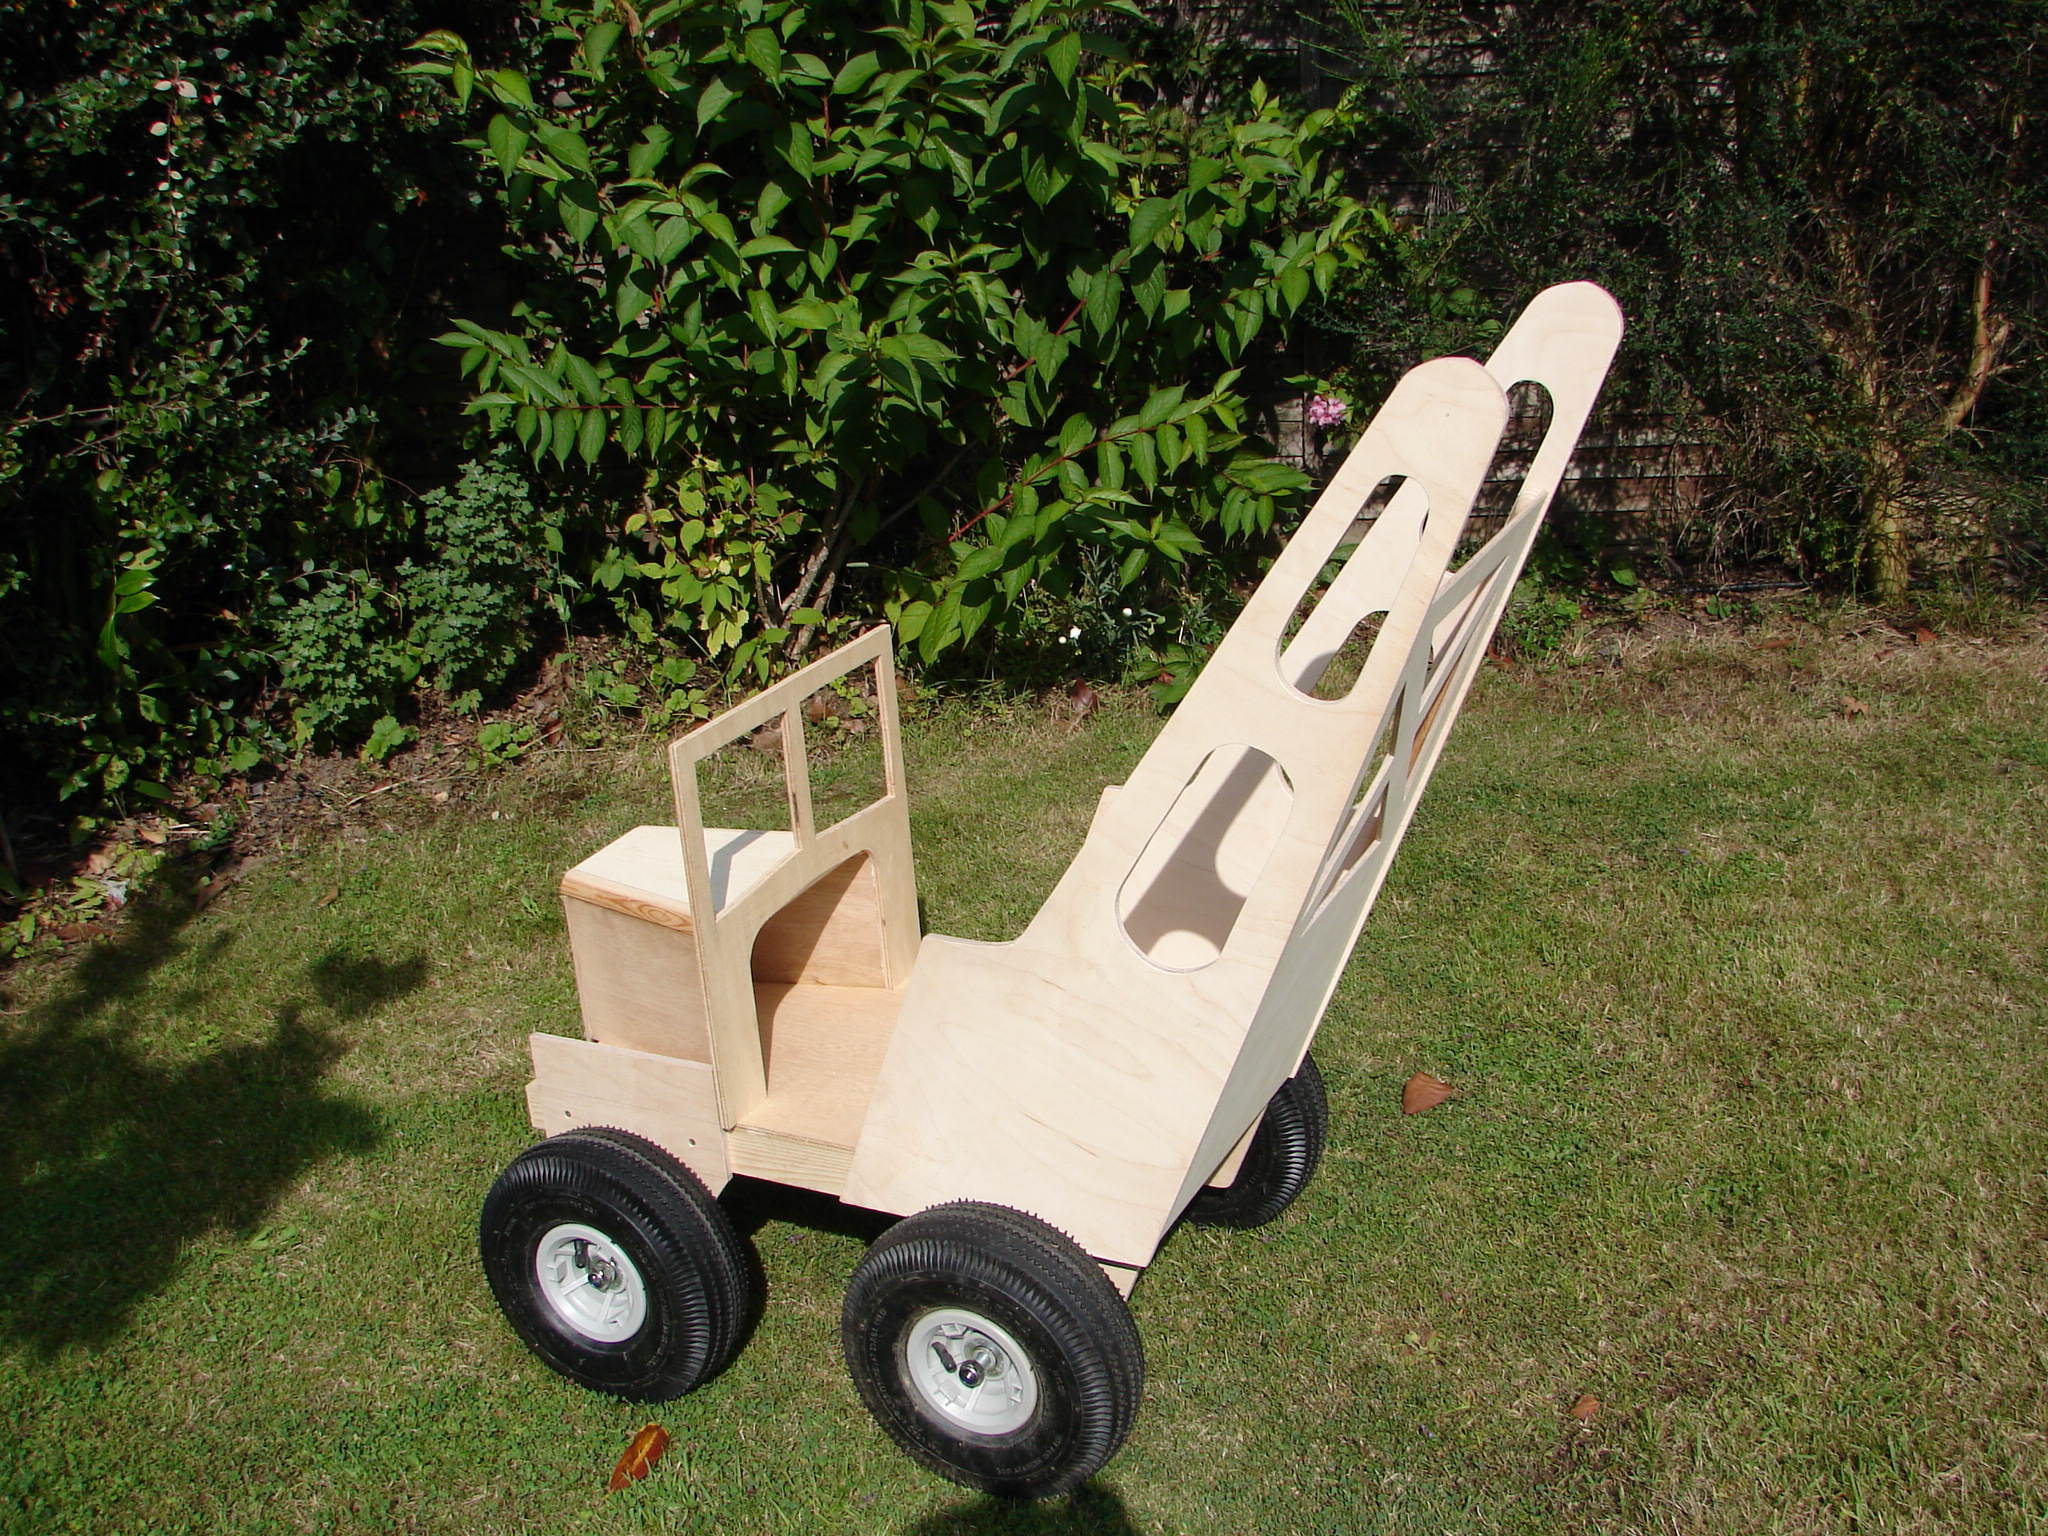
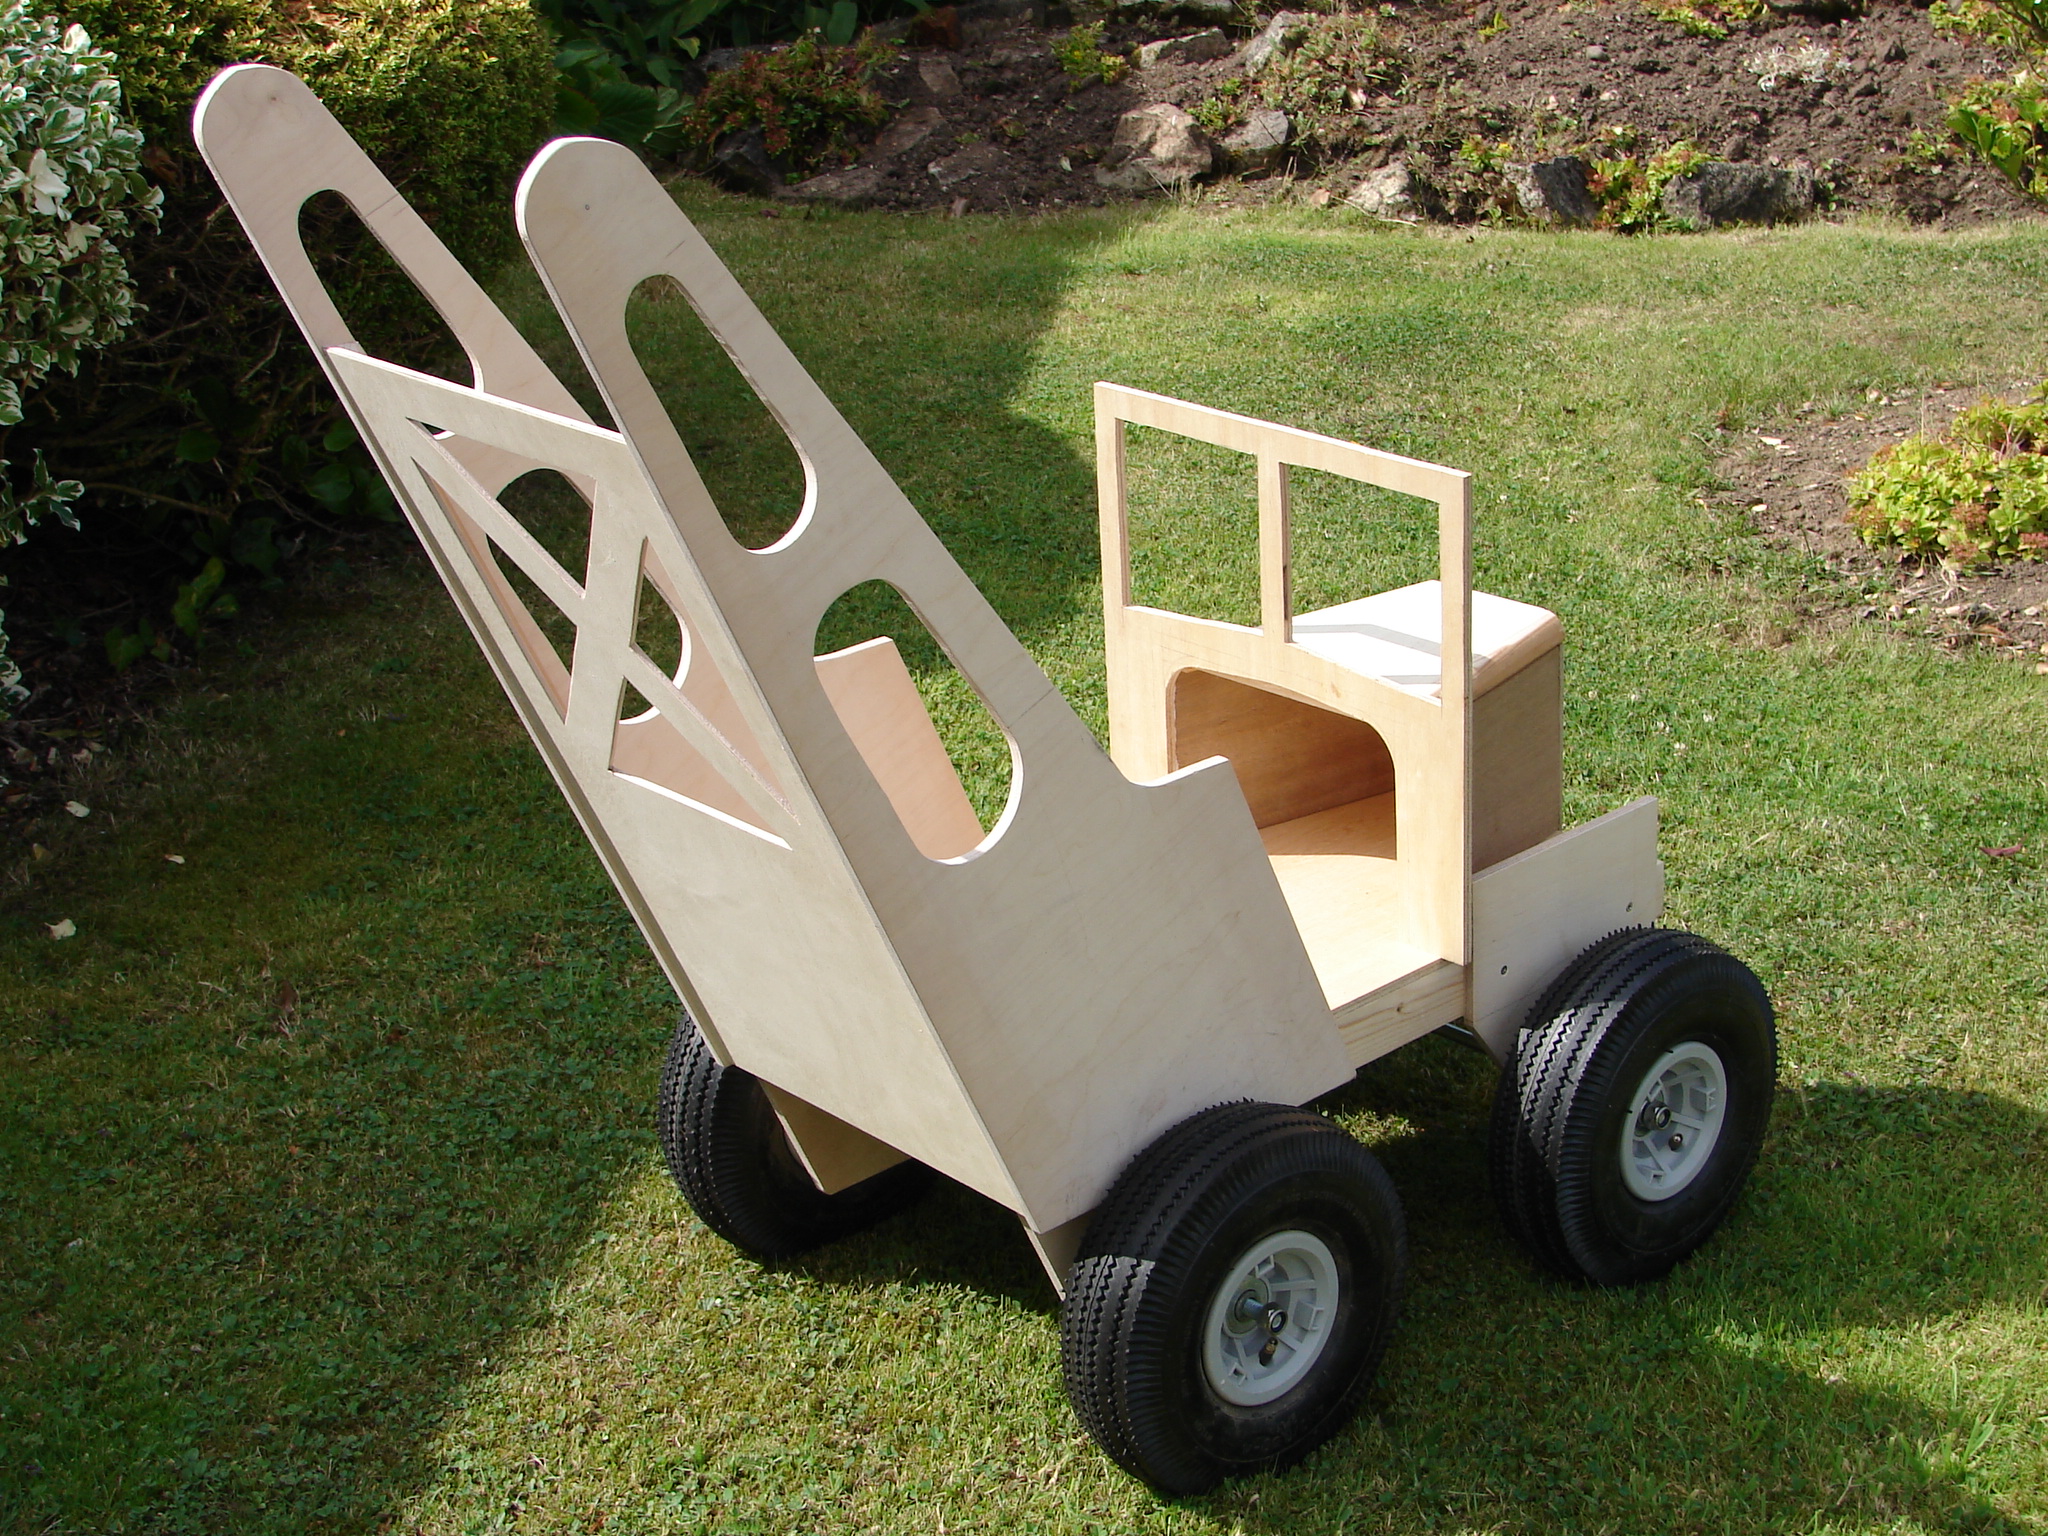
Determined to revisit my early years I began to give some thought to what I would build and how practical it would be to use in a typical suburban garden. Who remembers those dreadful Tri-ang metal pedal cars where you fought with the pendulum pedals only to move a few inches forward and then a few inches backwards!!
To be pedal driven the gearing would have to be low and use easily obtainable materials so what better for the propulsion than a child’s bicycle pedals and chain set driving the rear axle. And what would be the ideal vehicle for ease of construction and the low gearing :

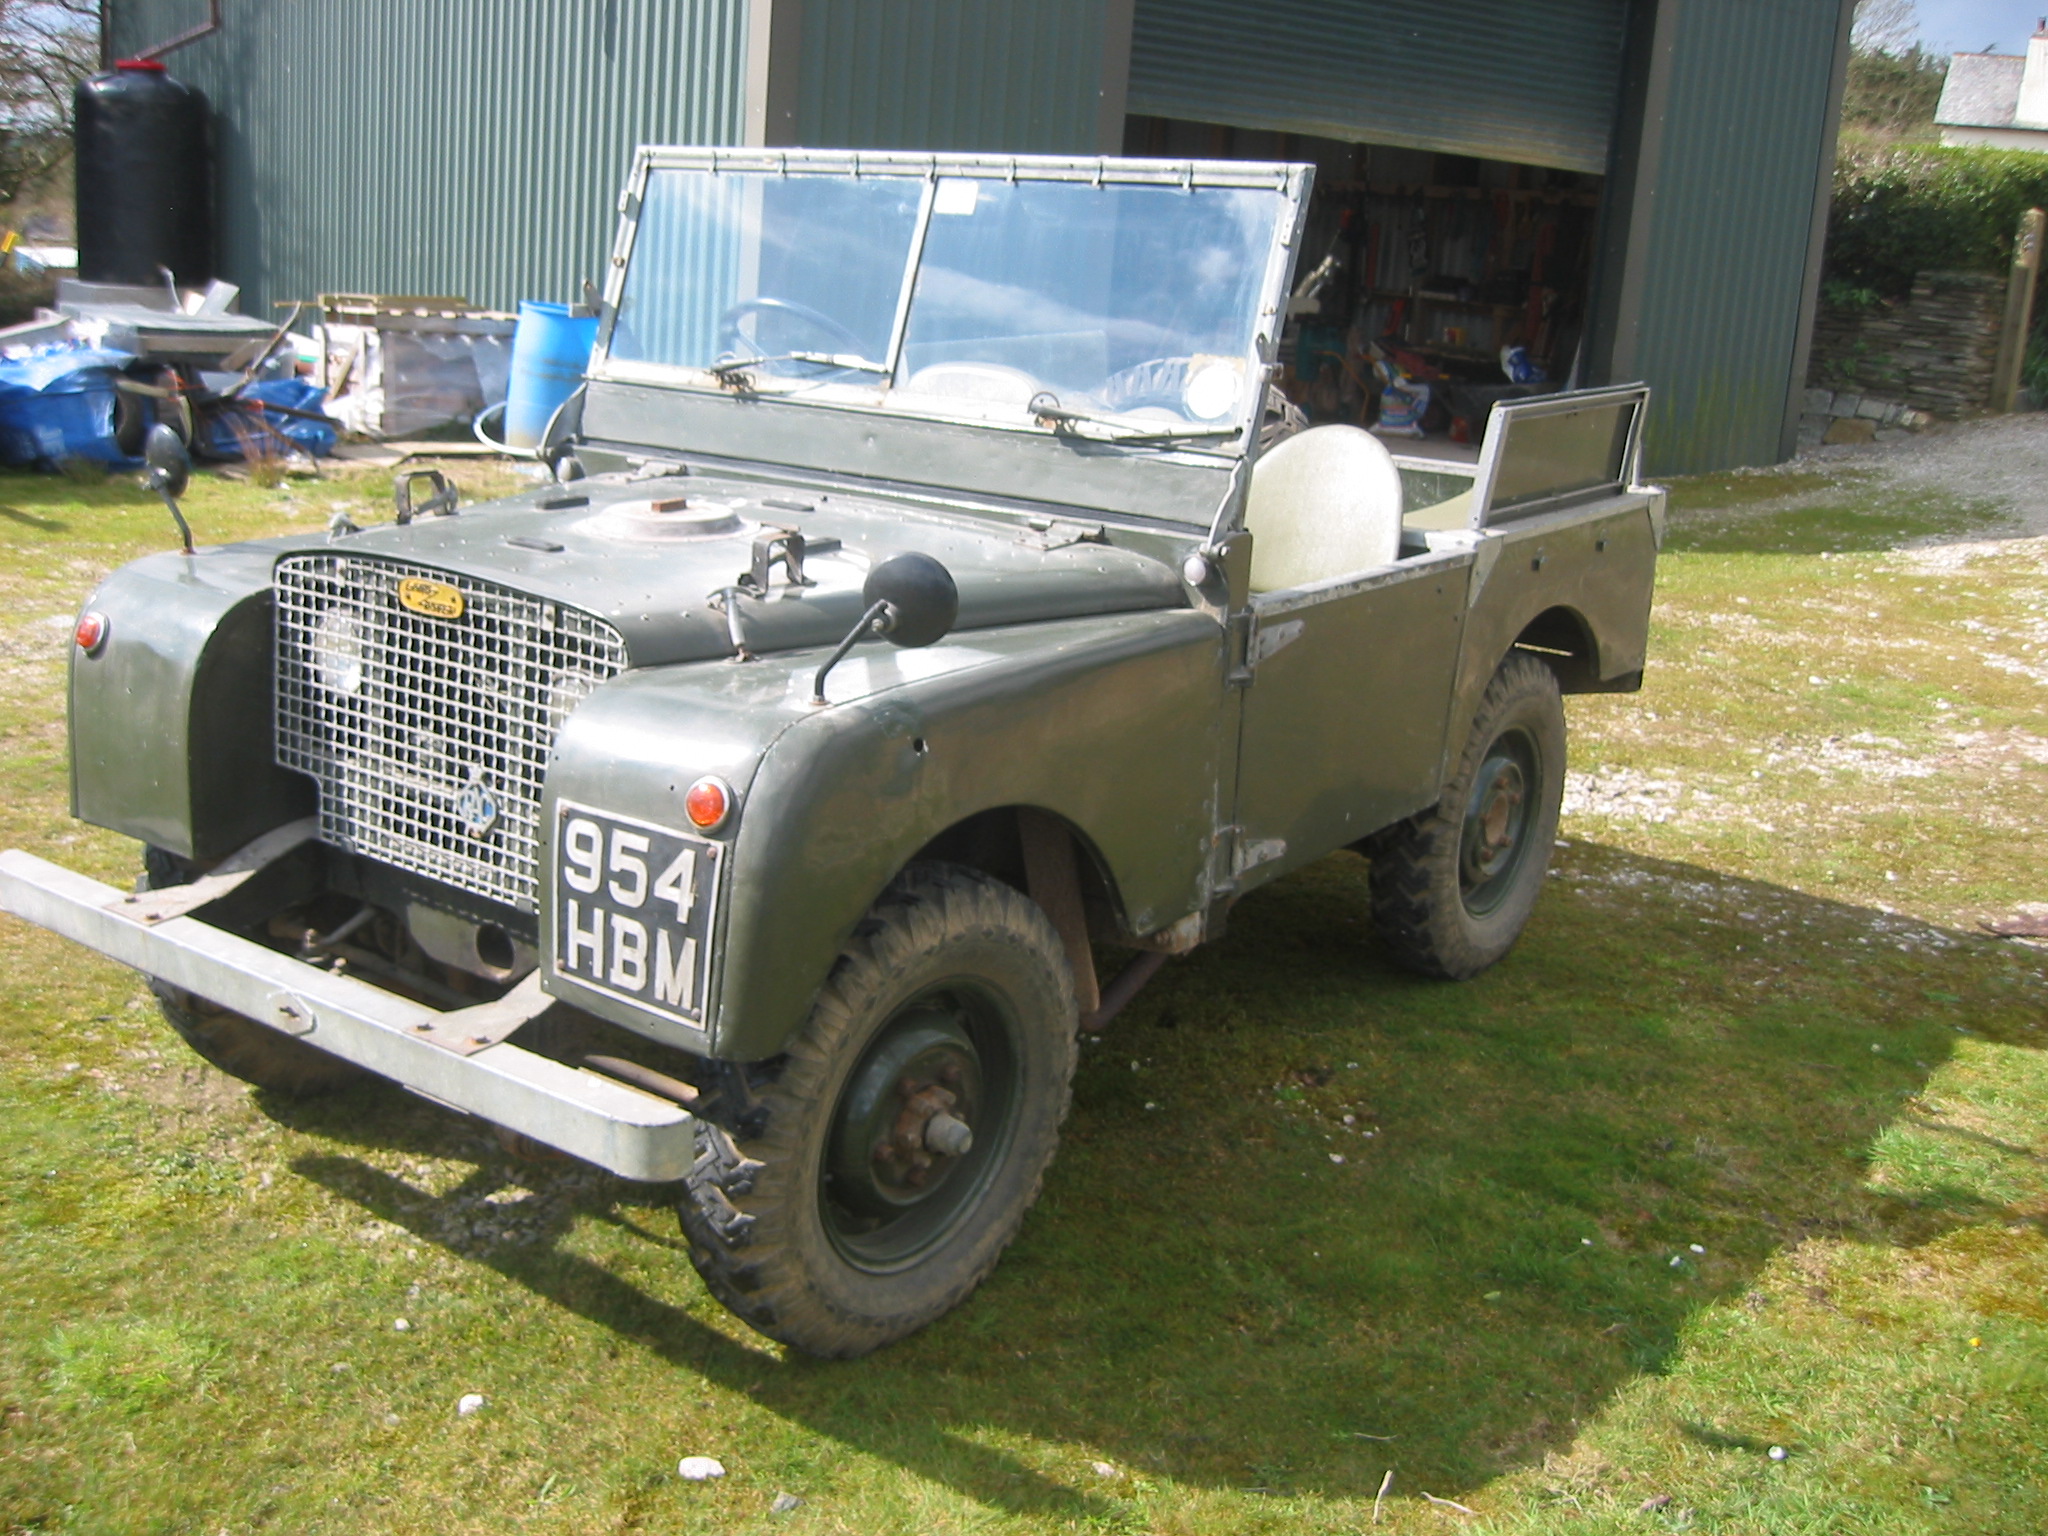
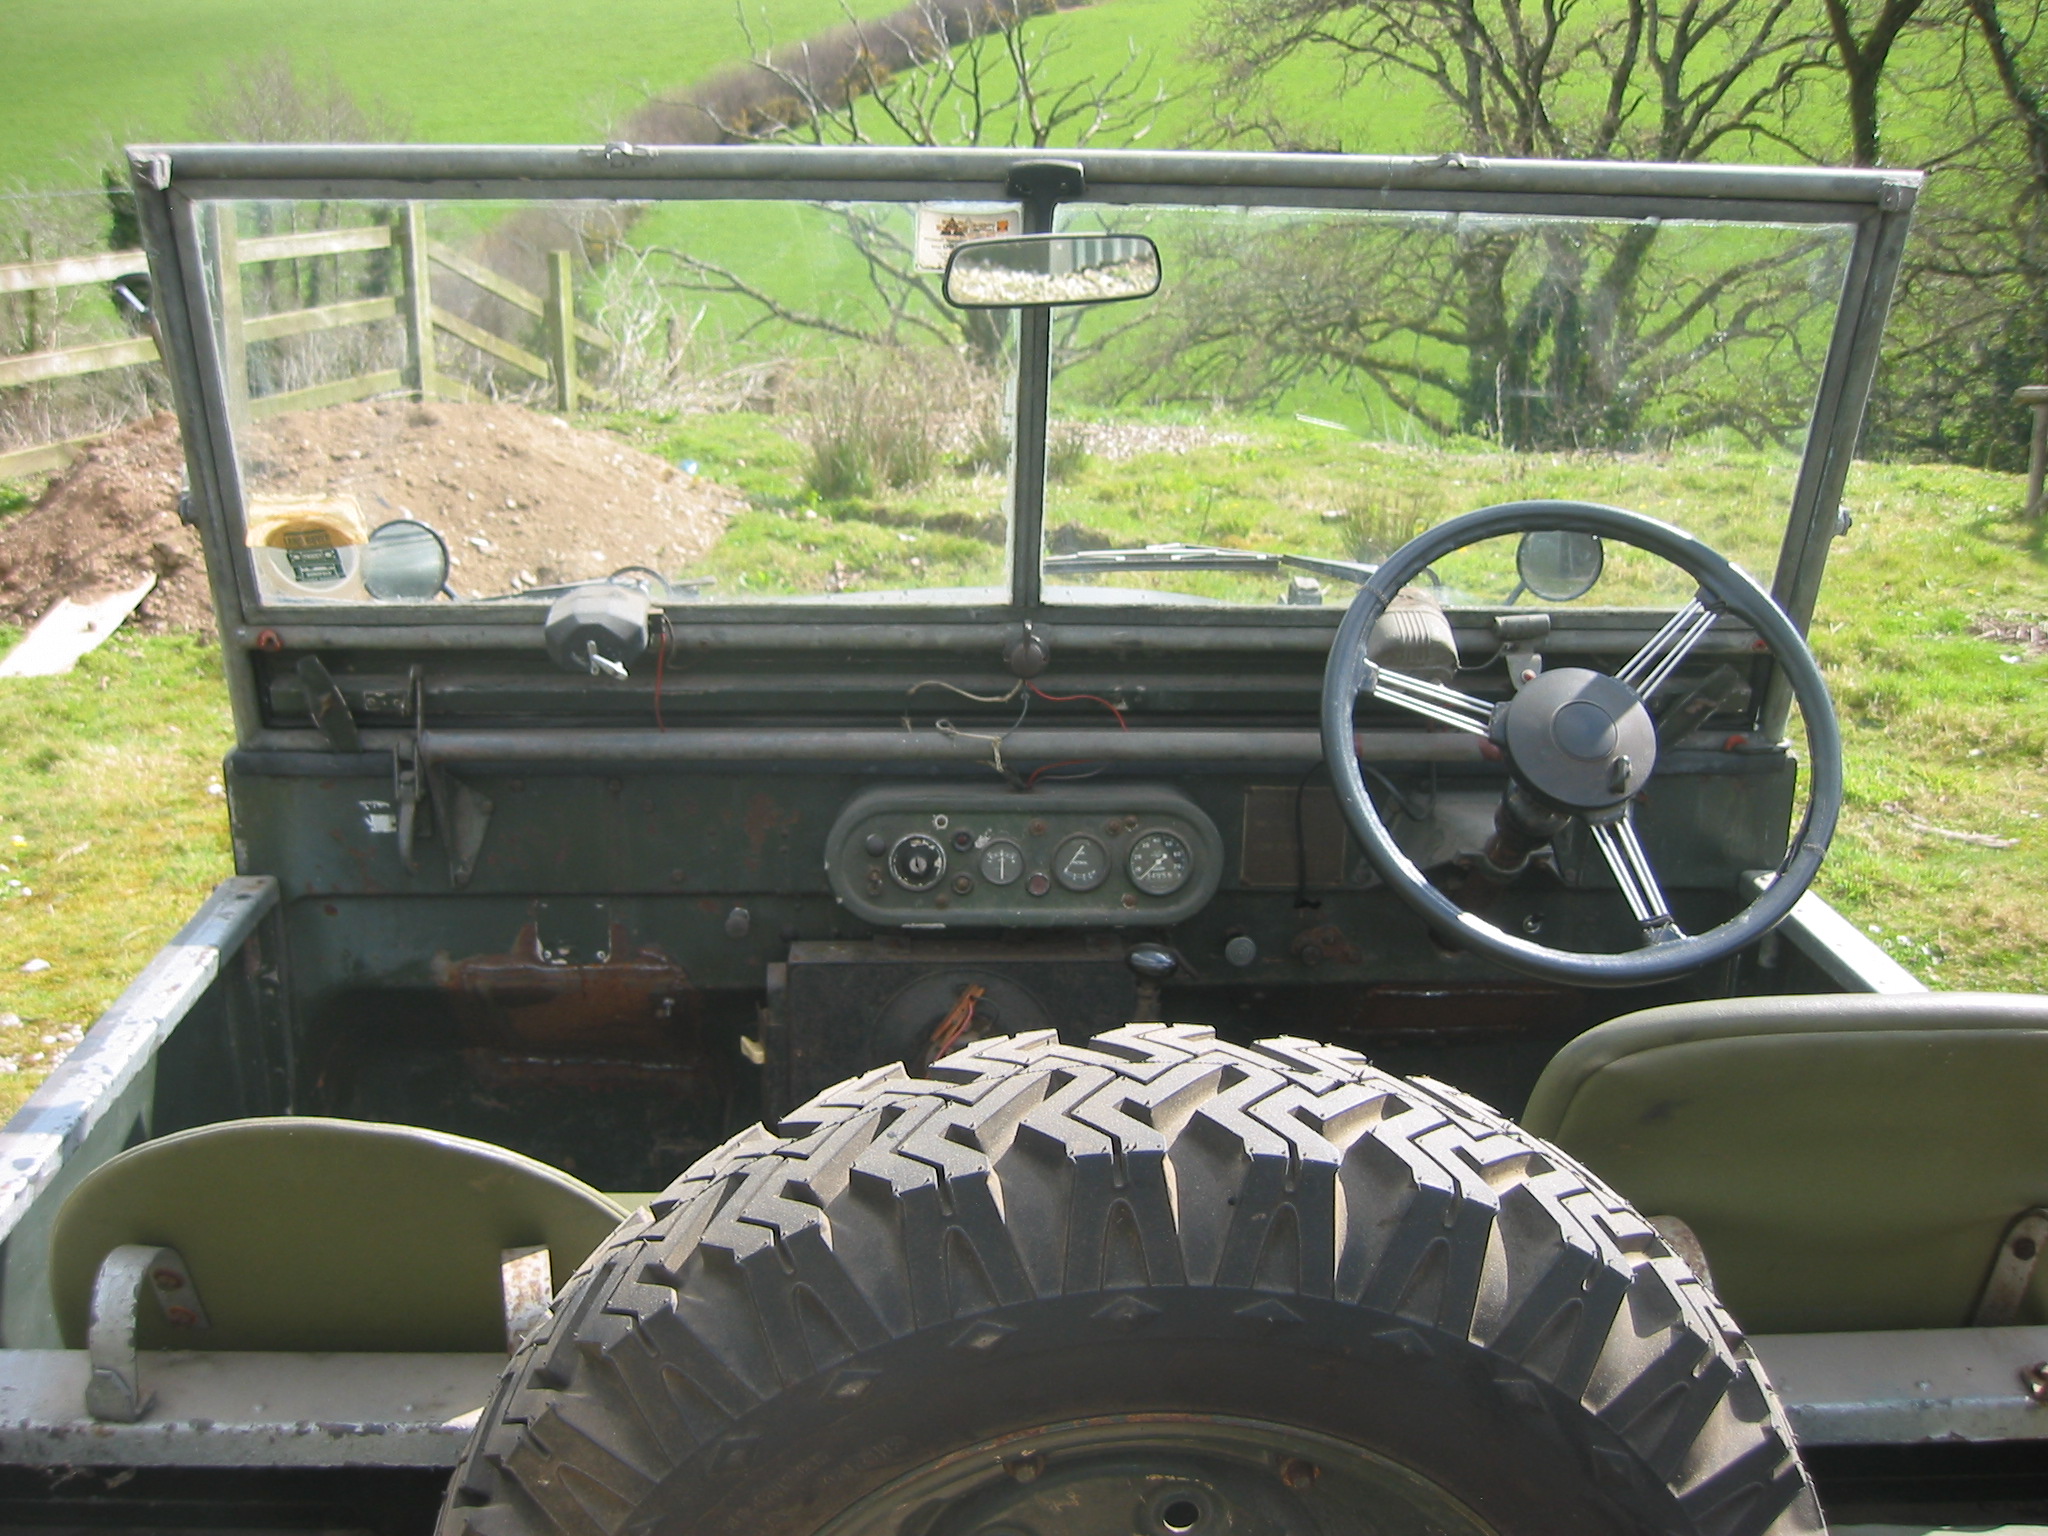
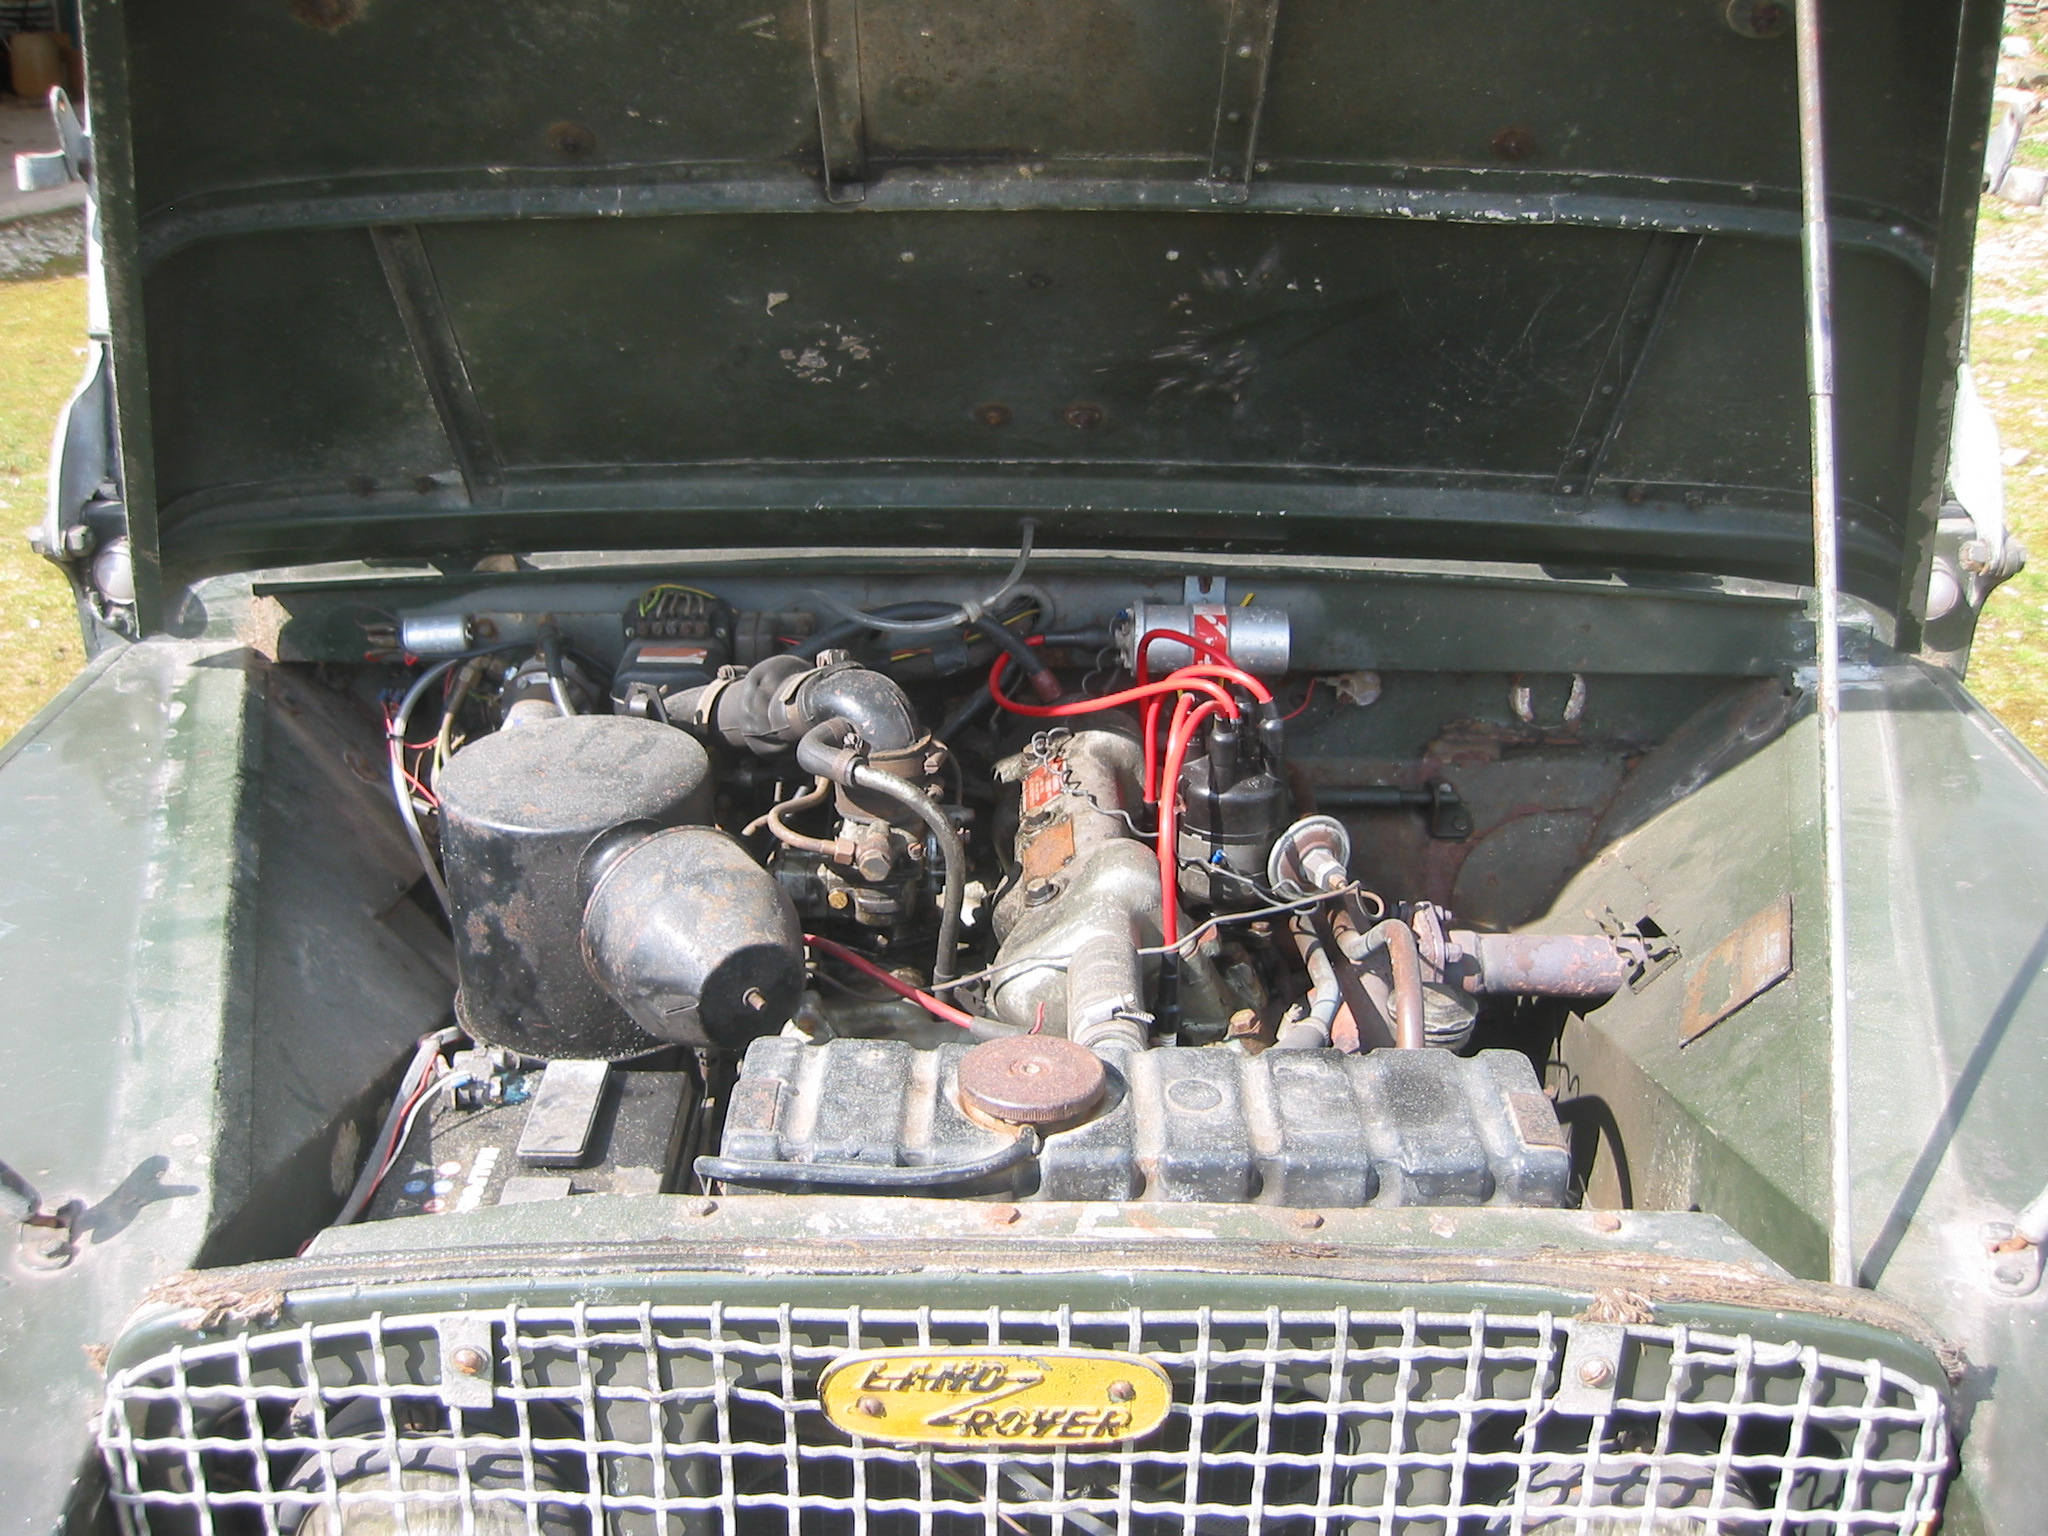
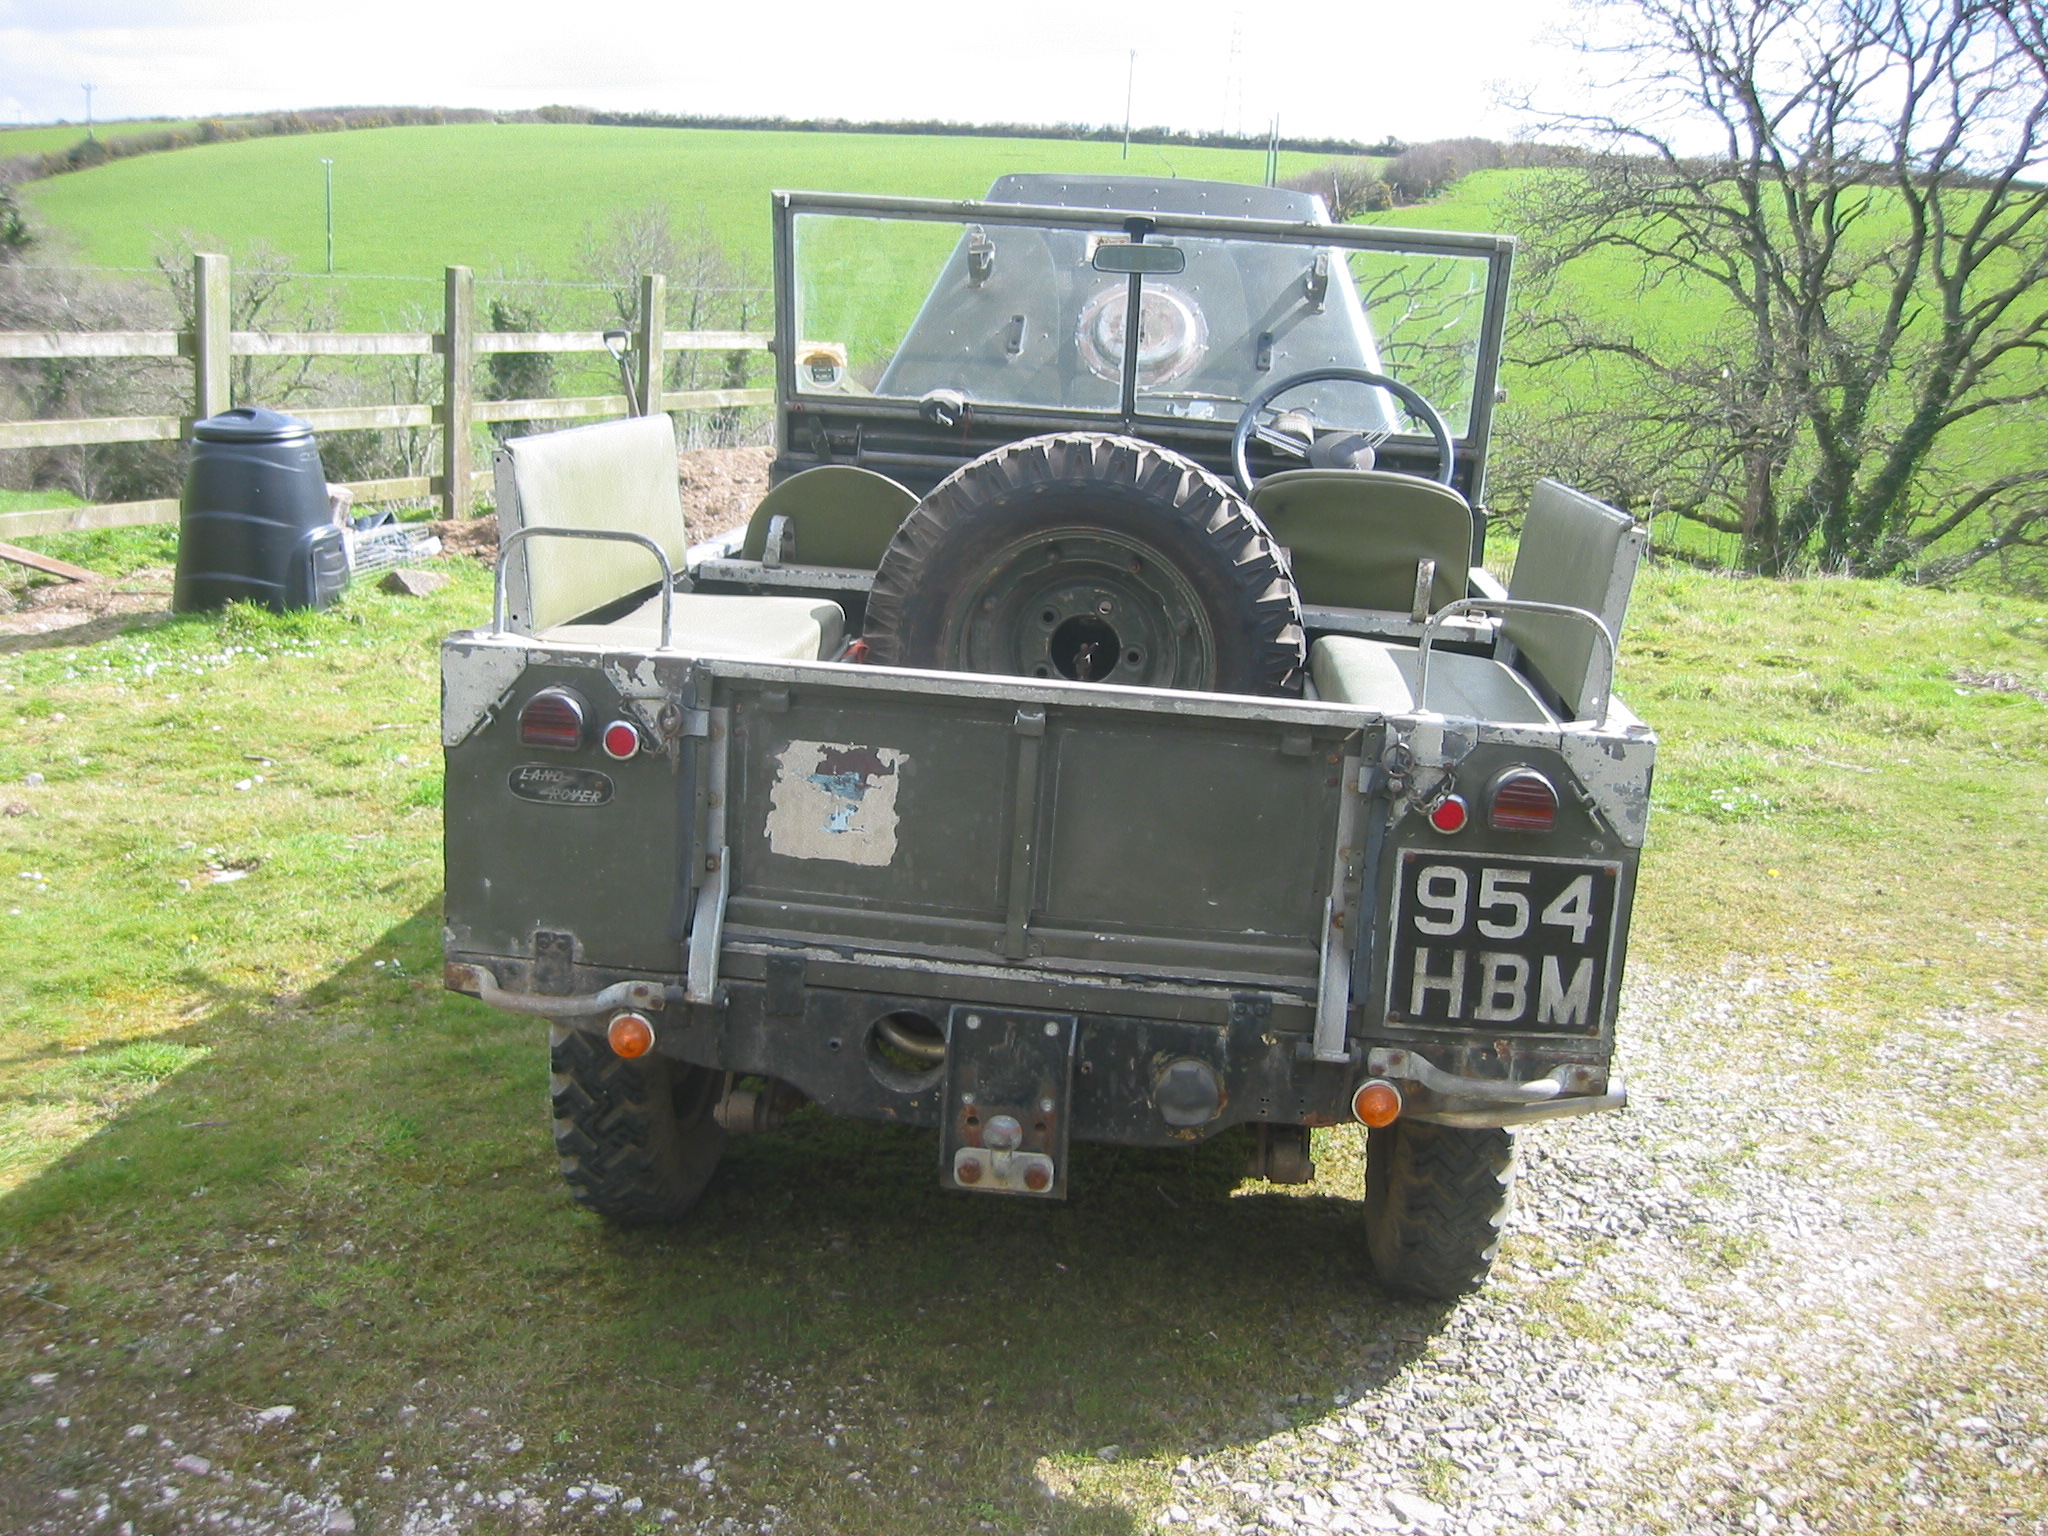
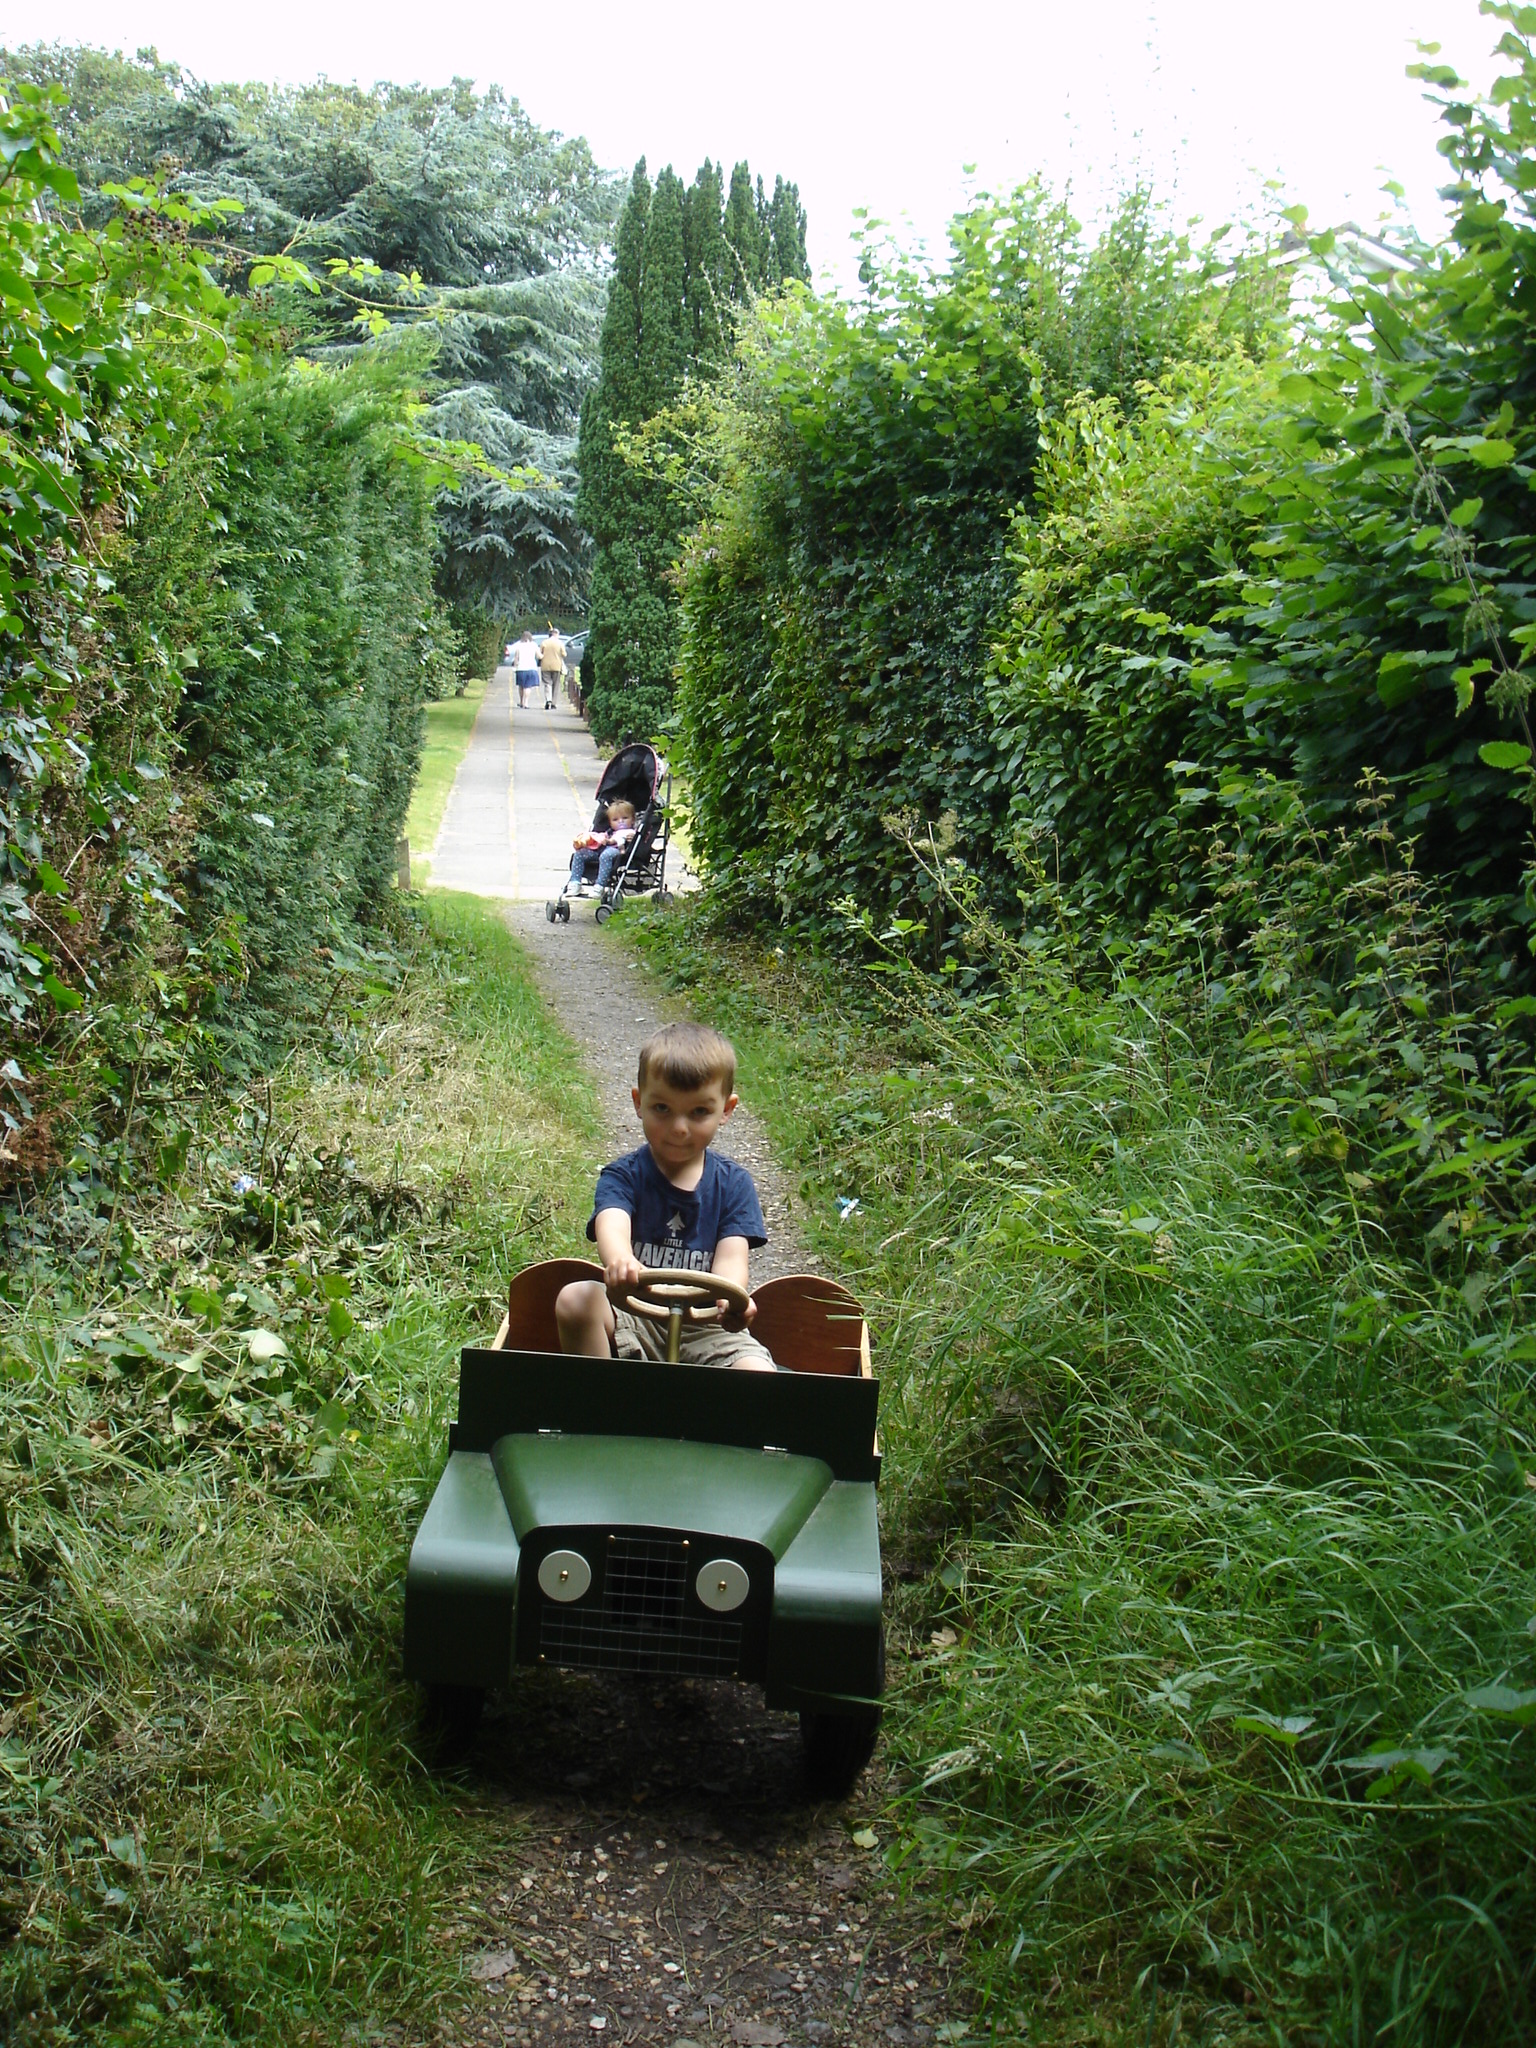
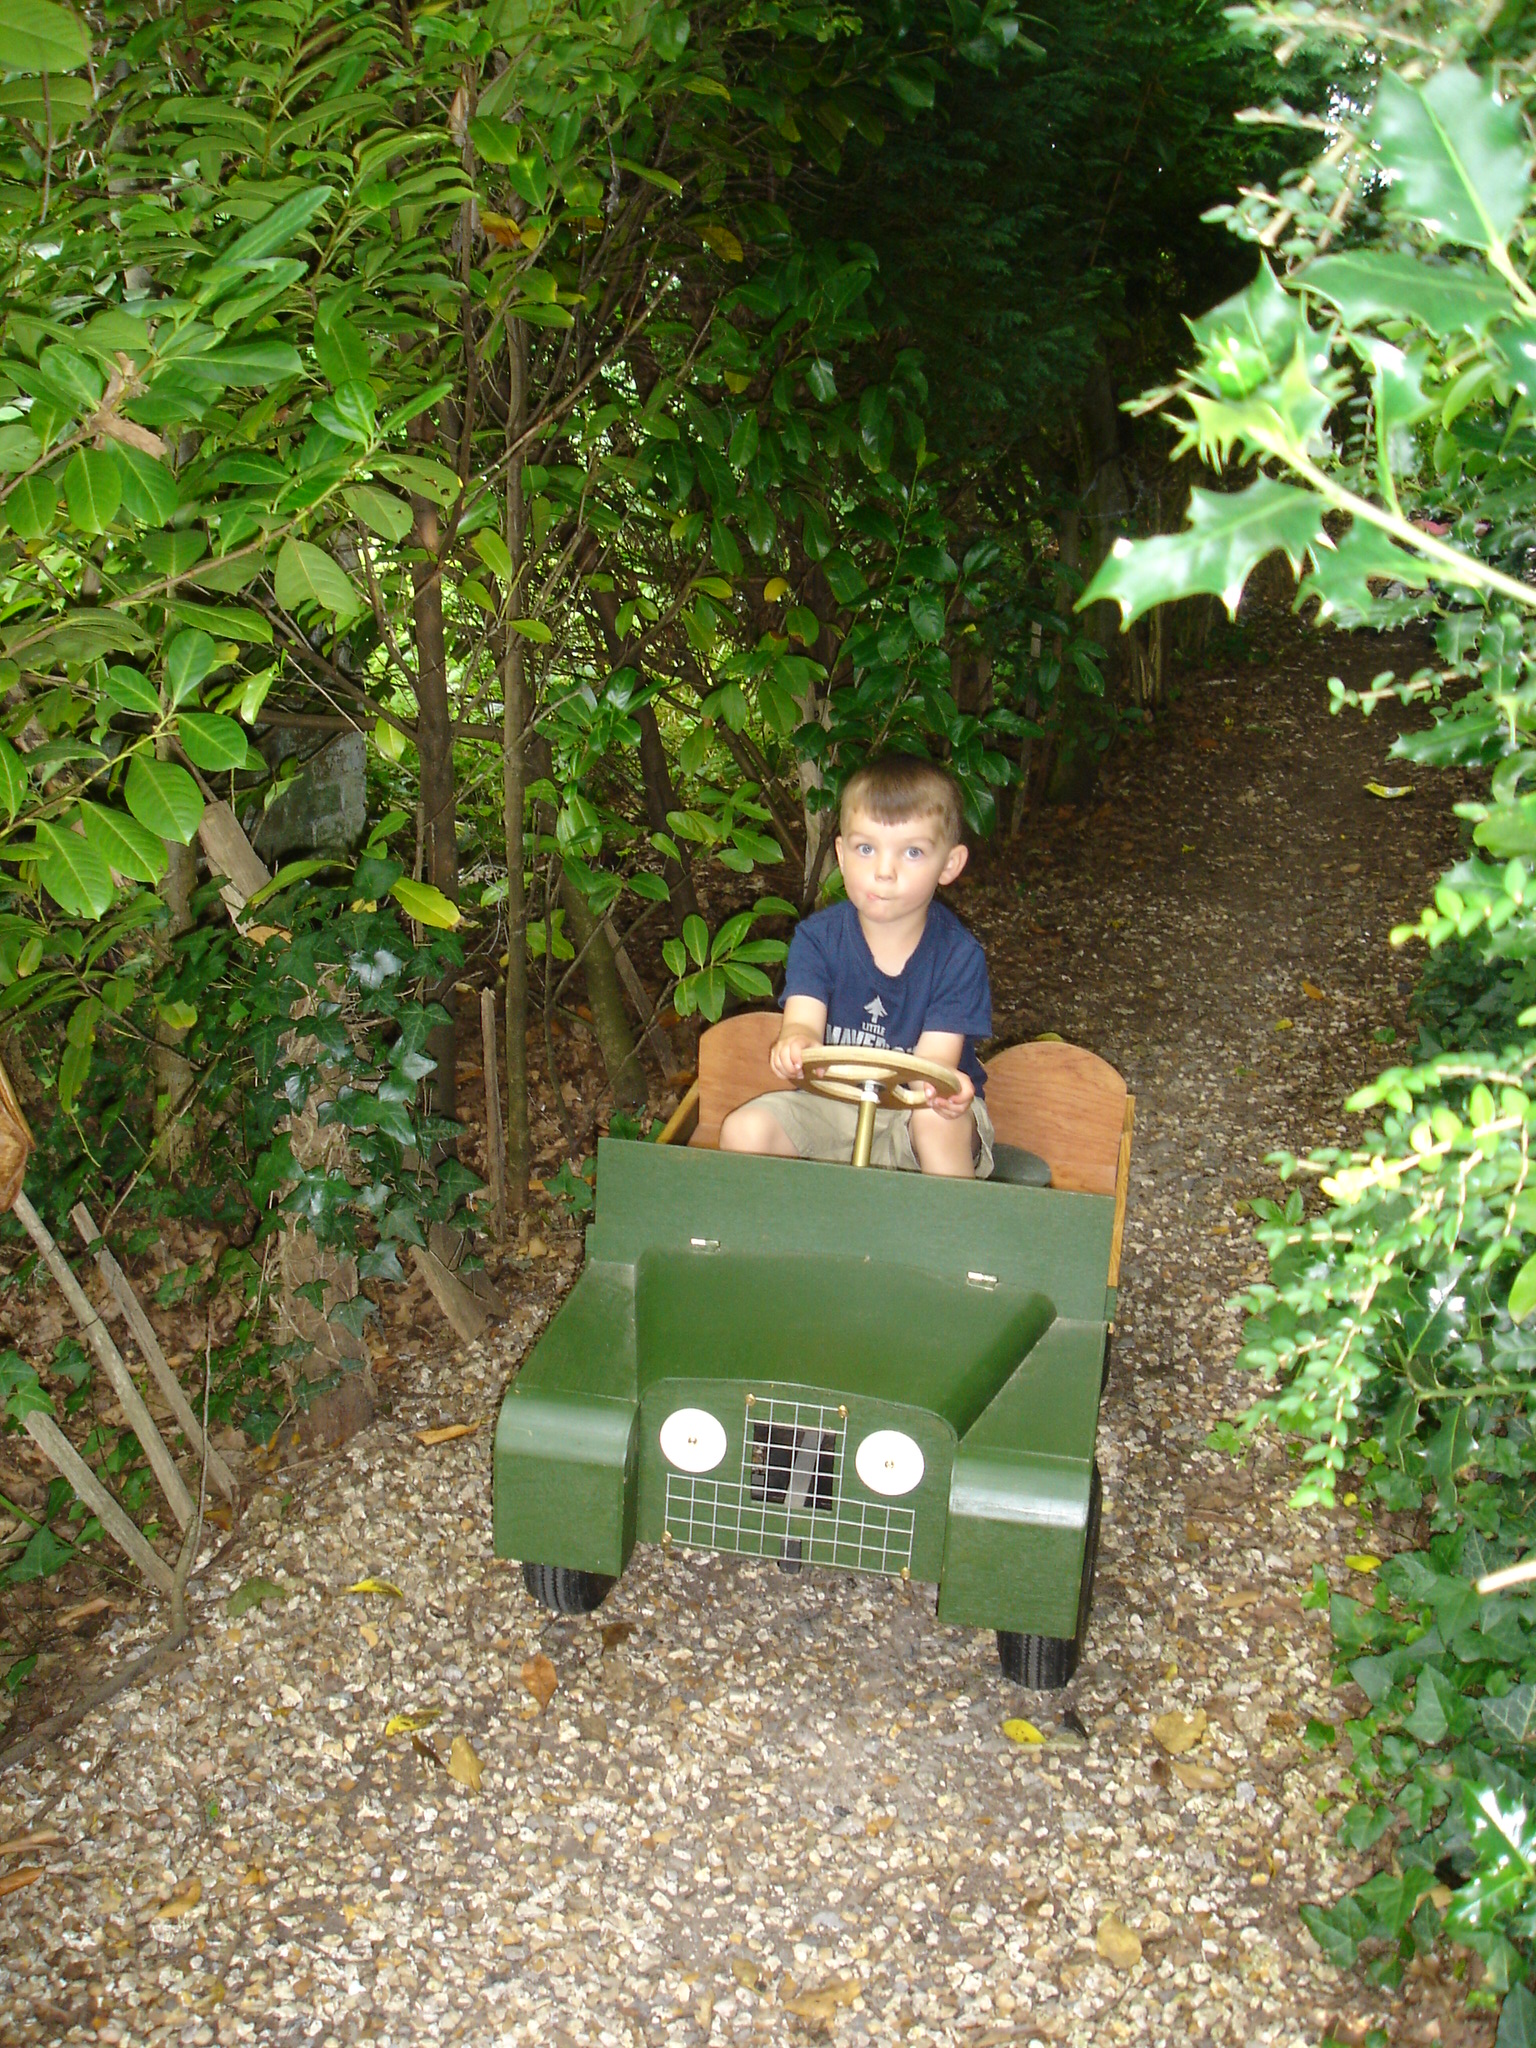
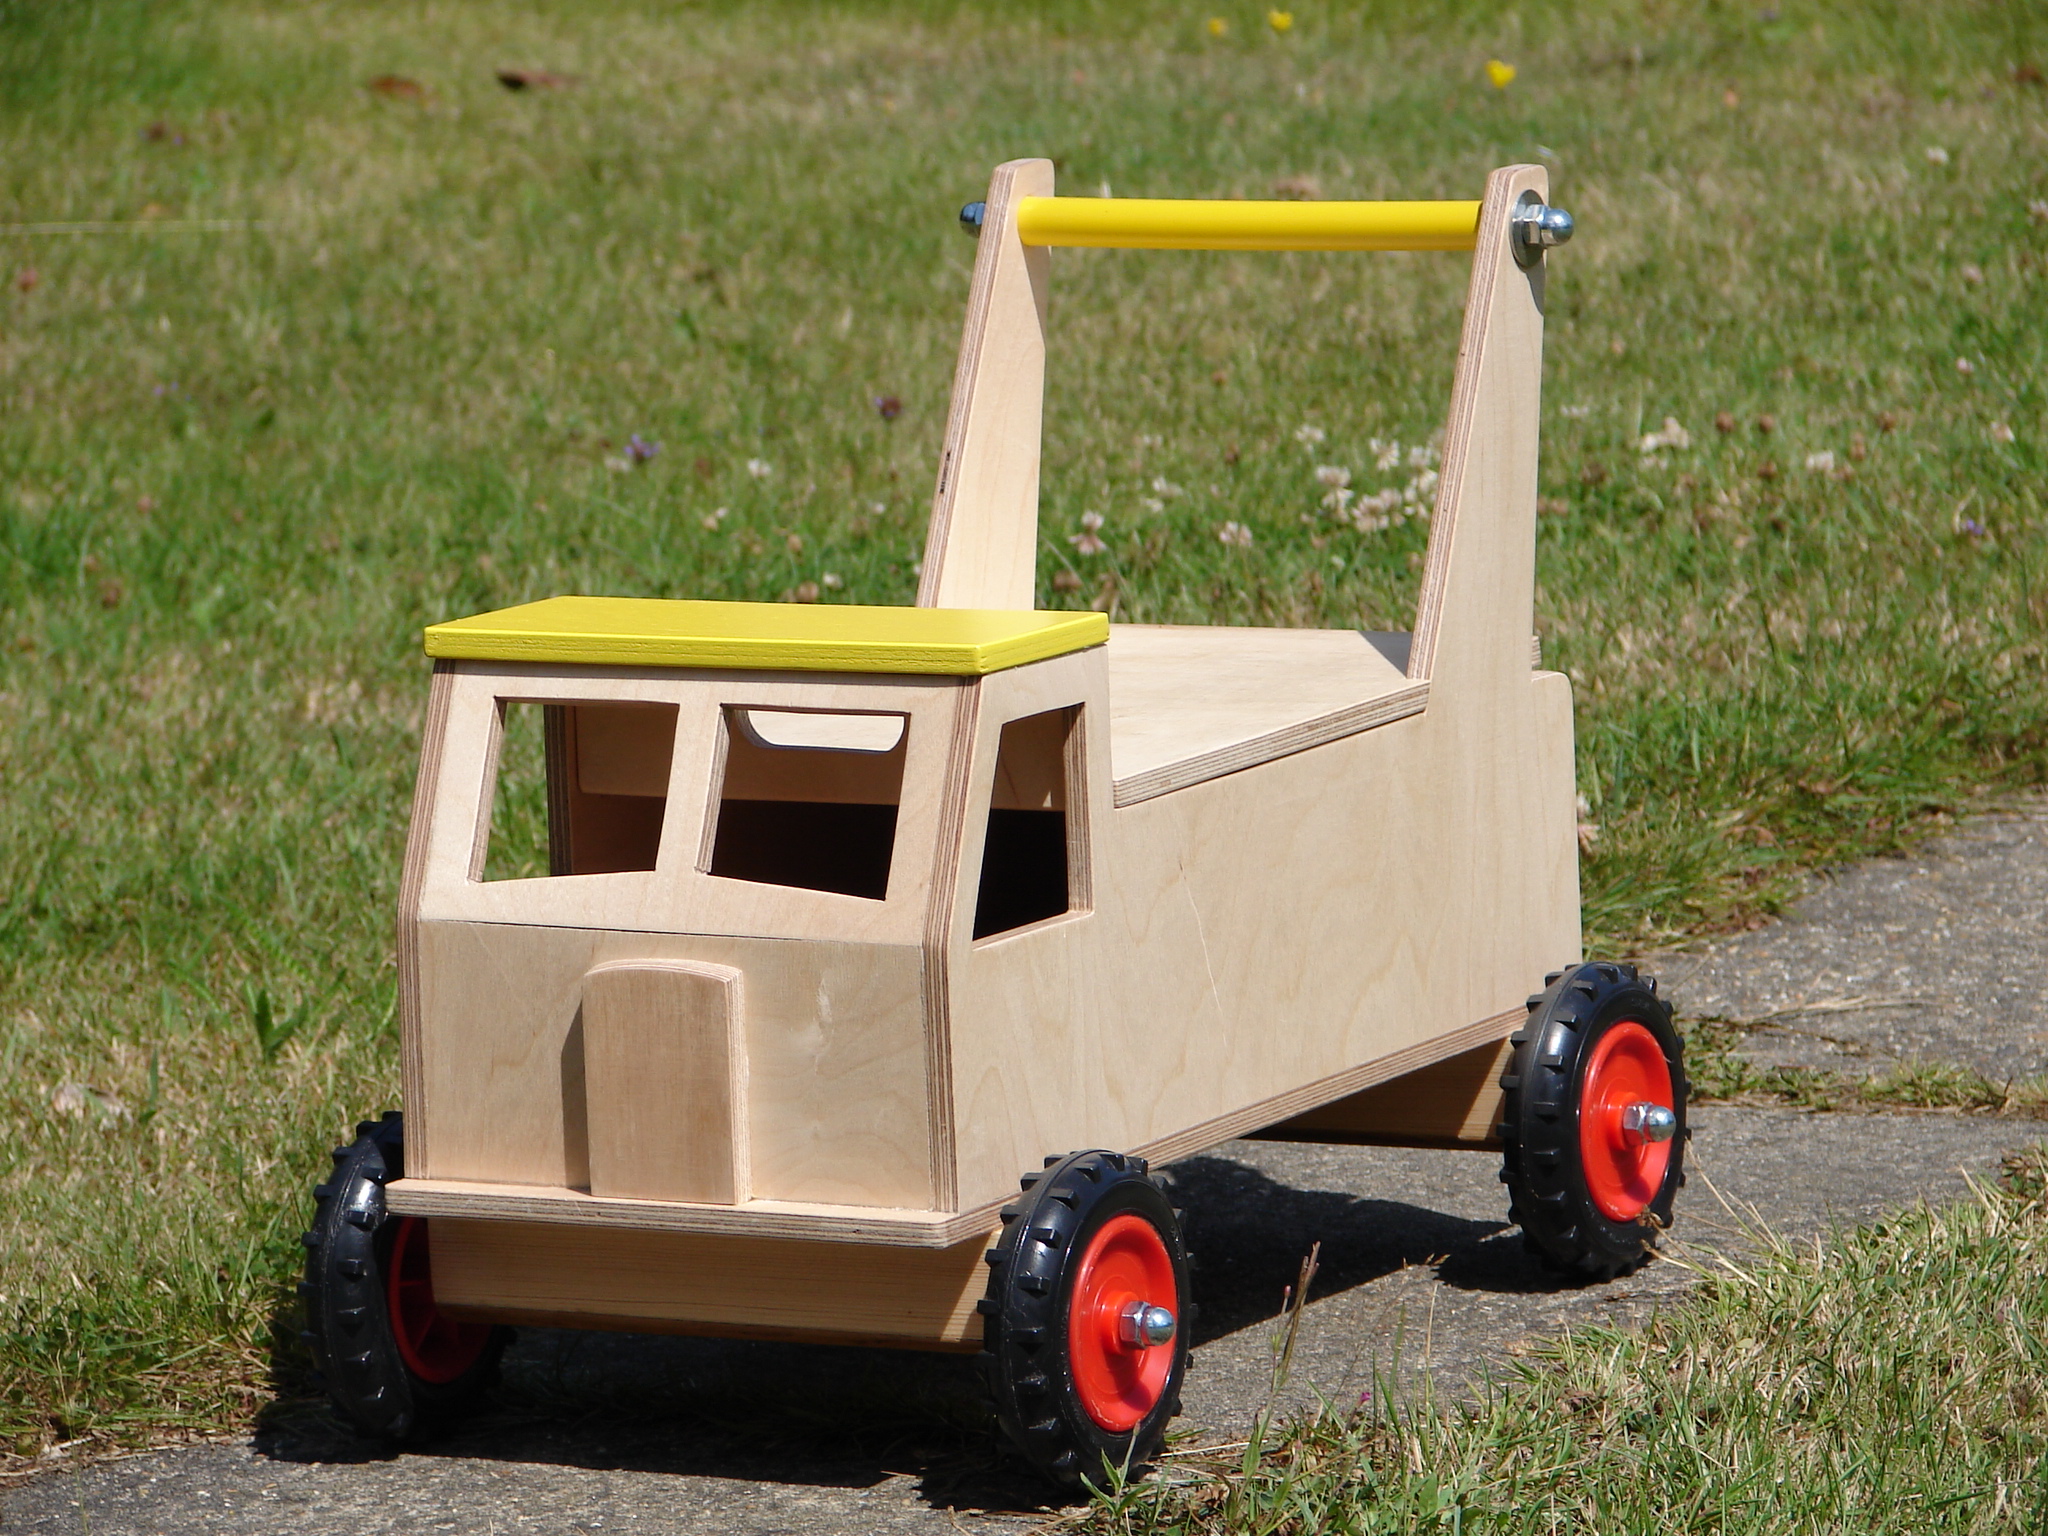
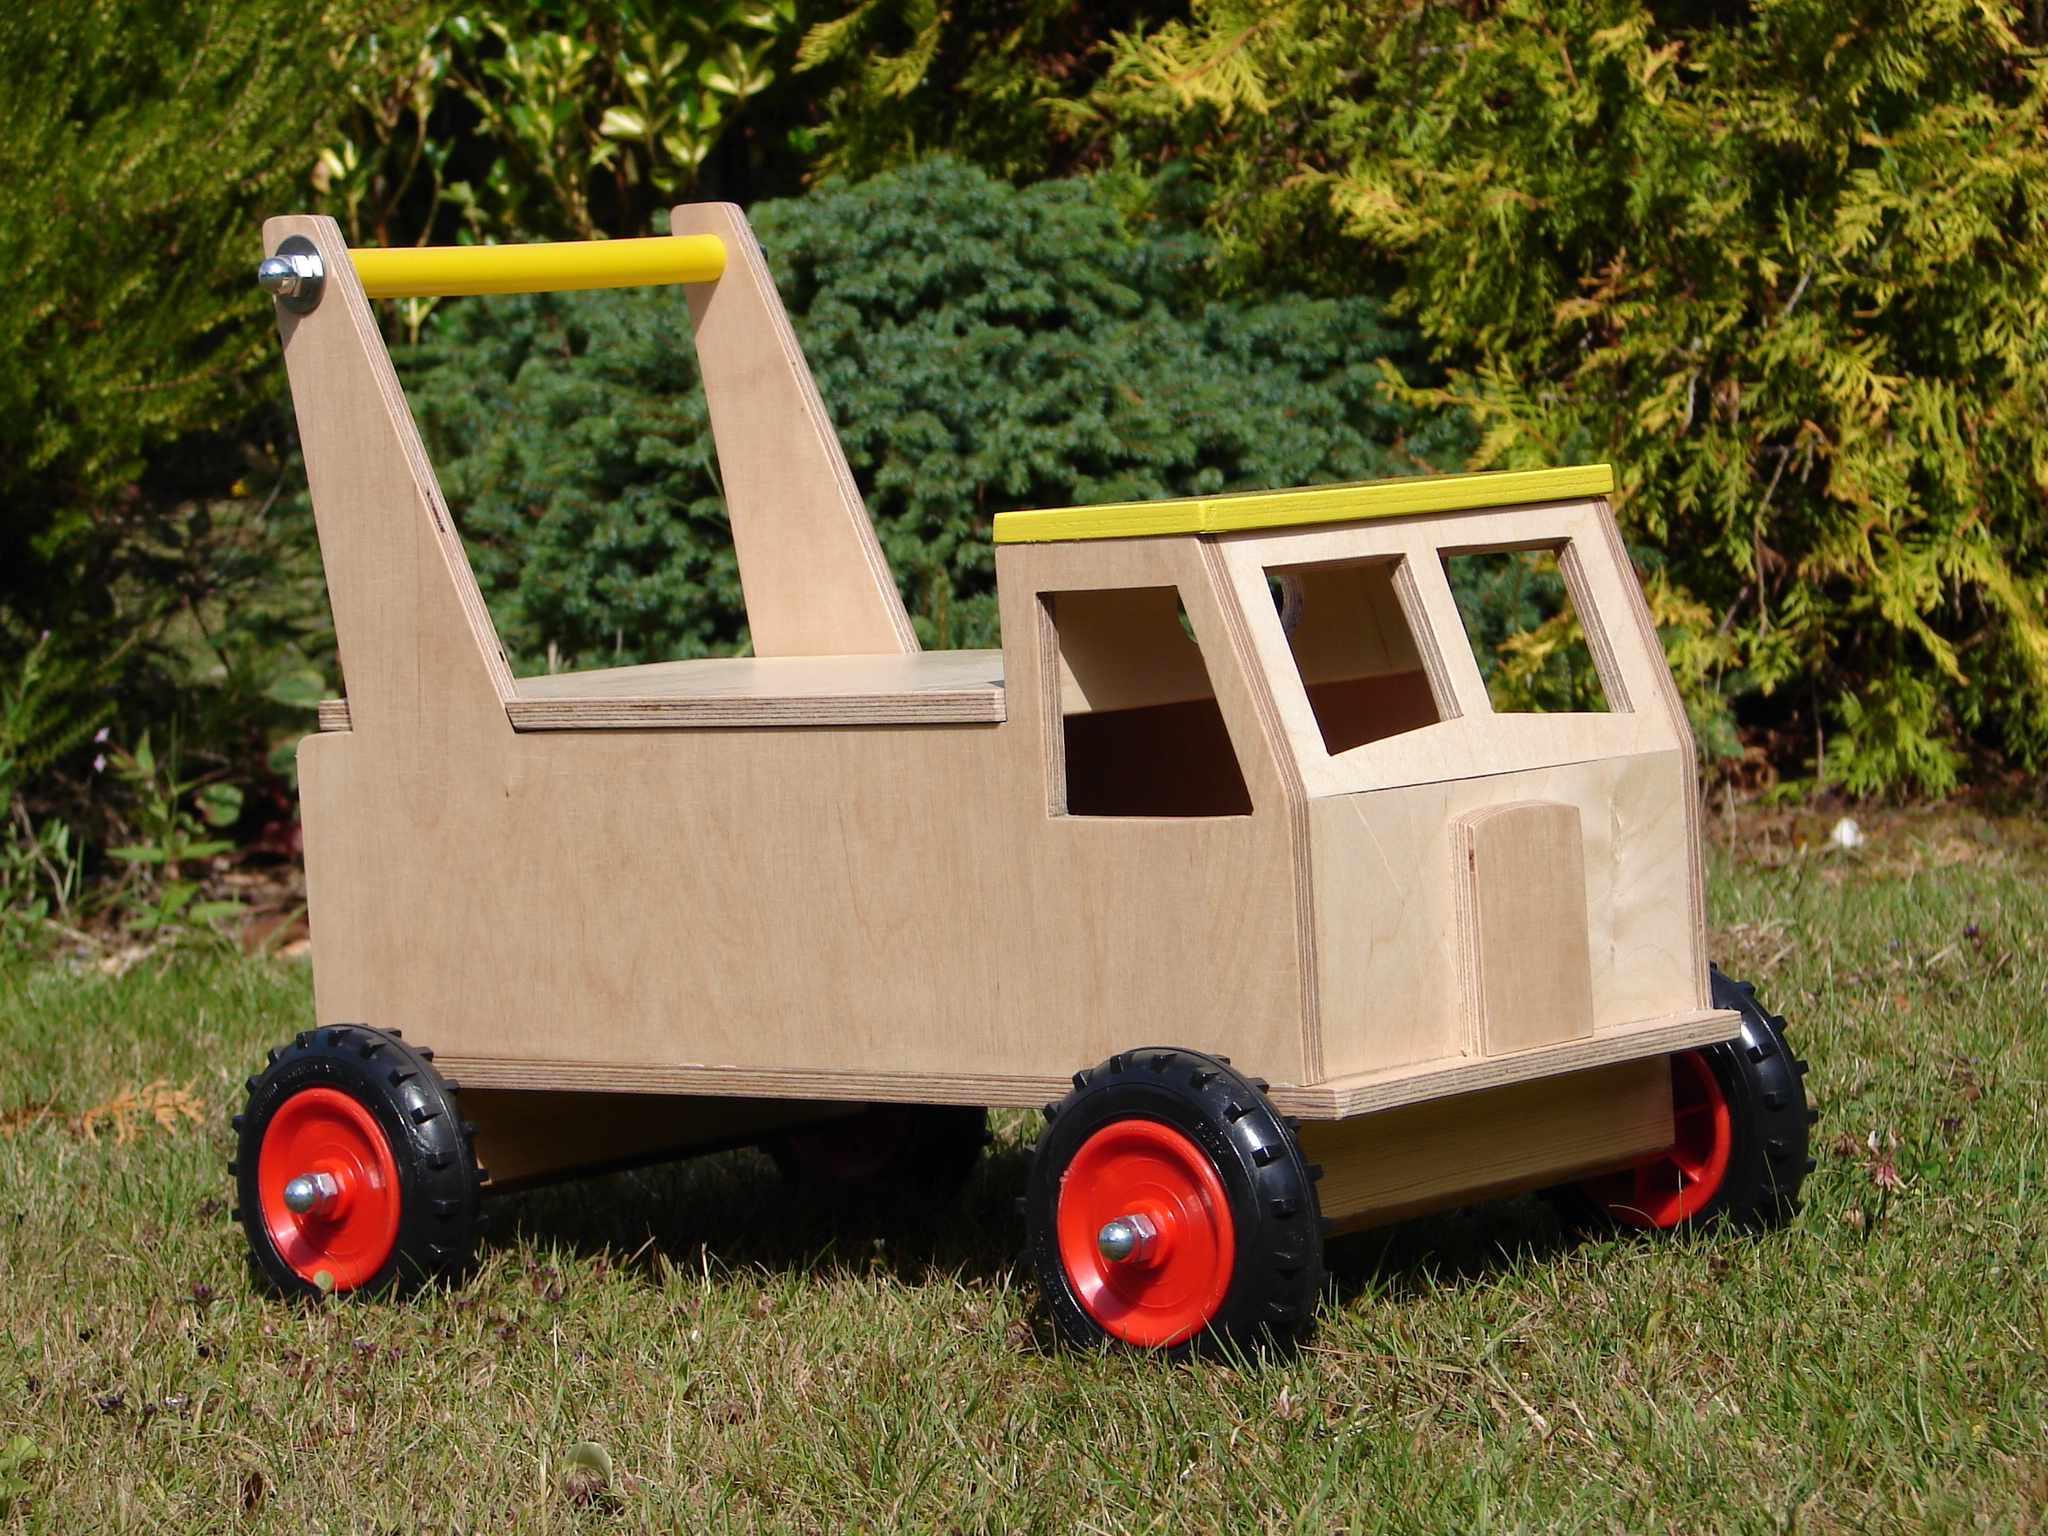
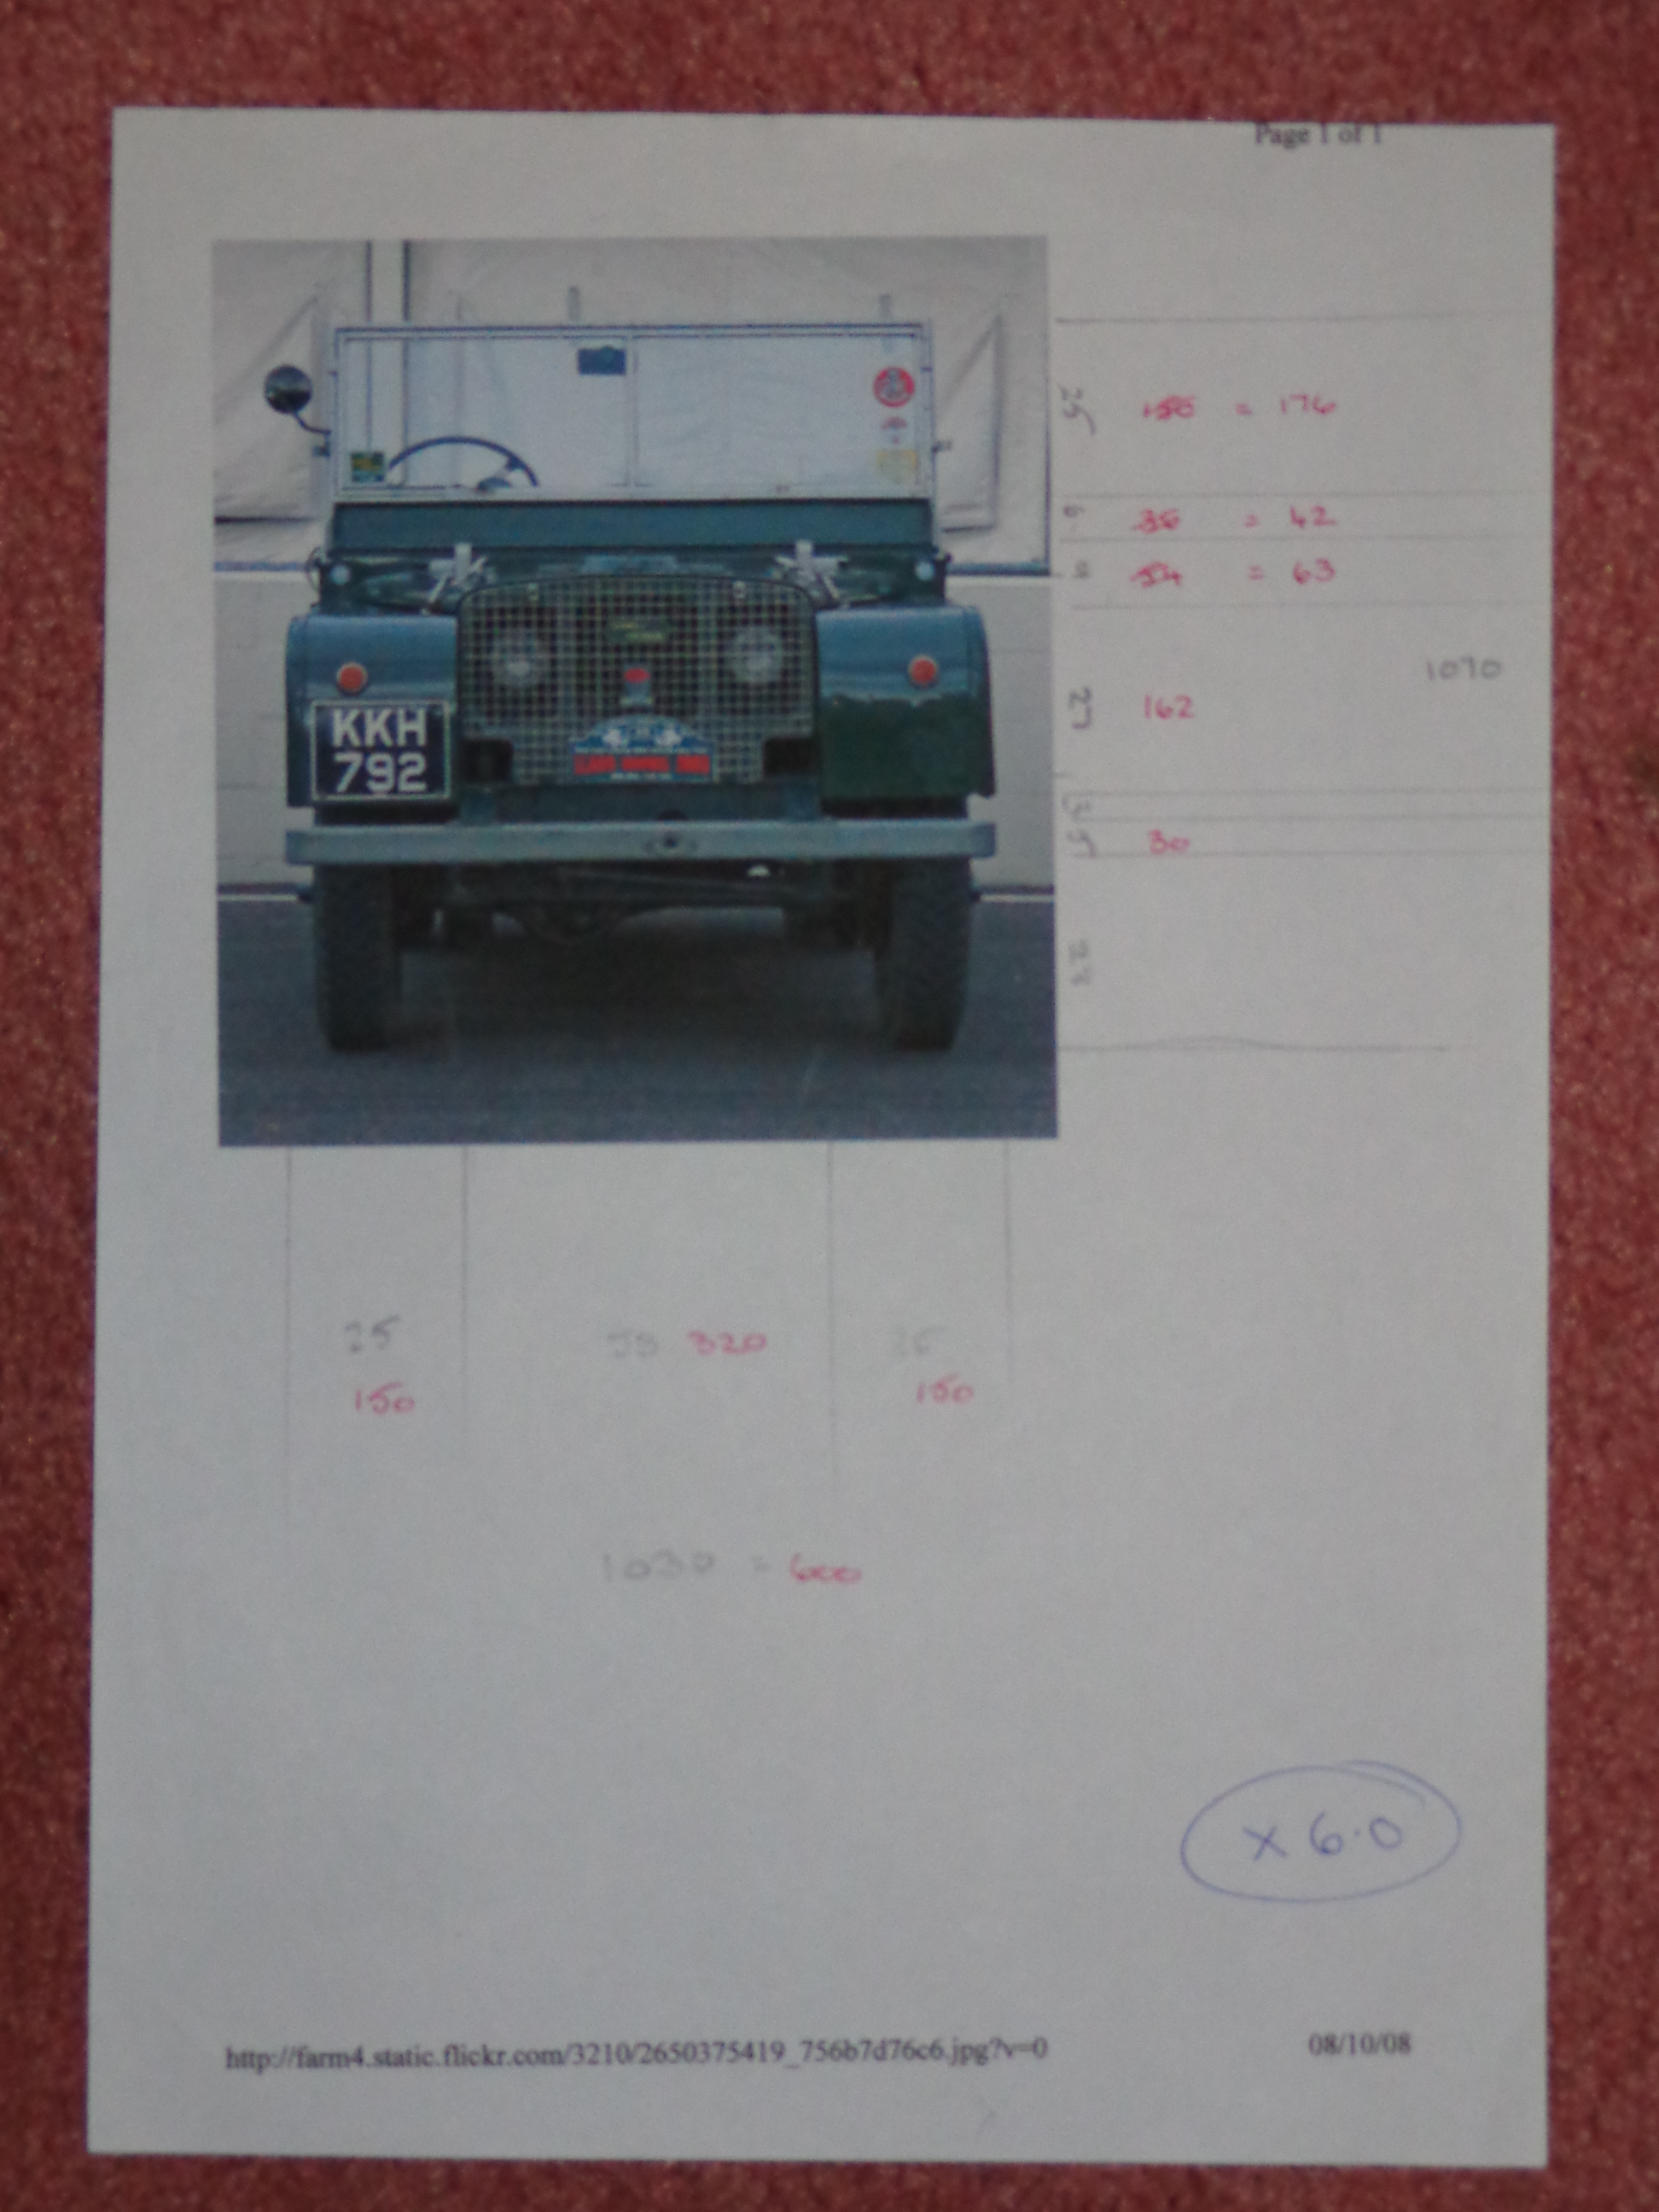
Well of course one obvious choice was a Land Rover and for me the Series 1 certainly was an iconic vehicle in my early years. I was fortunate whilst visiting friends Chris and Penny in Cornwall to discover that he had a genuine Series 1 in his barn and so I was able to have a good look round and Chris took a few photograph’s for me for reference.
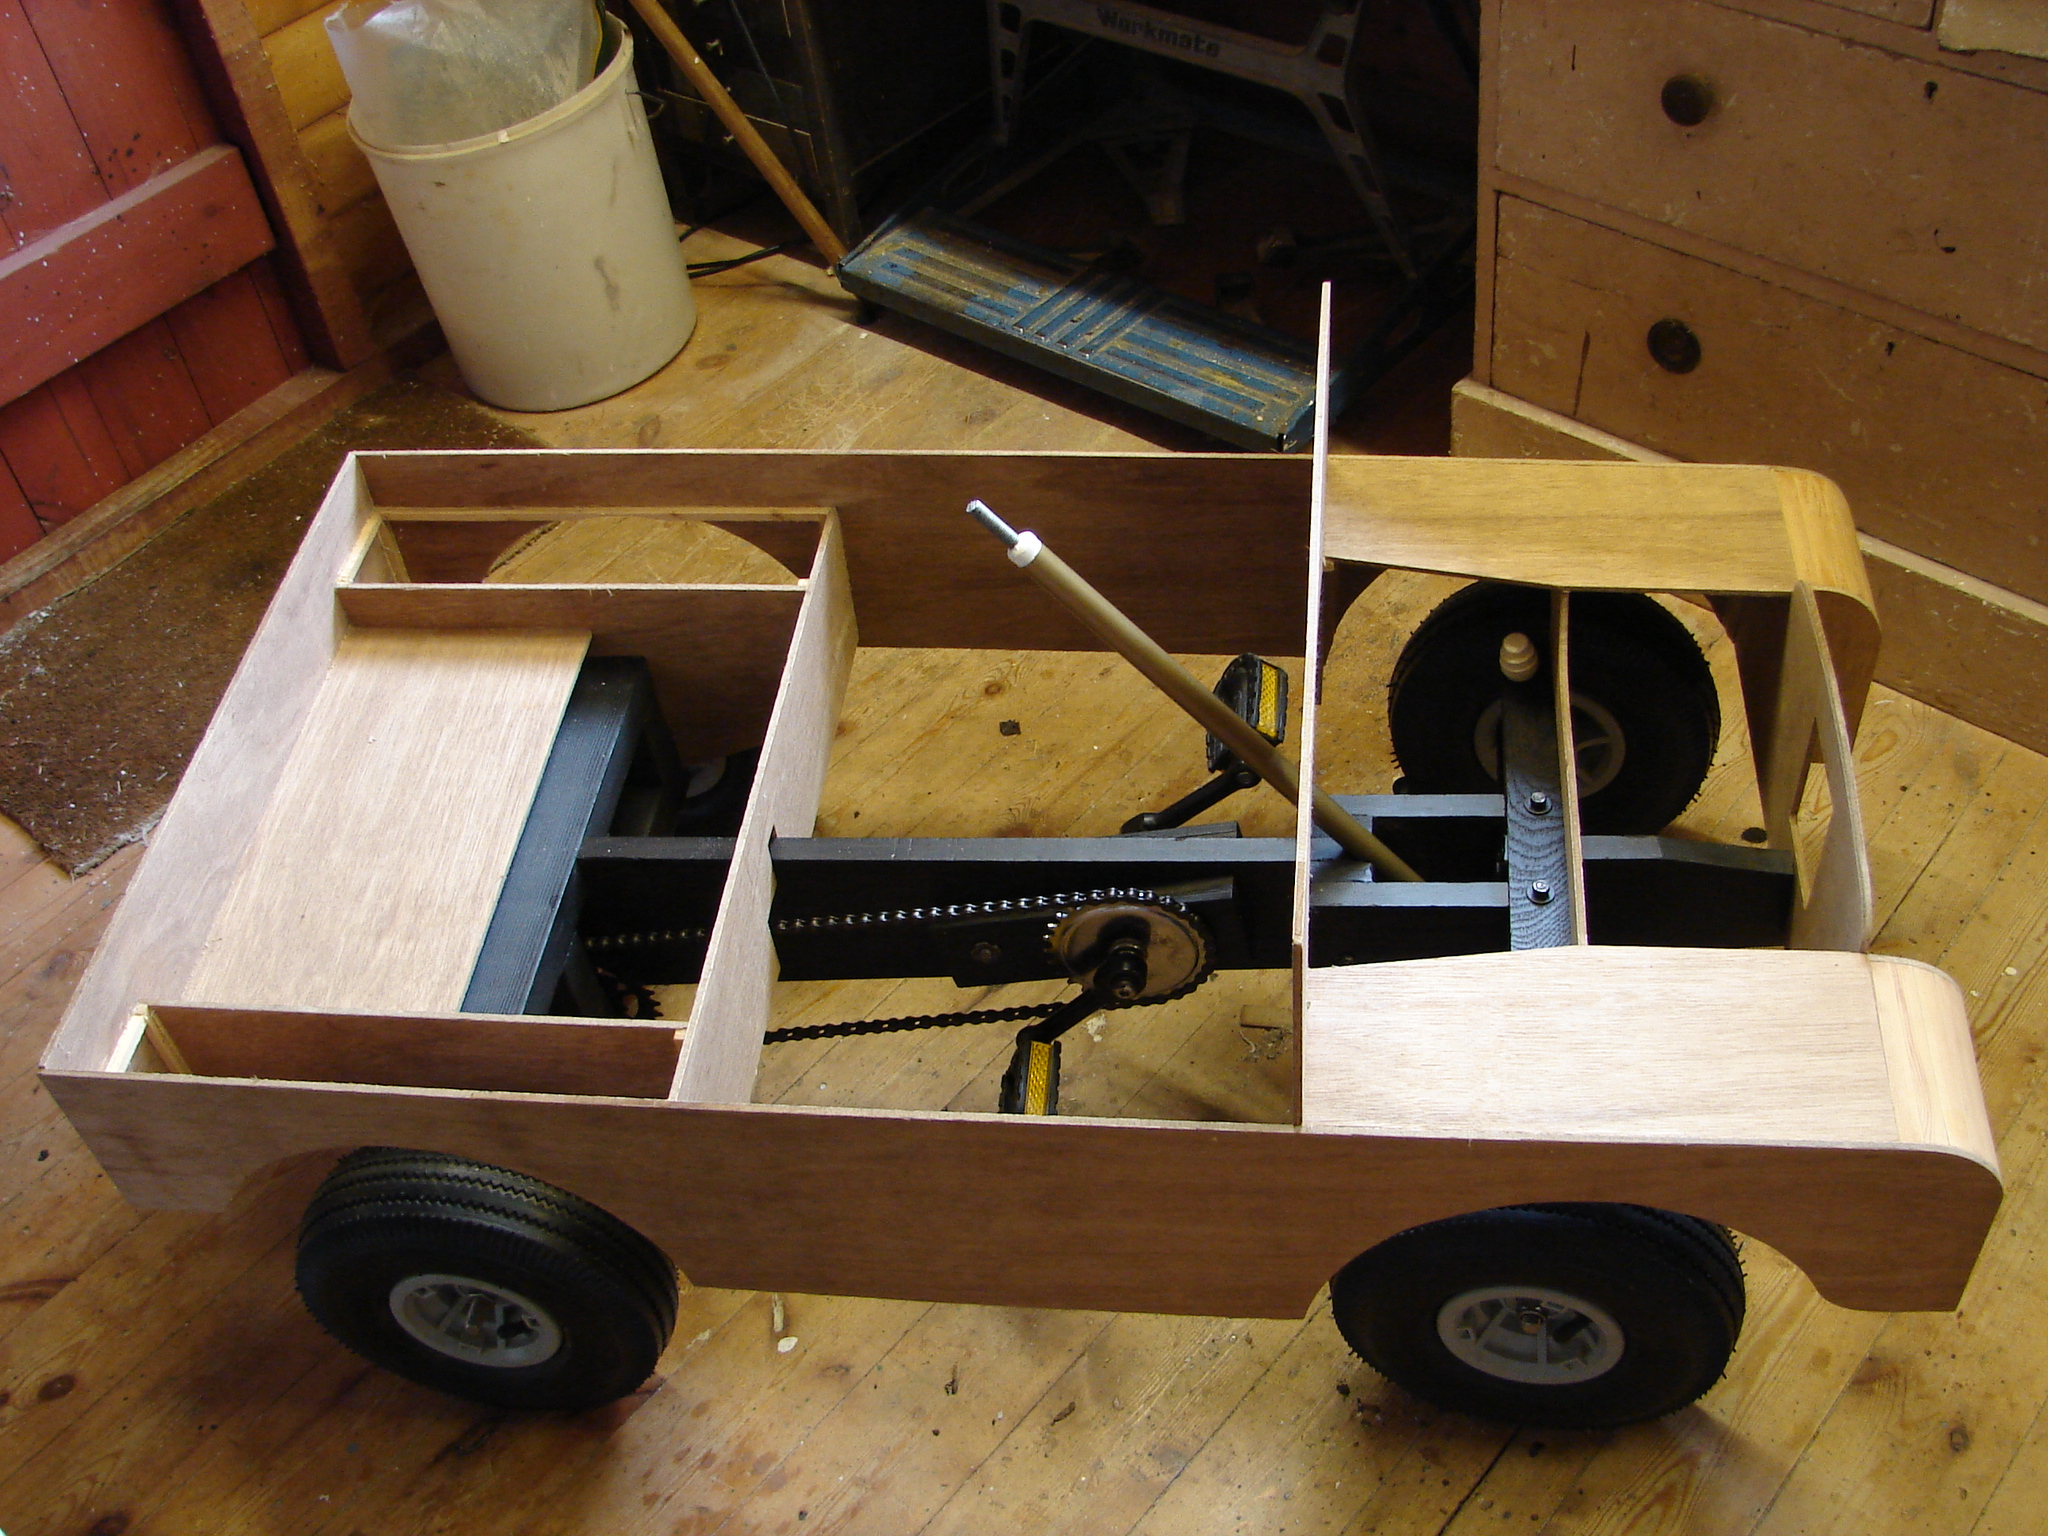
For my model I decided that a separate body and chassis were a must. The problem with scratch building a monocoque is that if you get it wrong you may have to scrap all your work. I hoped that by building it in two parts it would be both more true to life and give me some scope for the inevitable modifications to the design.
I did some research on the internet and found some very useful material
I was very impressed with the Toylander but it is electric motor powered and for an older child.
Articles from an American magazine of the 1940’s detailing the construction of toy jeeps by two different authors were the source of much inspiration. Not so much in terms of copying their ideas but I thought with access to modern materials some of the limitations of their designs could be greatly improved.
https://cj3b.info/Toys/RidingToyPlans3.html
https://cj3b.info/Toys/RidingToyPlans.html
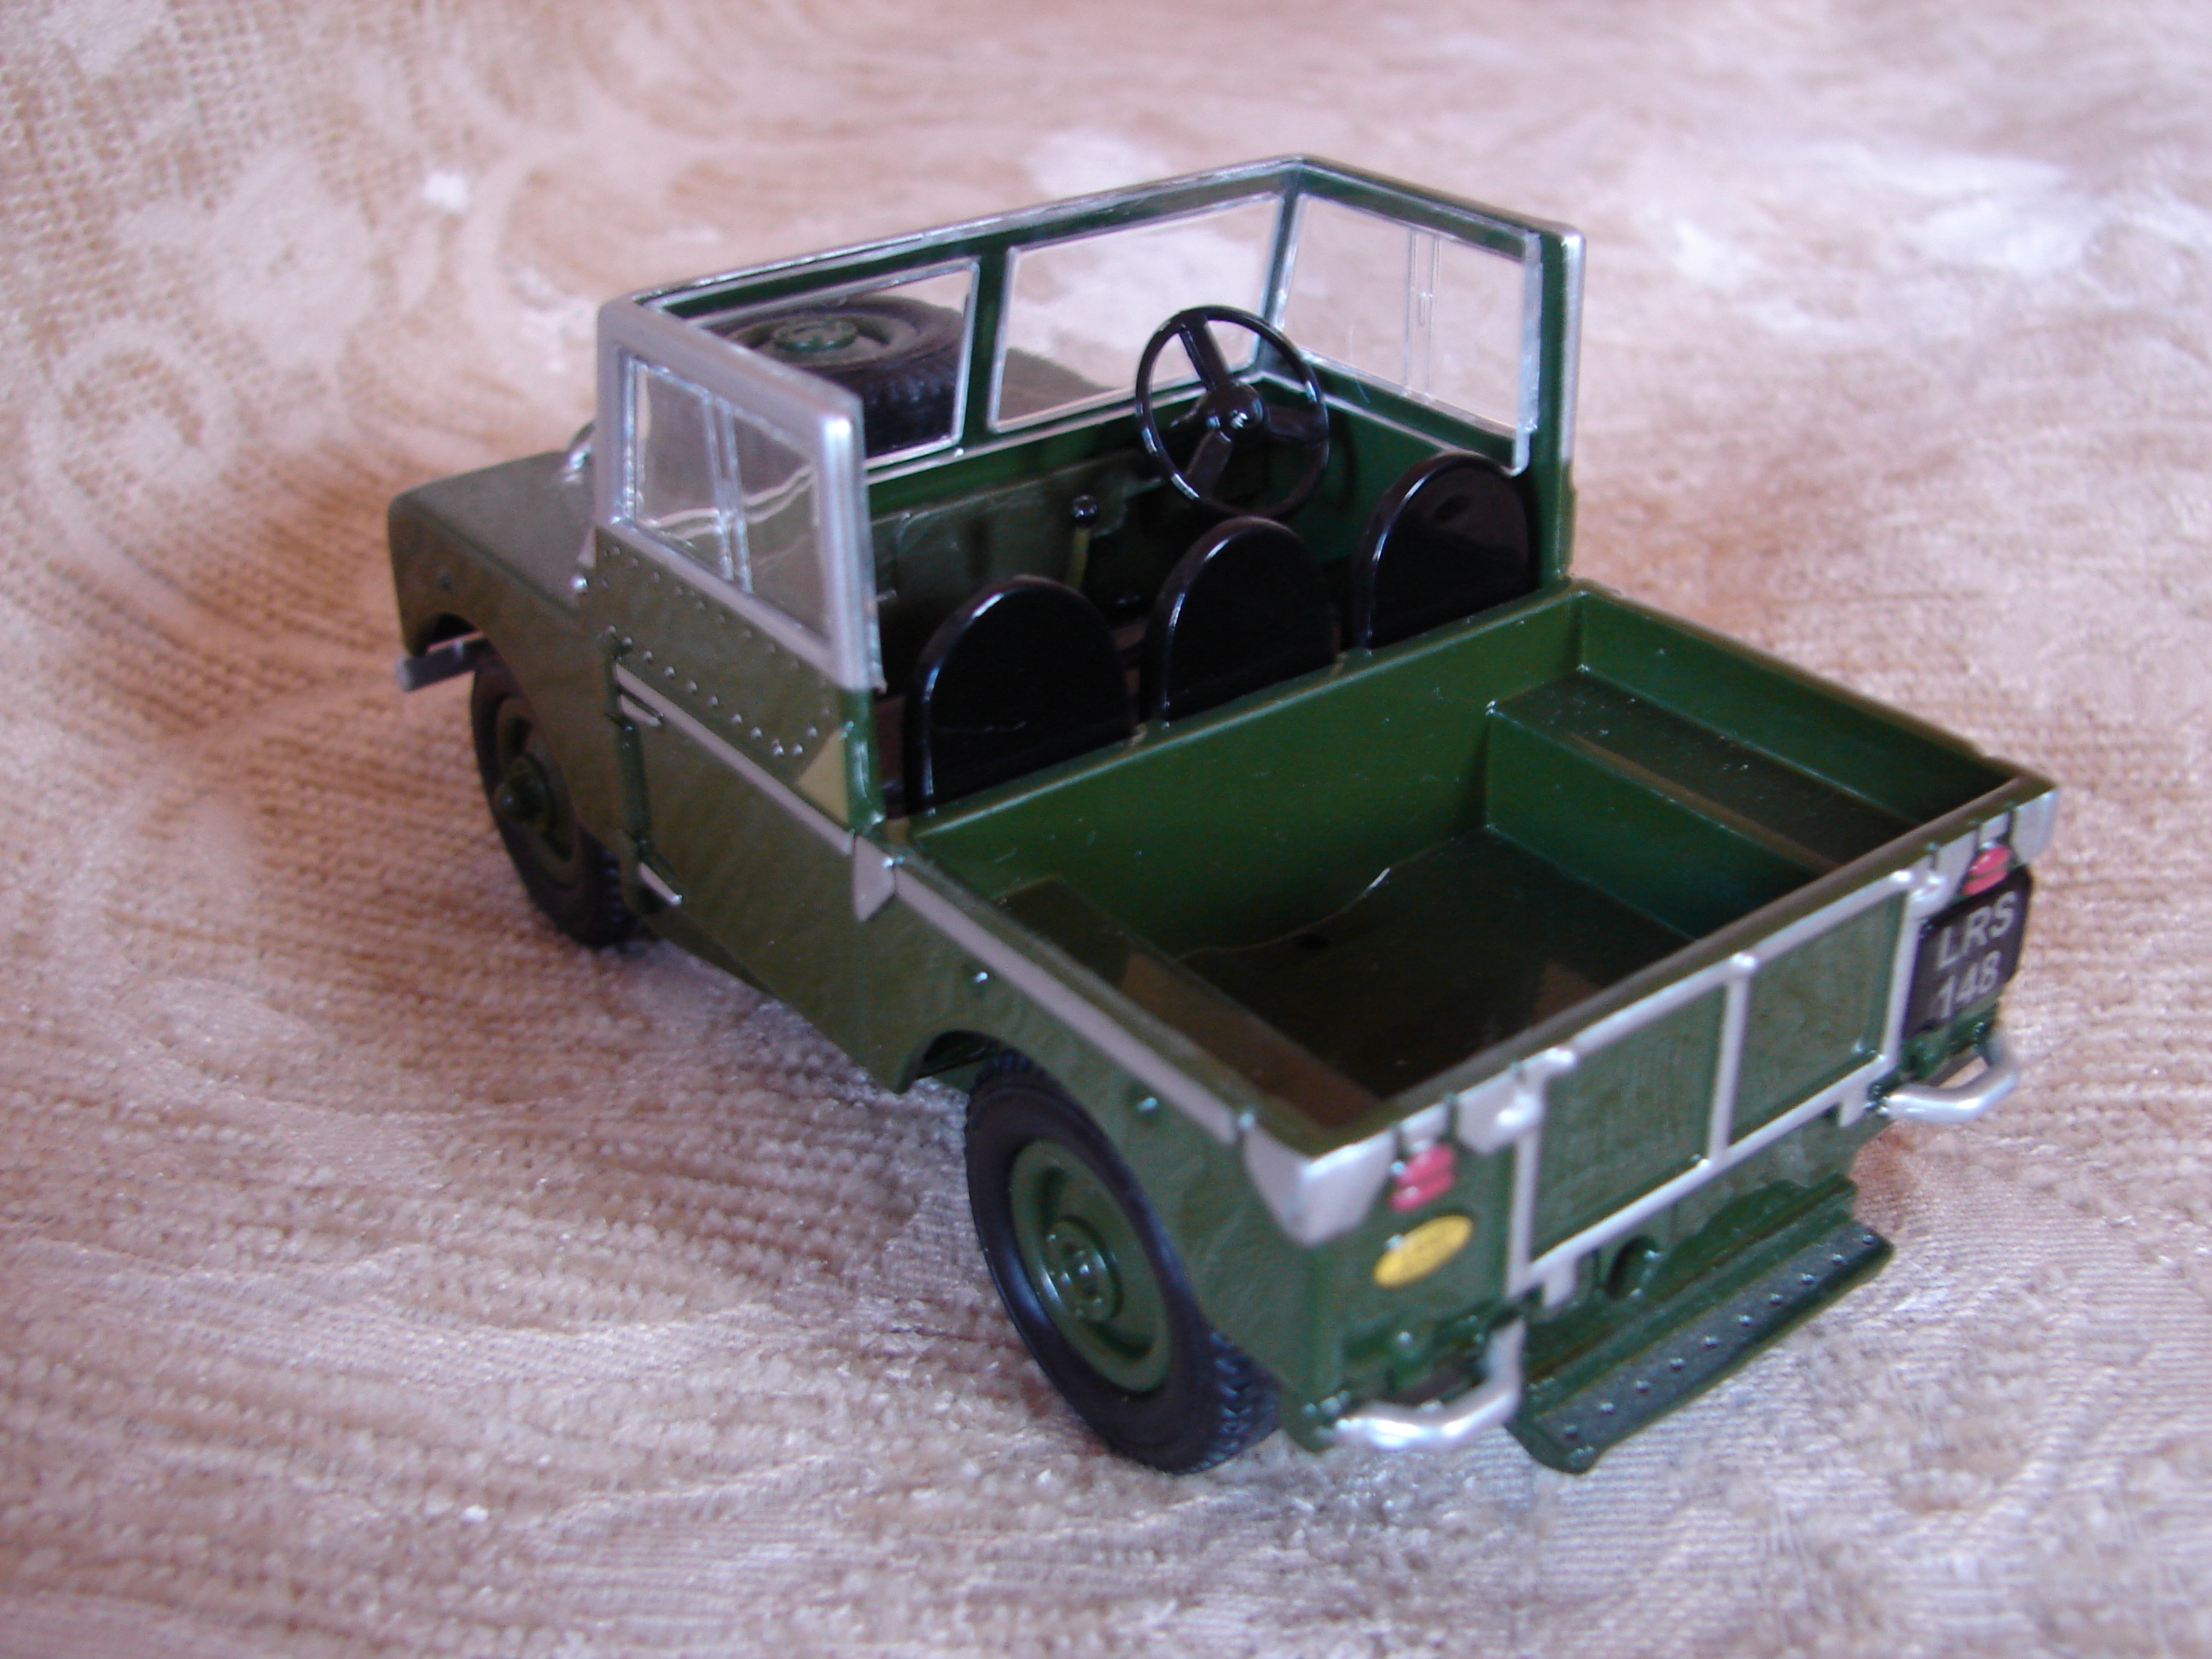
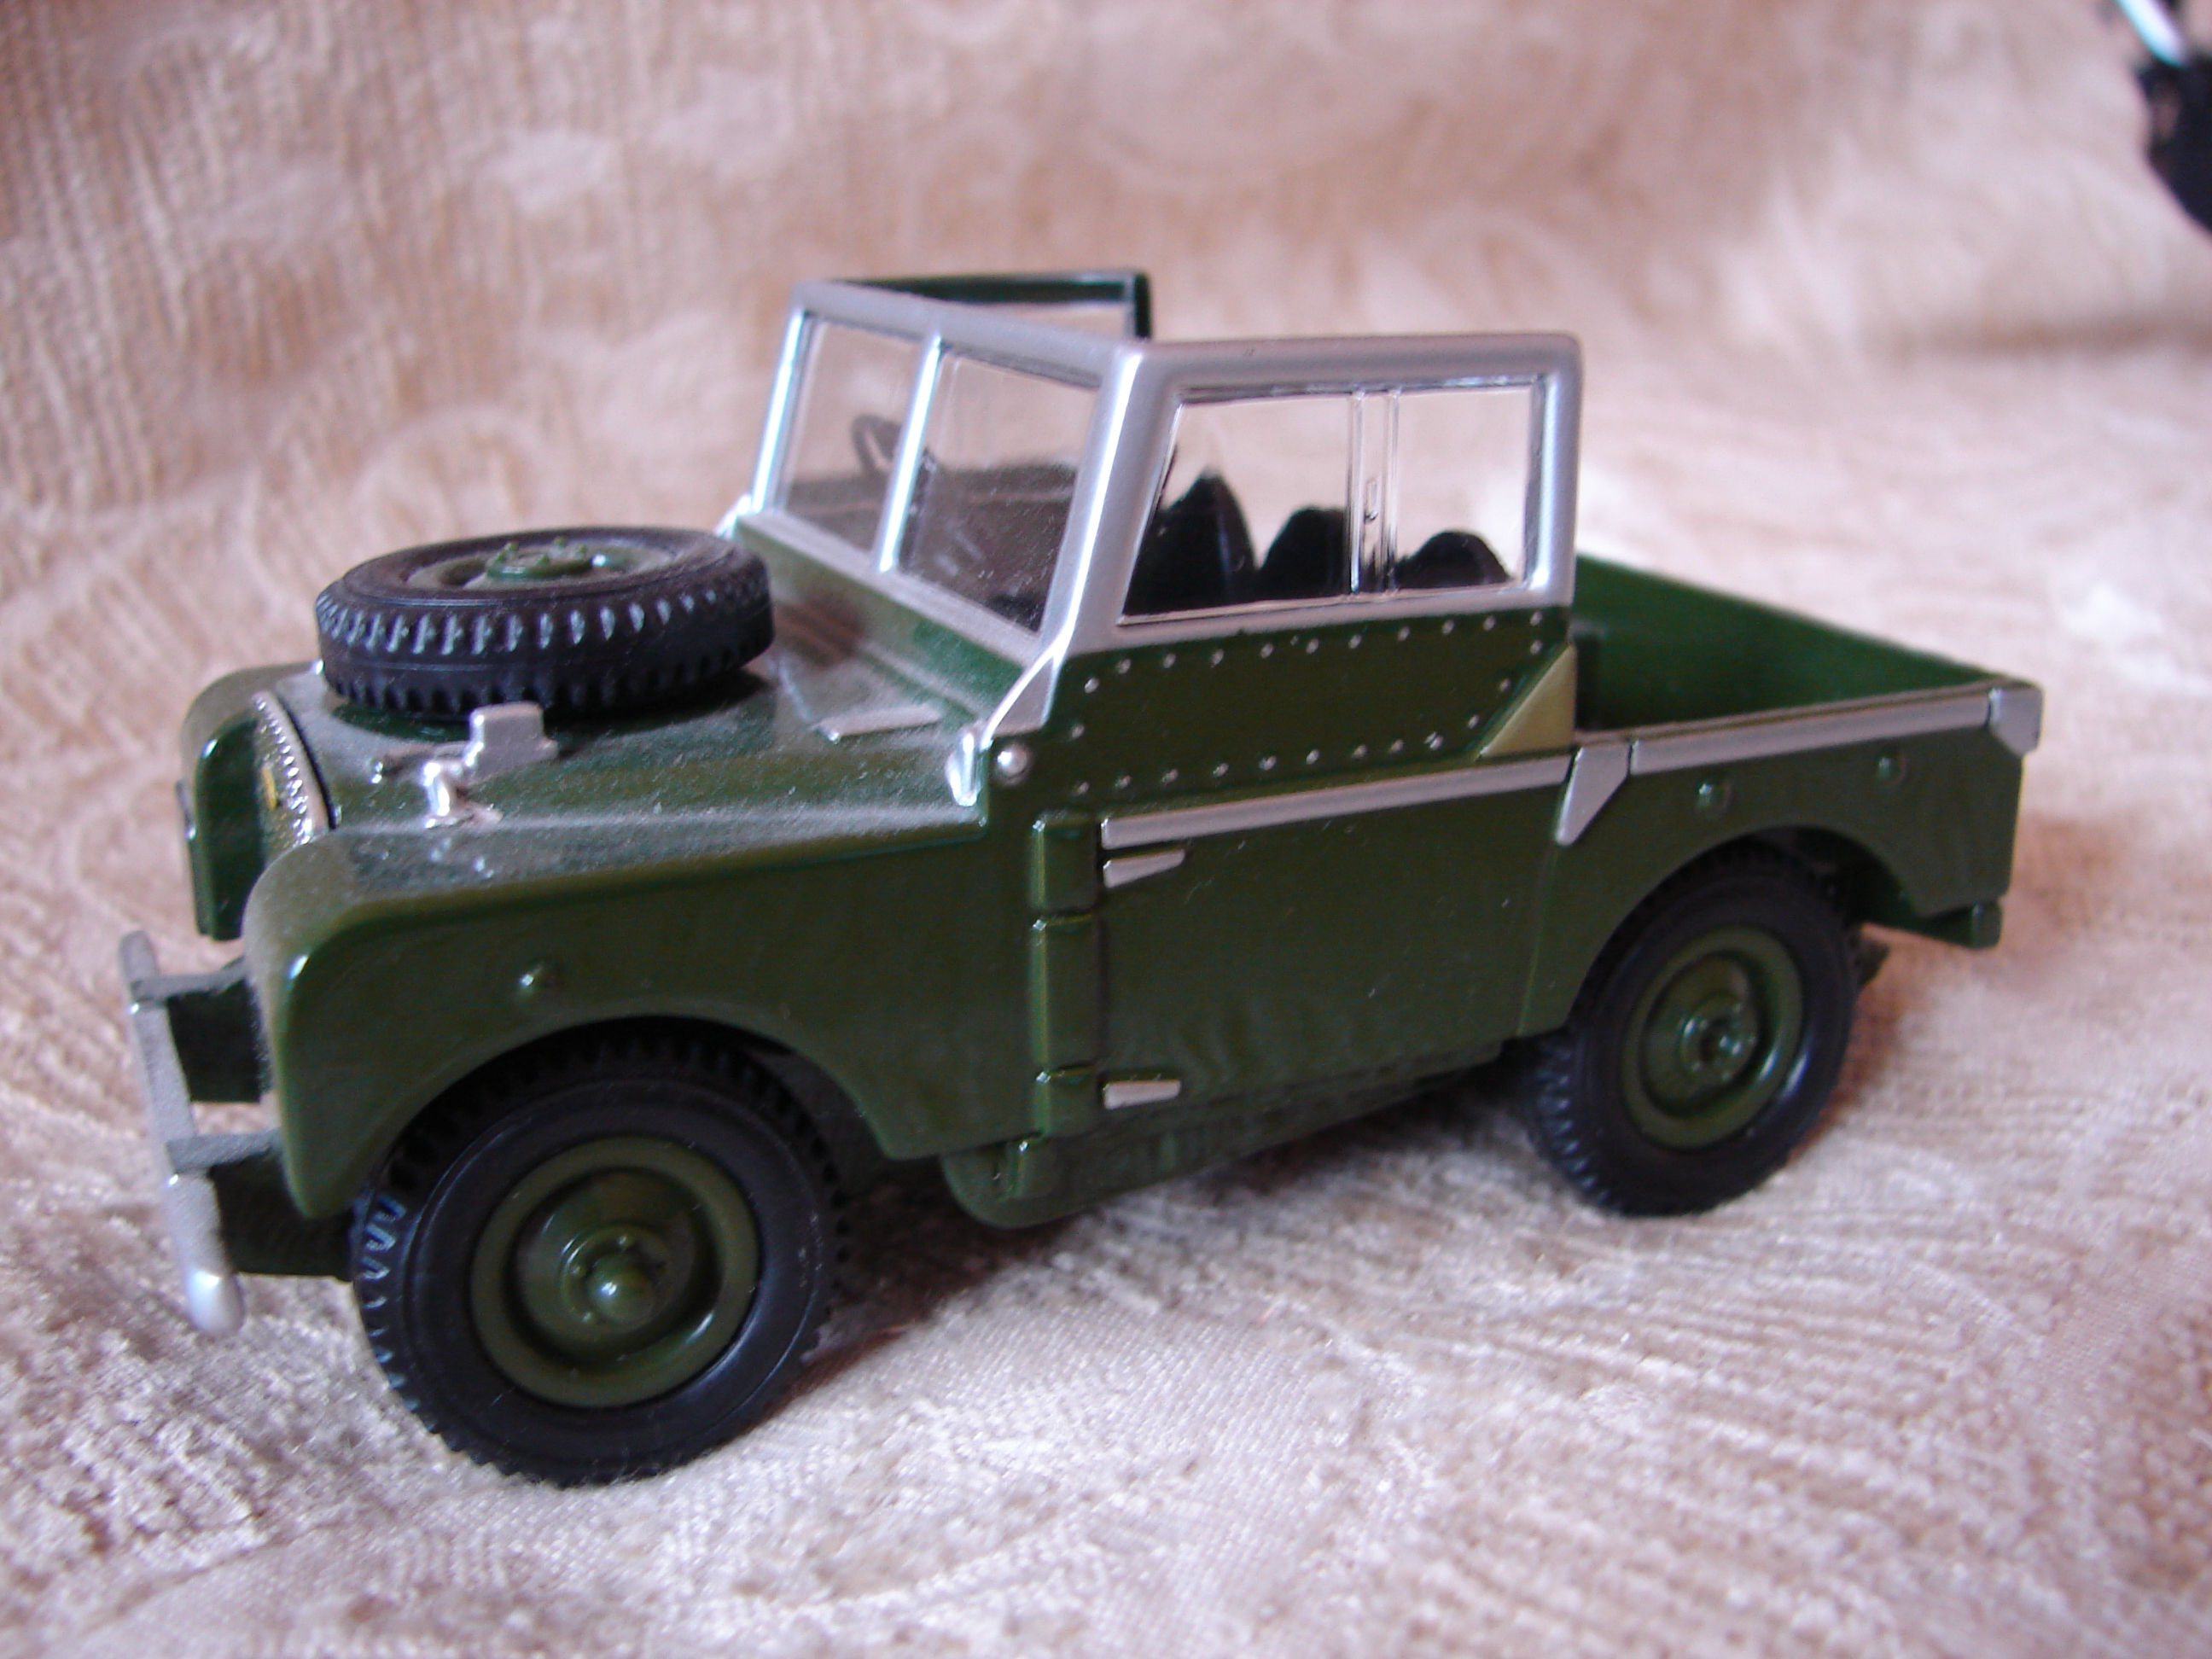
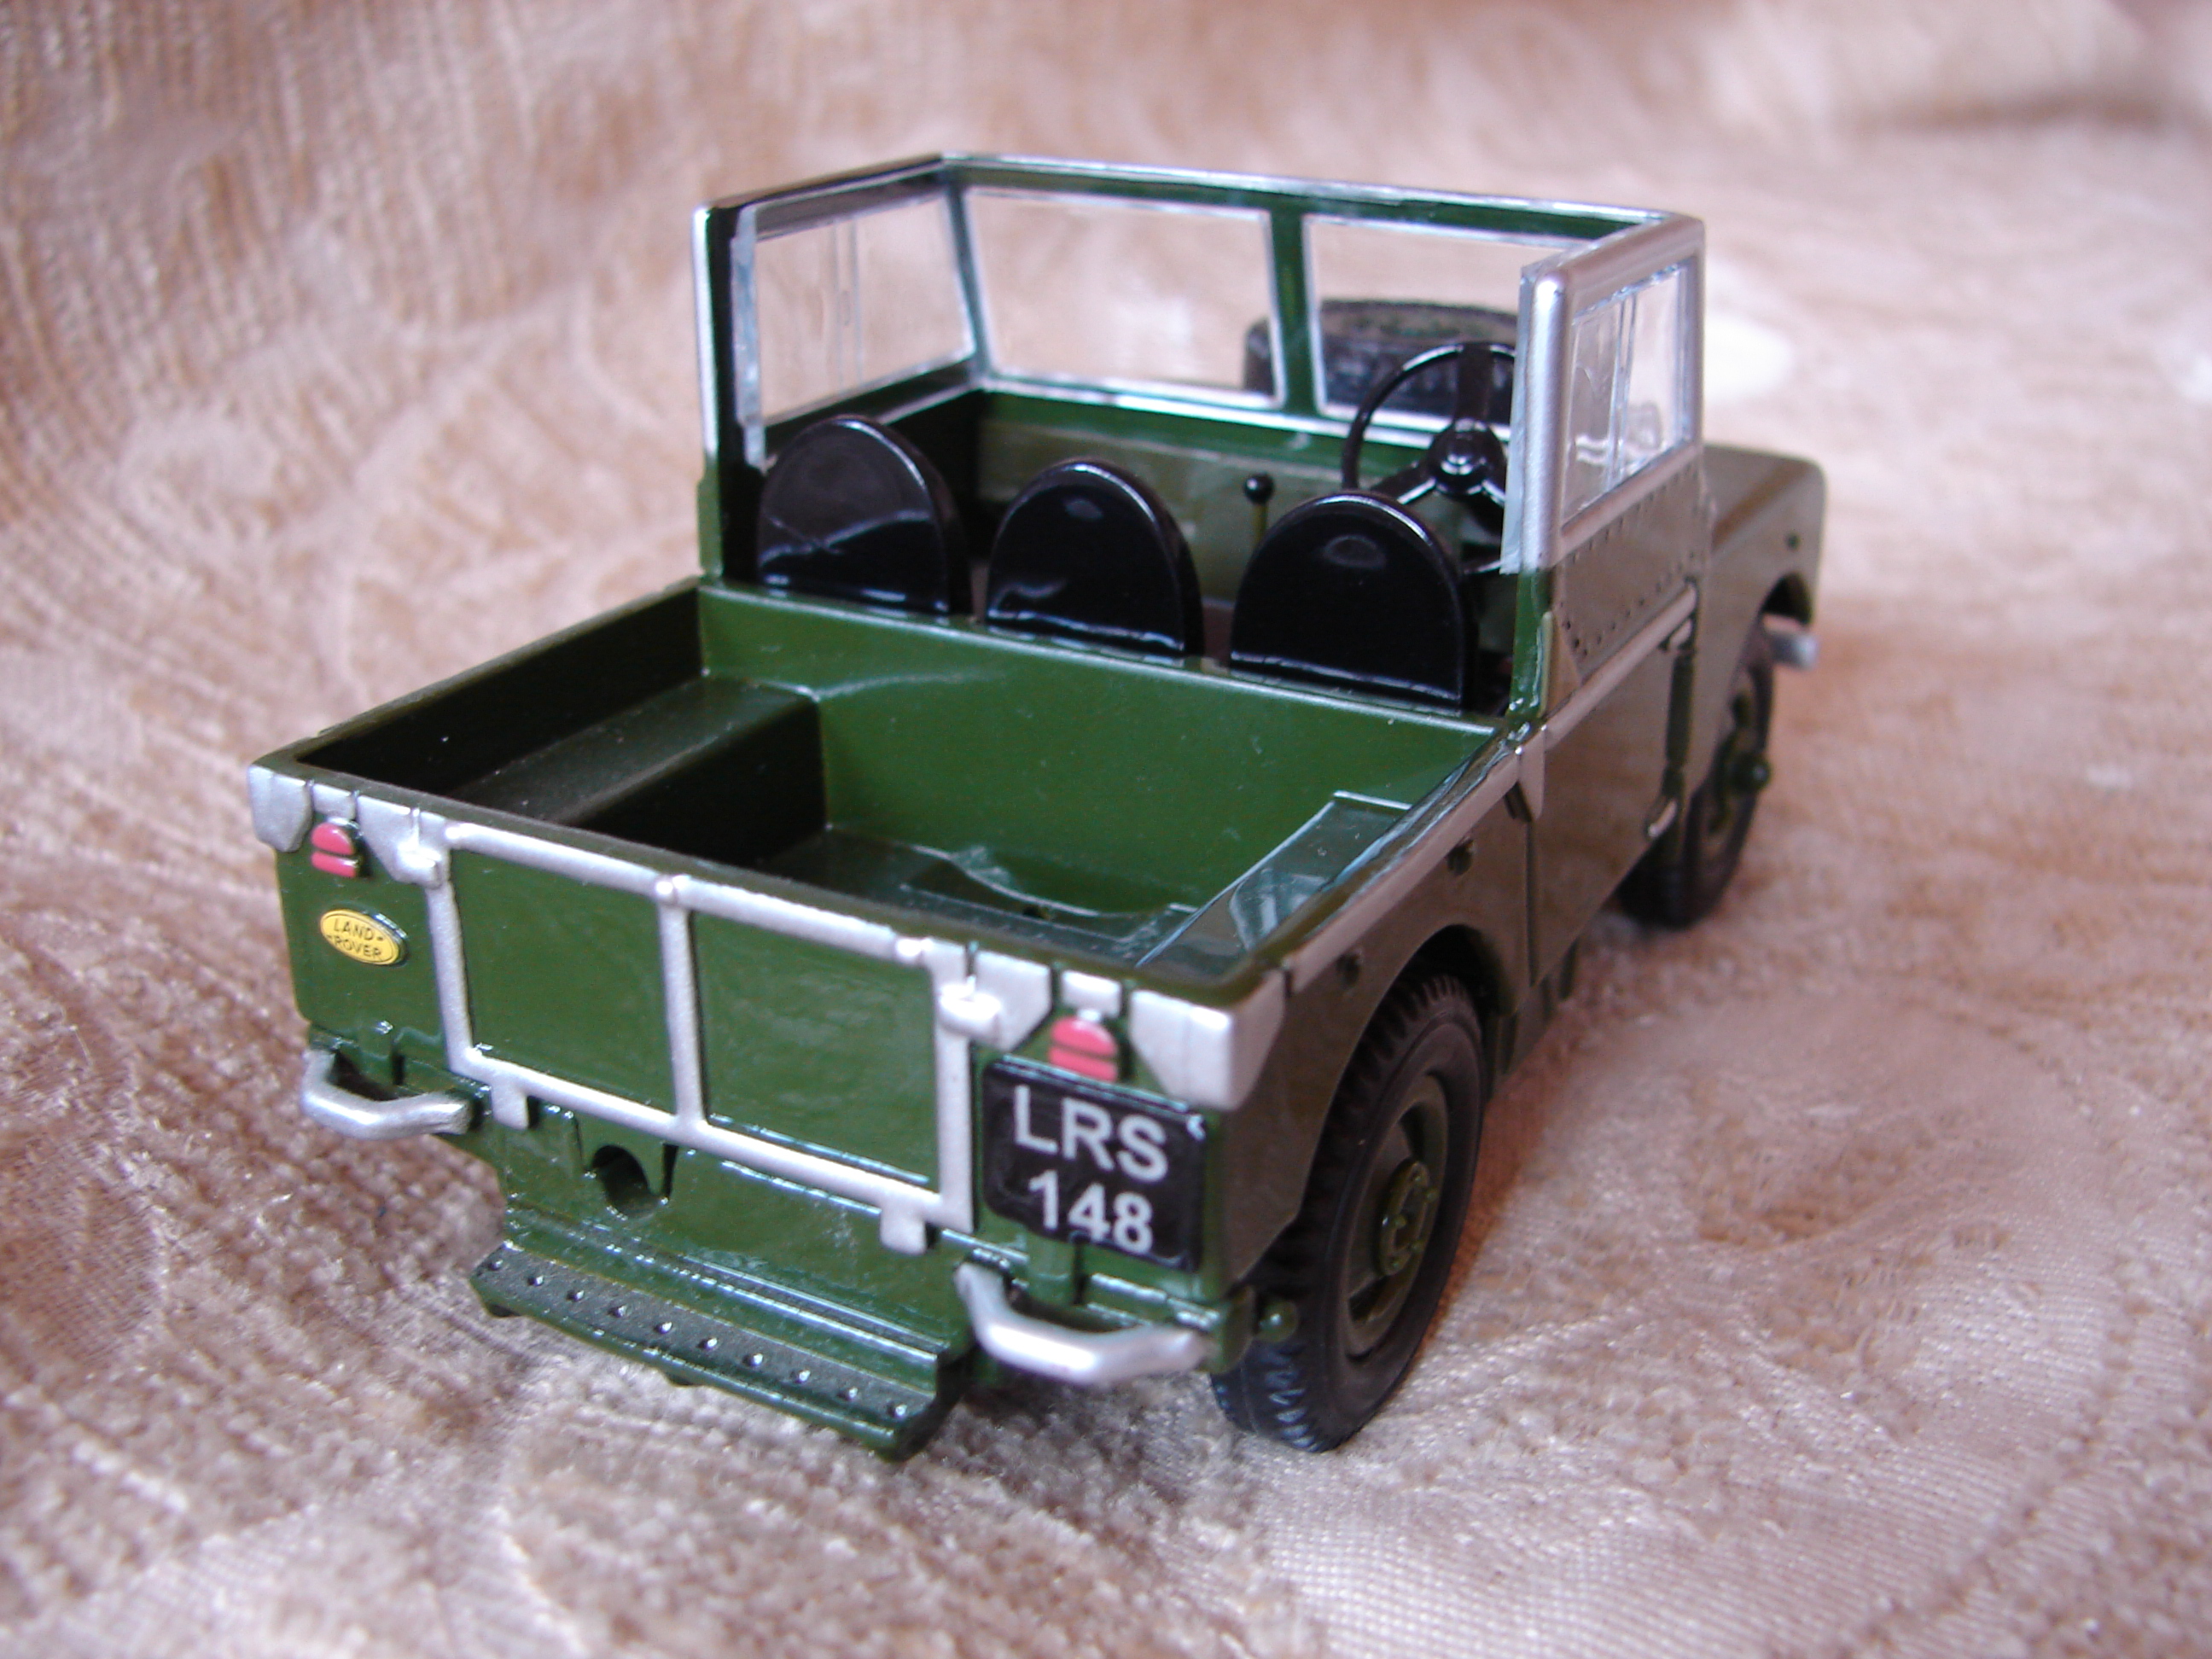
I also bought the Britain’s 1/32 scale diecast model of the Series 1 Land Rover to provide me with a three dimensional subject as a handy reference and some detailing which would prove to be useful later.
Perhaps I should say at this point that I do have a varied background in both engineering and carpentry but I am no more than an enthusiastic amateur with a small workshop, DIY tools and a couple of useful friends for assistance.
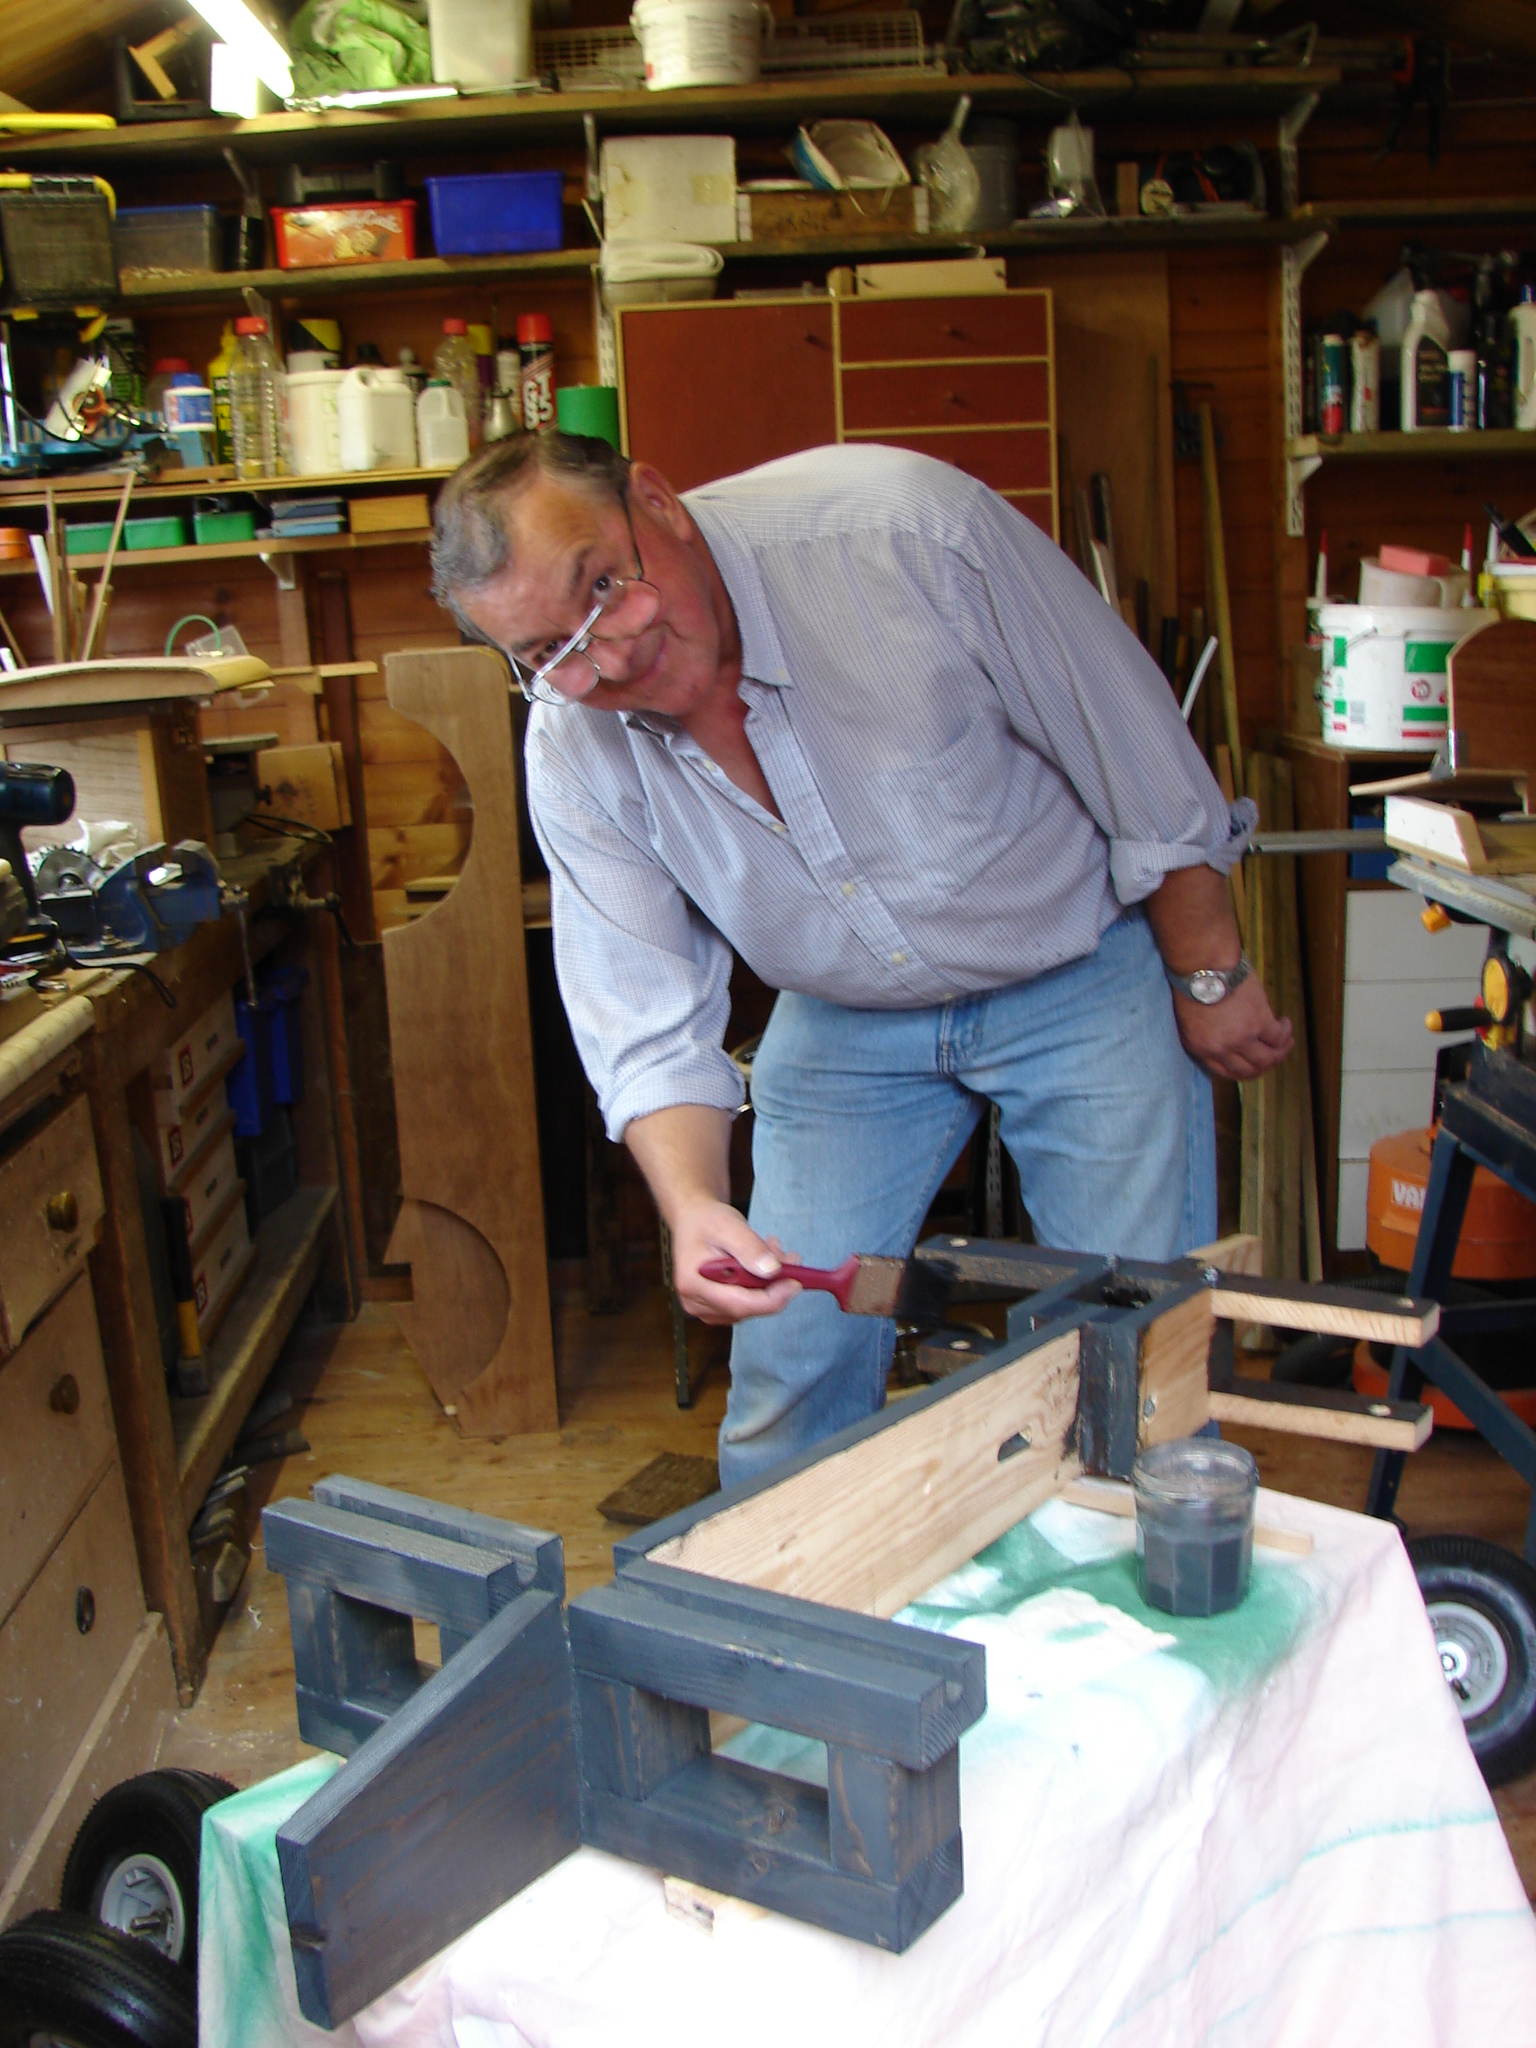
One other thing I should mention is that there are almost no mechanical fixings (screws, nails, nuts and bolts) in the construction of the body which is separately mounted to the chassis. For this some experience in the use of a polyurethane wood adhesive would be invaluable. It has incredible strength and can “cure” in as little as half an hour but it “foams” in use and therefore careful application and accurate clamping are required. Oh, and by the way, don’t get it on yourself as it sticks like the proverbial to the blanket. You could use other wood adhesives but for me they are too slow to cure.
I would also like to stress that throughout the build I was very conscious that the end product would be in the control of some very tiny and inexperienced fingers. At each stage of the design I debated the merits of or the inclusion or otherwise of certain features with regard to a risk assessment.
One item that has historically been a serious limiting factor to building a model of this type has been the availability of suitable wheels. Today you can purchase small pneumatic tyred wheels for just a few pounds each and this is where I actually started my project.
A visit to my local surplus supplies warehouse, produced 4 X 10” diameter wheels complete with bearings and pneumatic tyres for under £30. They also had many other useful bits and pieces including tools, timber and studding.
Having the wheels set the scene for endeavouring to “scale” my model. It is difficult to achieve perfection as you are using various components which are fairly readily available rather than purpose built. I downloaded some pictures of Series 1 Land Rover’s from the internet and then compared the size of my wheels to set the scale for all the other measurements. This process seemed to work out fairly well.
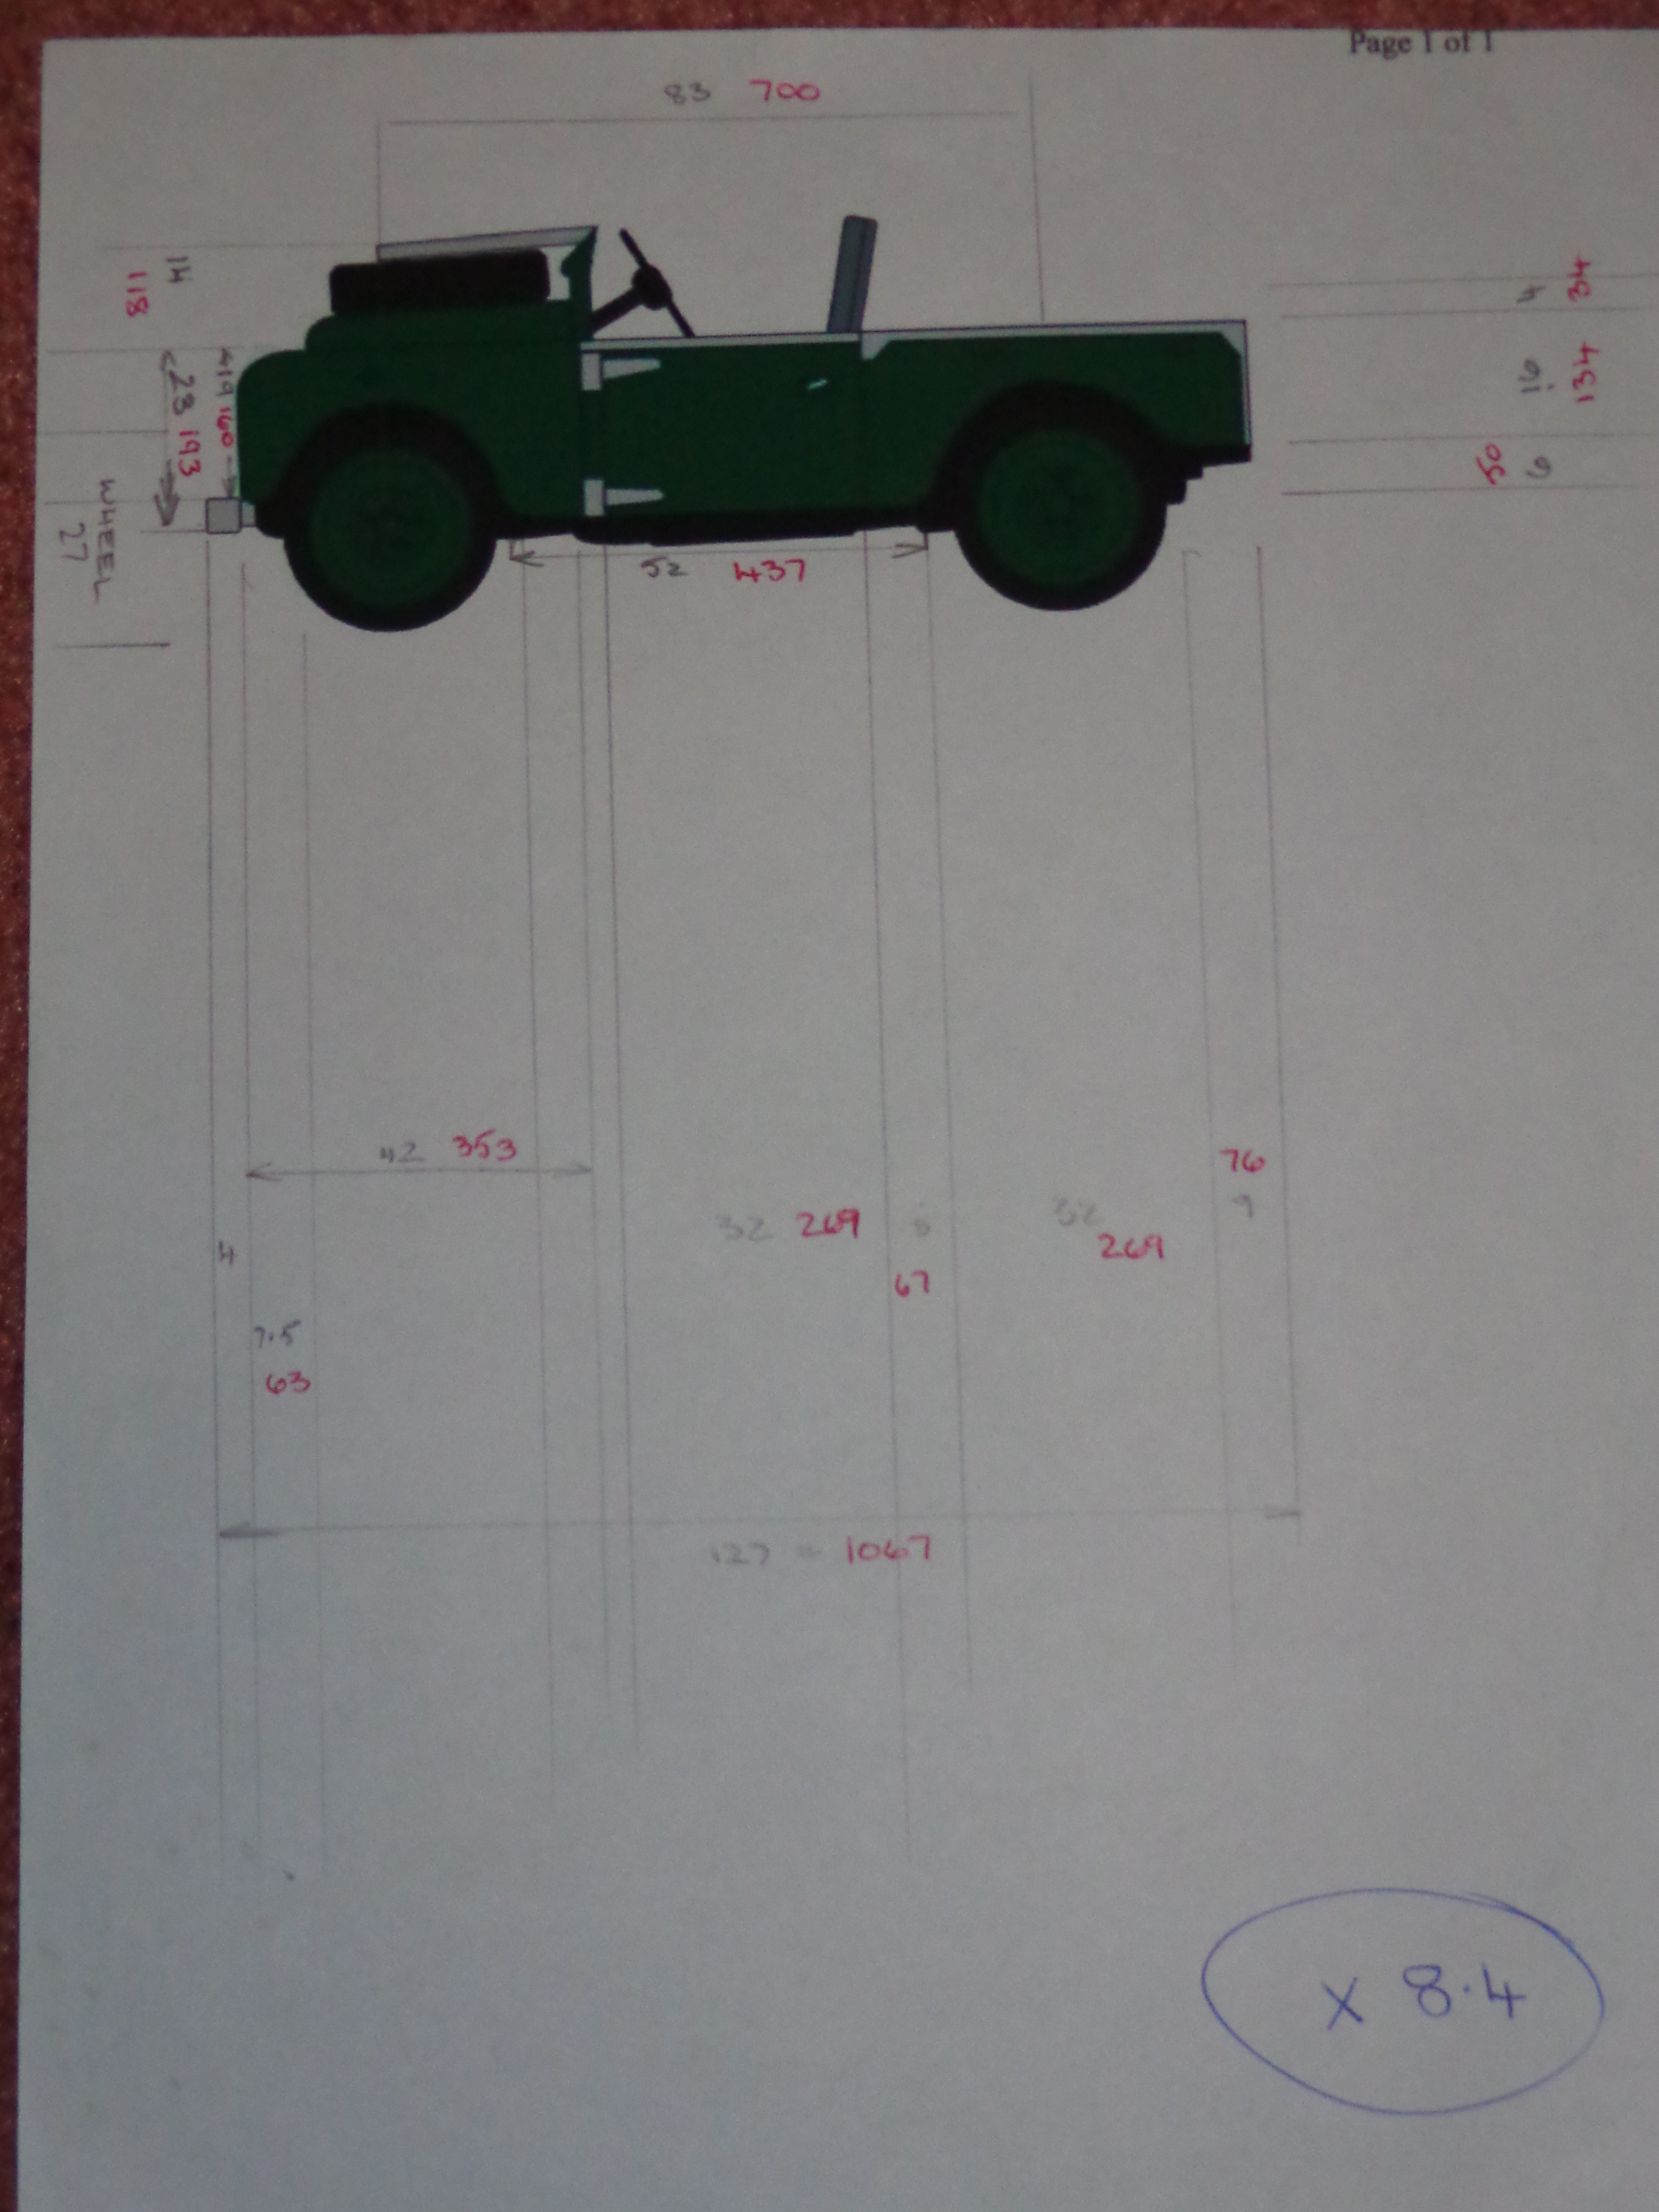
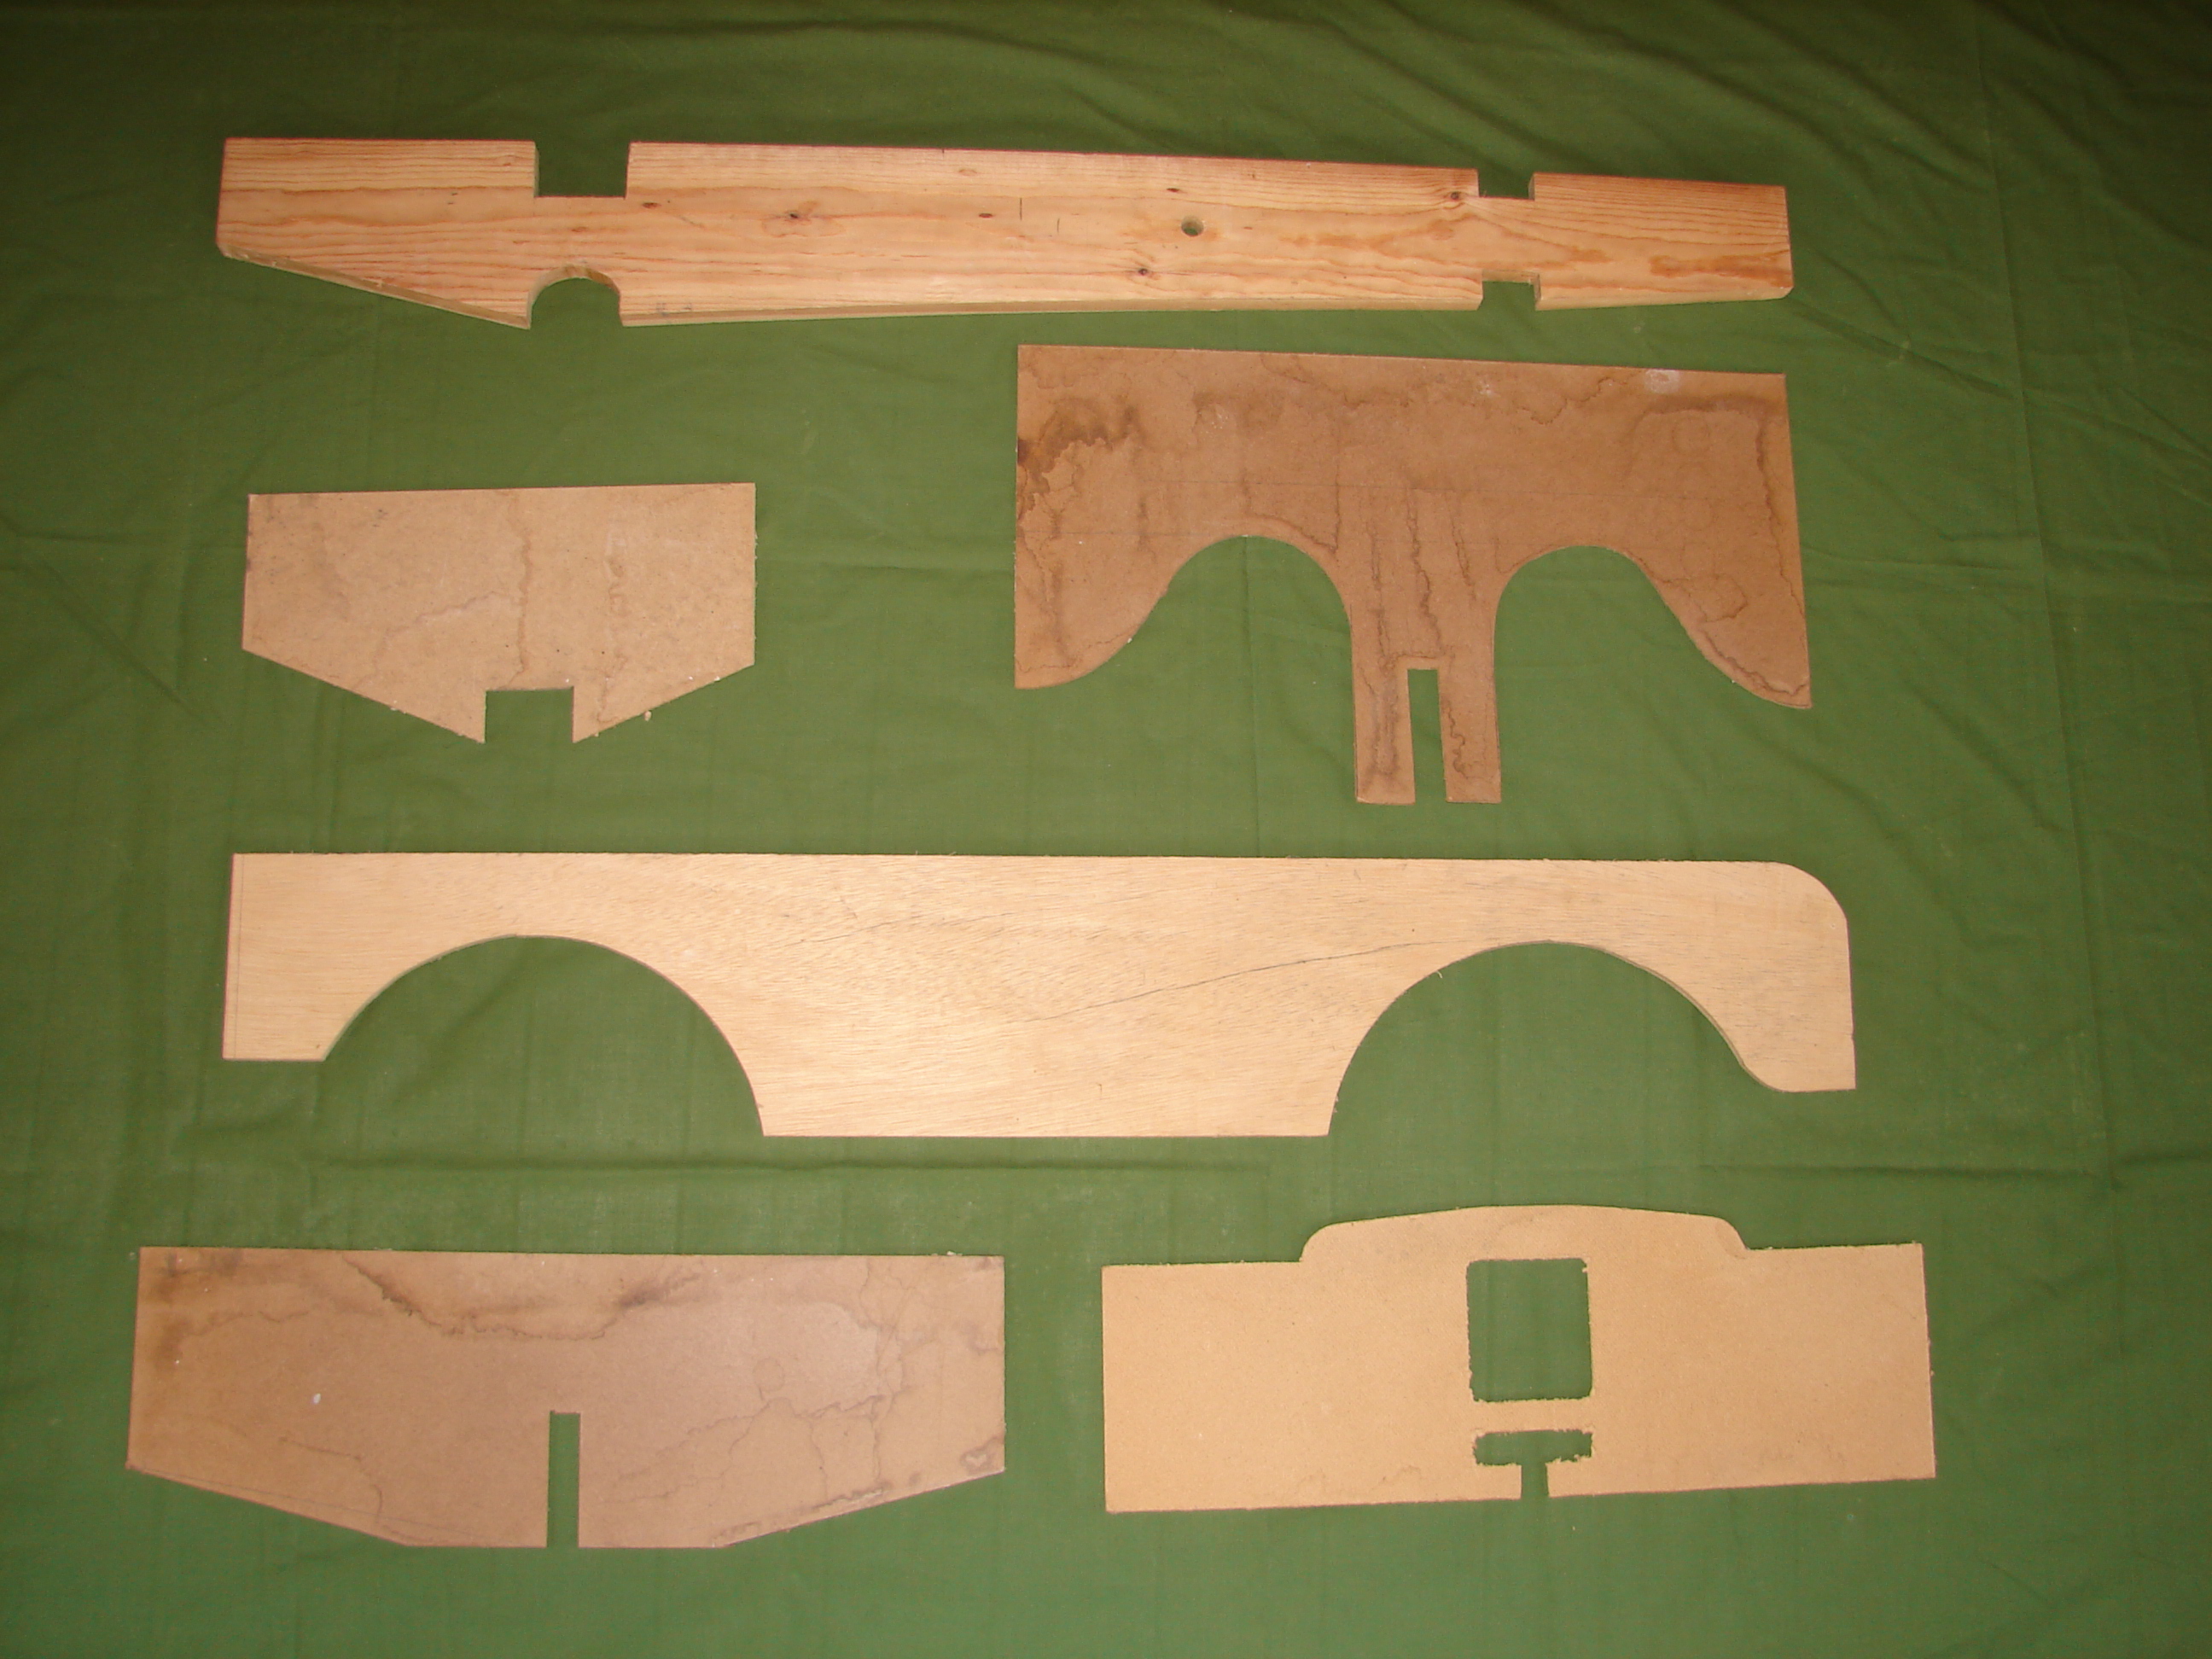
Next I made a few templates to determine the length and width of the model and this confirmed that I was on the right track.
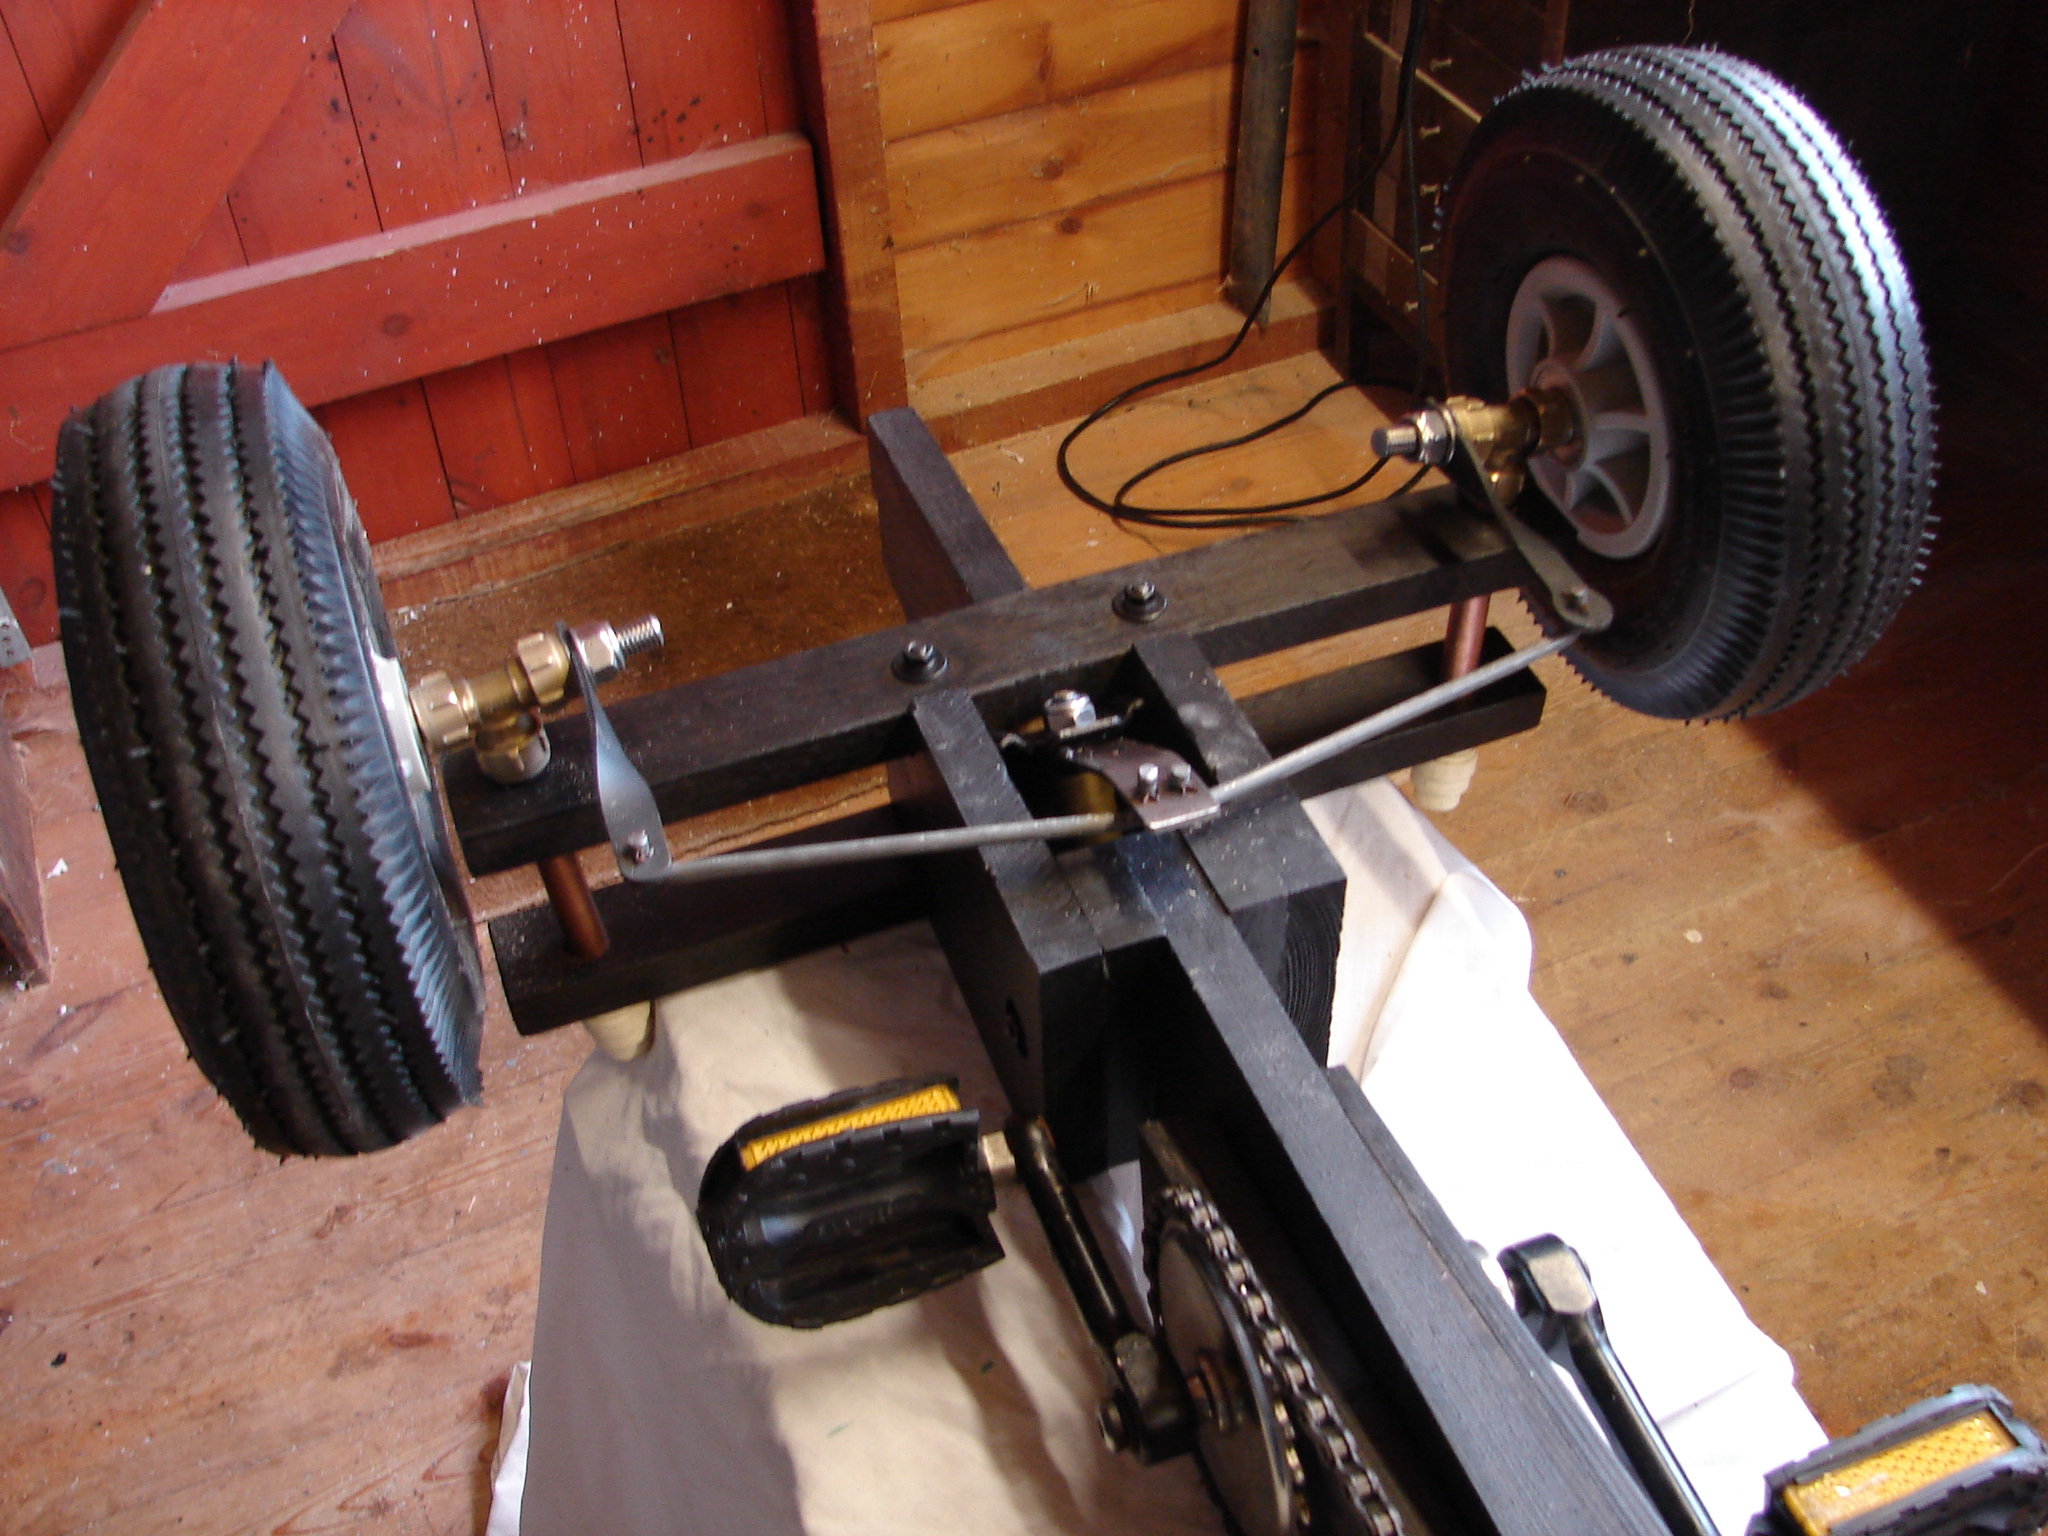
At this point I decided to turn my attention to the chassis and running gear. I badly needed the pedals to see how they would fit in the chassis. It just so happened that we were off to visit our good friend’s Ineka and Teus in Utrecht. I knew that they had recently purchased new push bikes so off we went to their local Bicycle shop.


Here Teus explained to the owner that I was looking for some pedals from a child’s bike. The owner said he had nothing in the shop but to come back in a couple of days and he would have something. Sure enough when we returned he had a complete kiddies bike which he said I could have for nothing, what a helpful Dutchman.
(second hand kiddies bike’s are easily sourced for just a few pounds on the world wide web or even from your local recycling point)
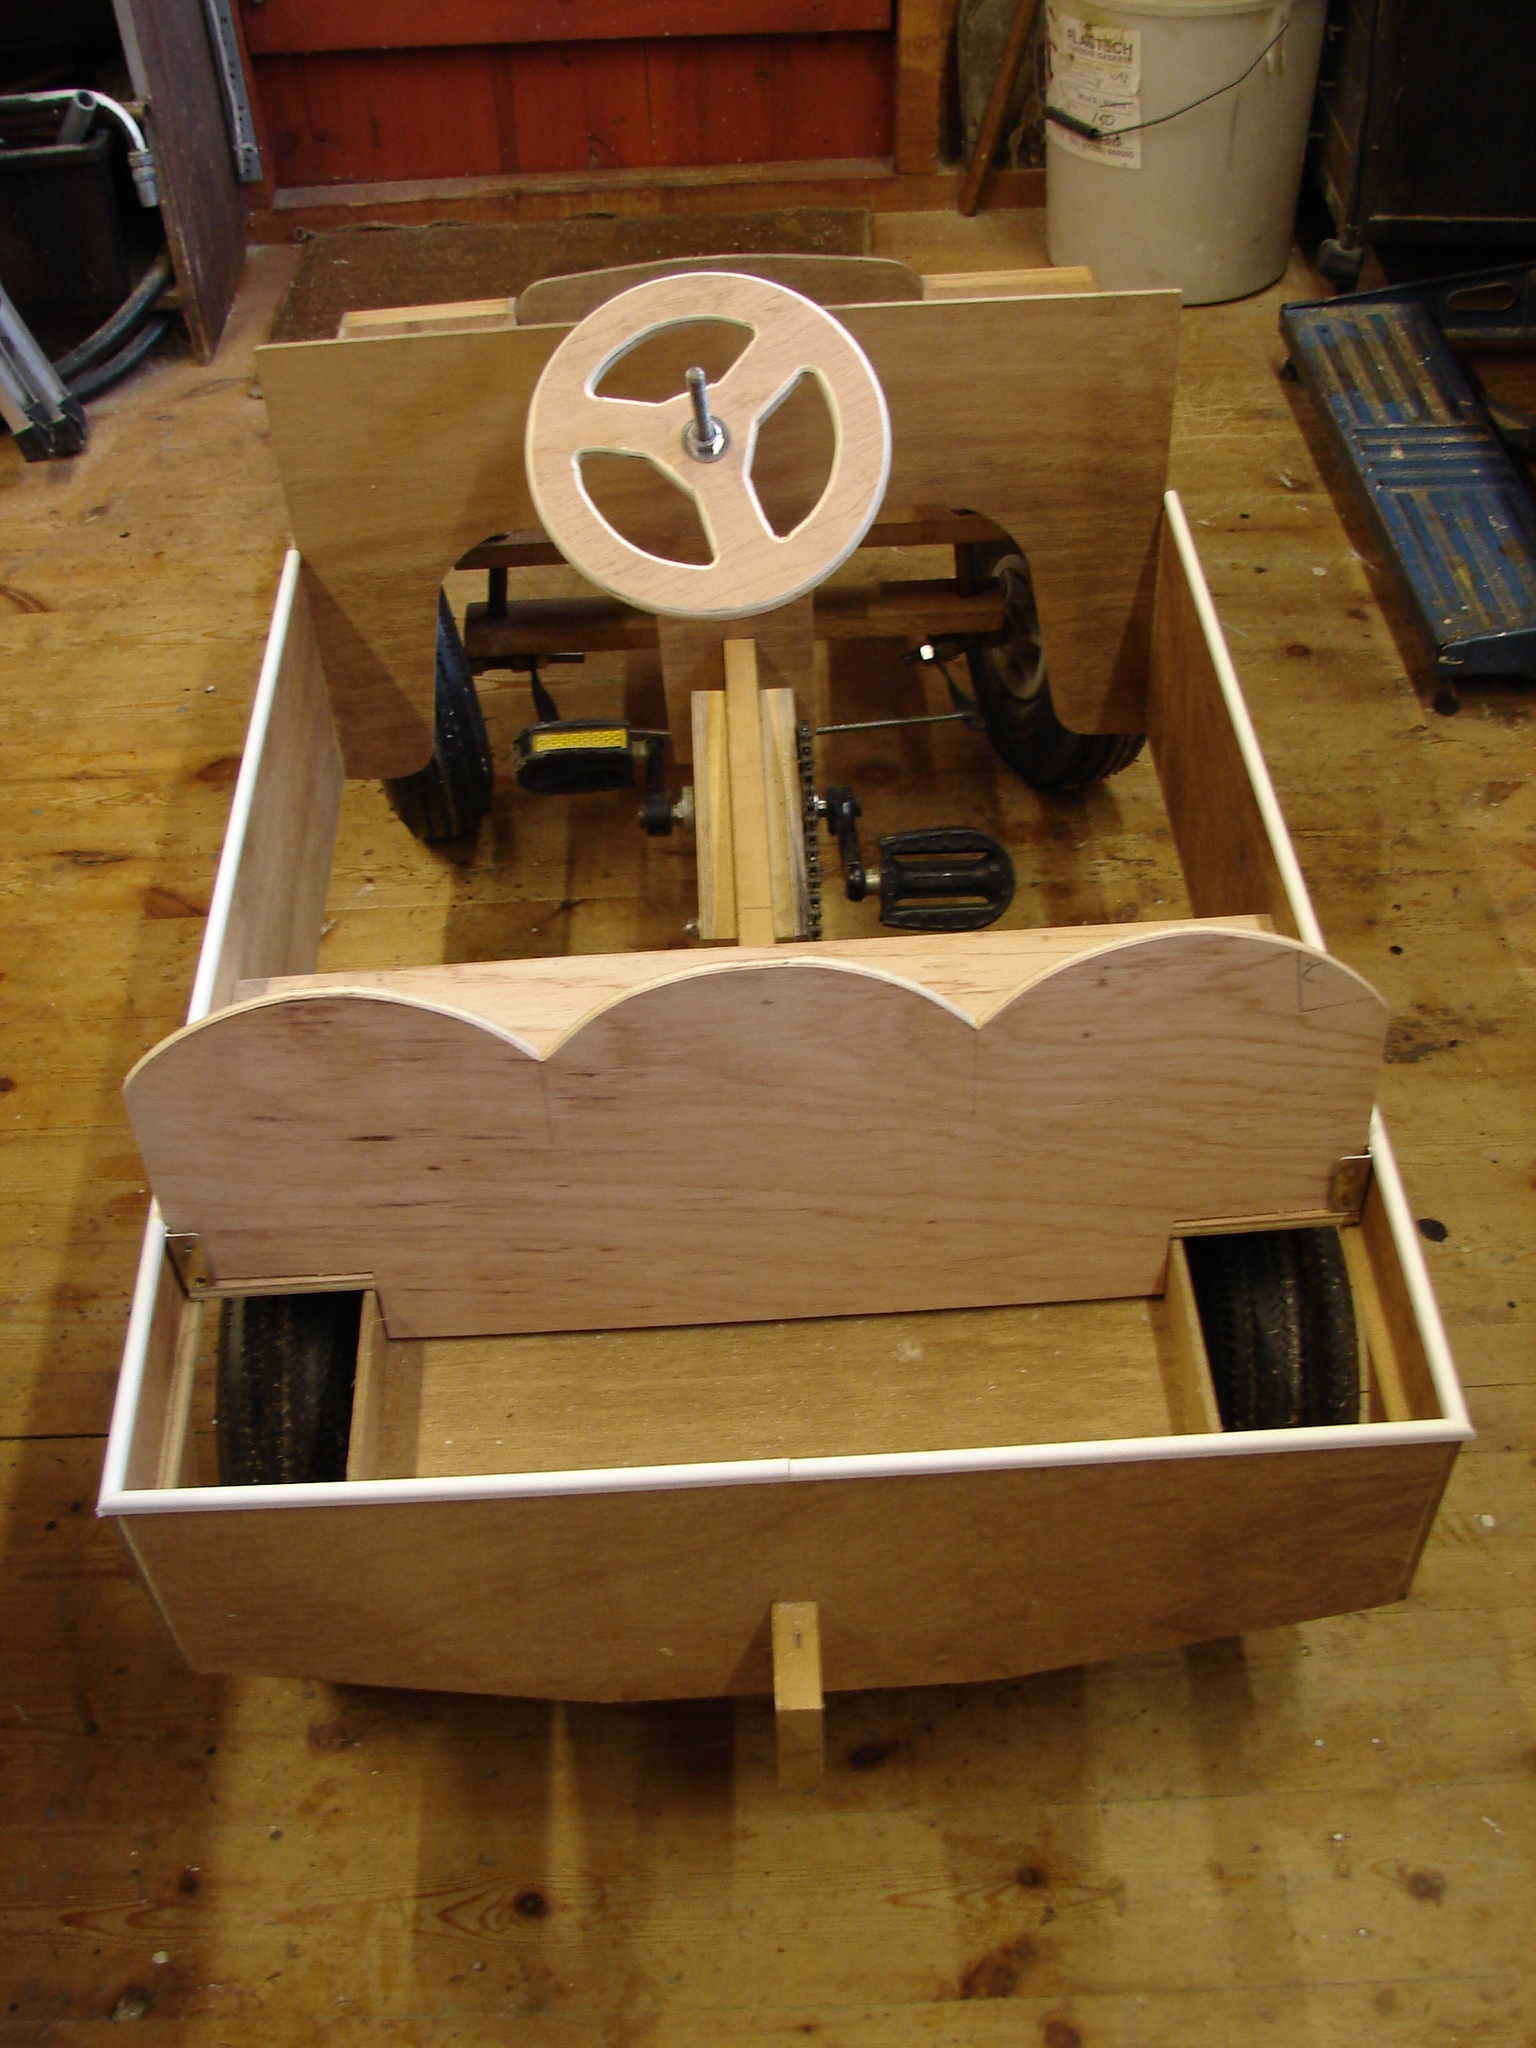
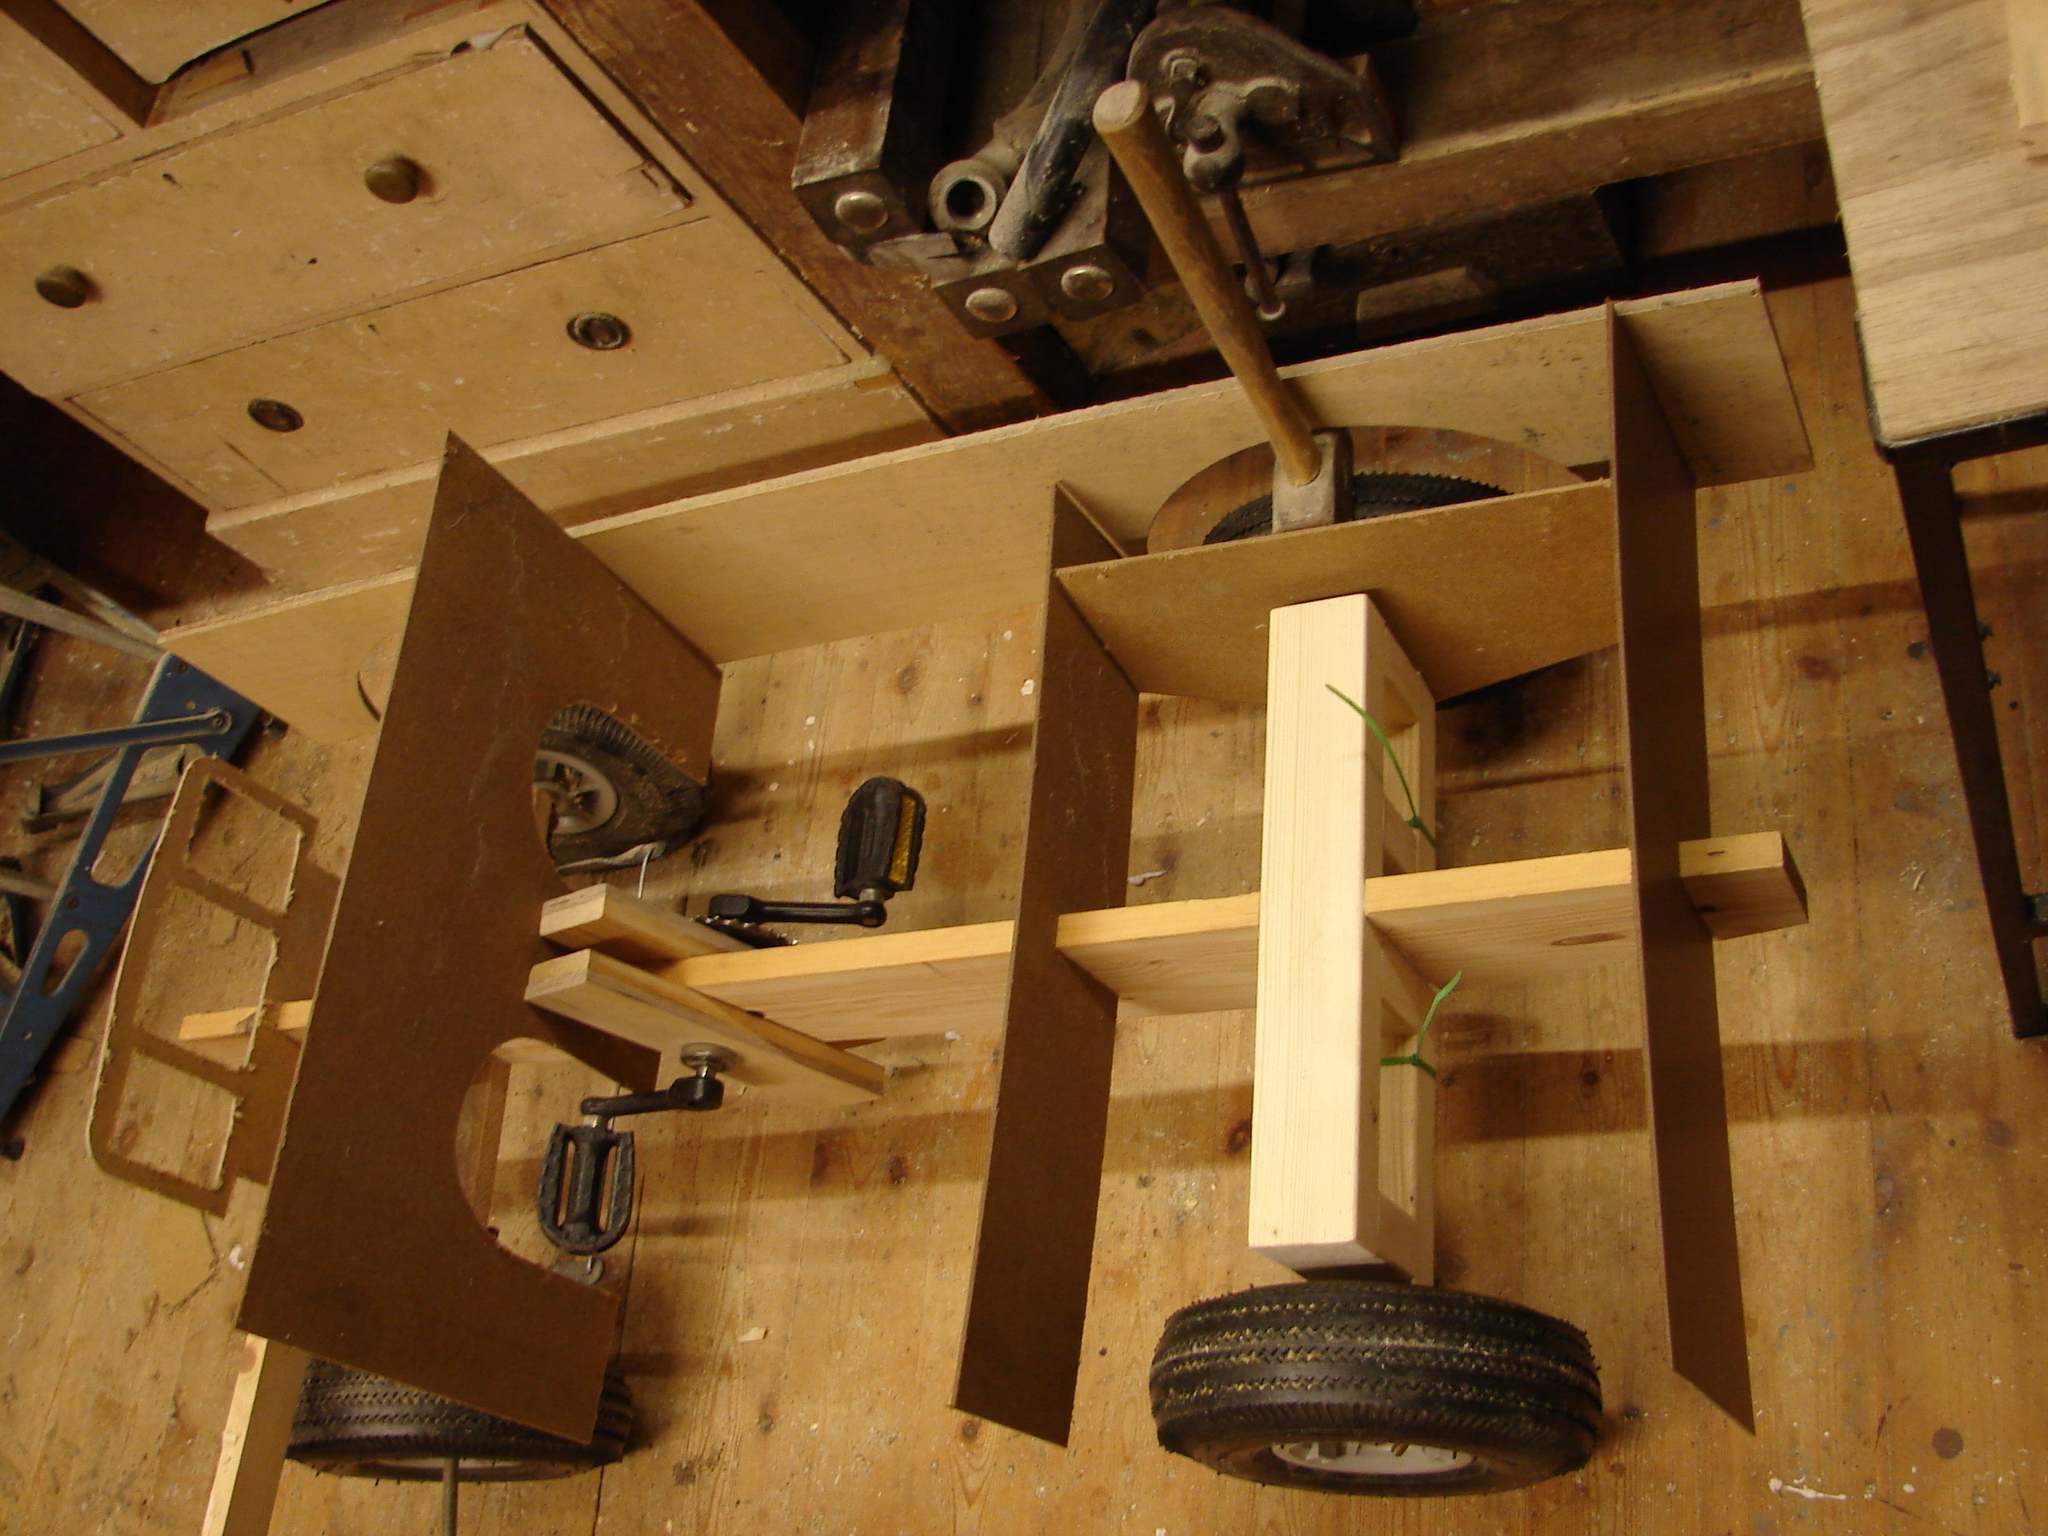
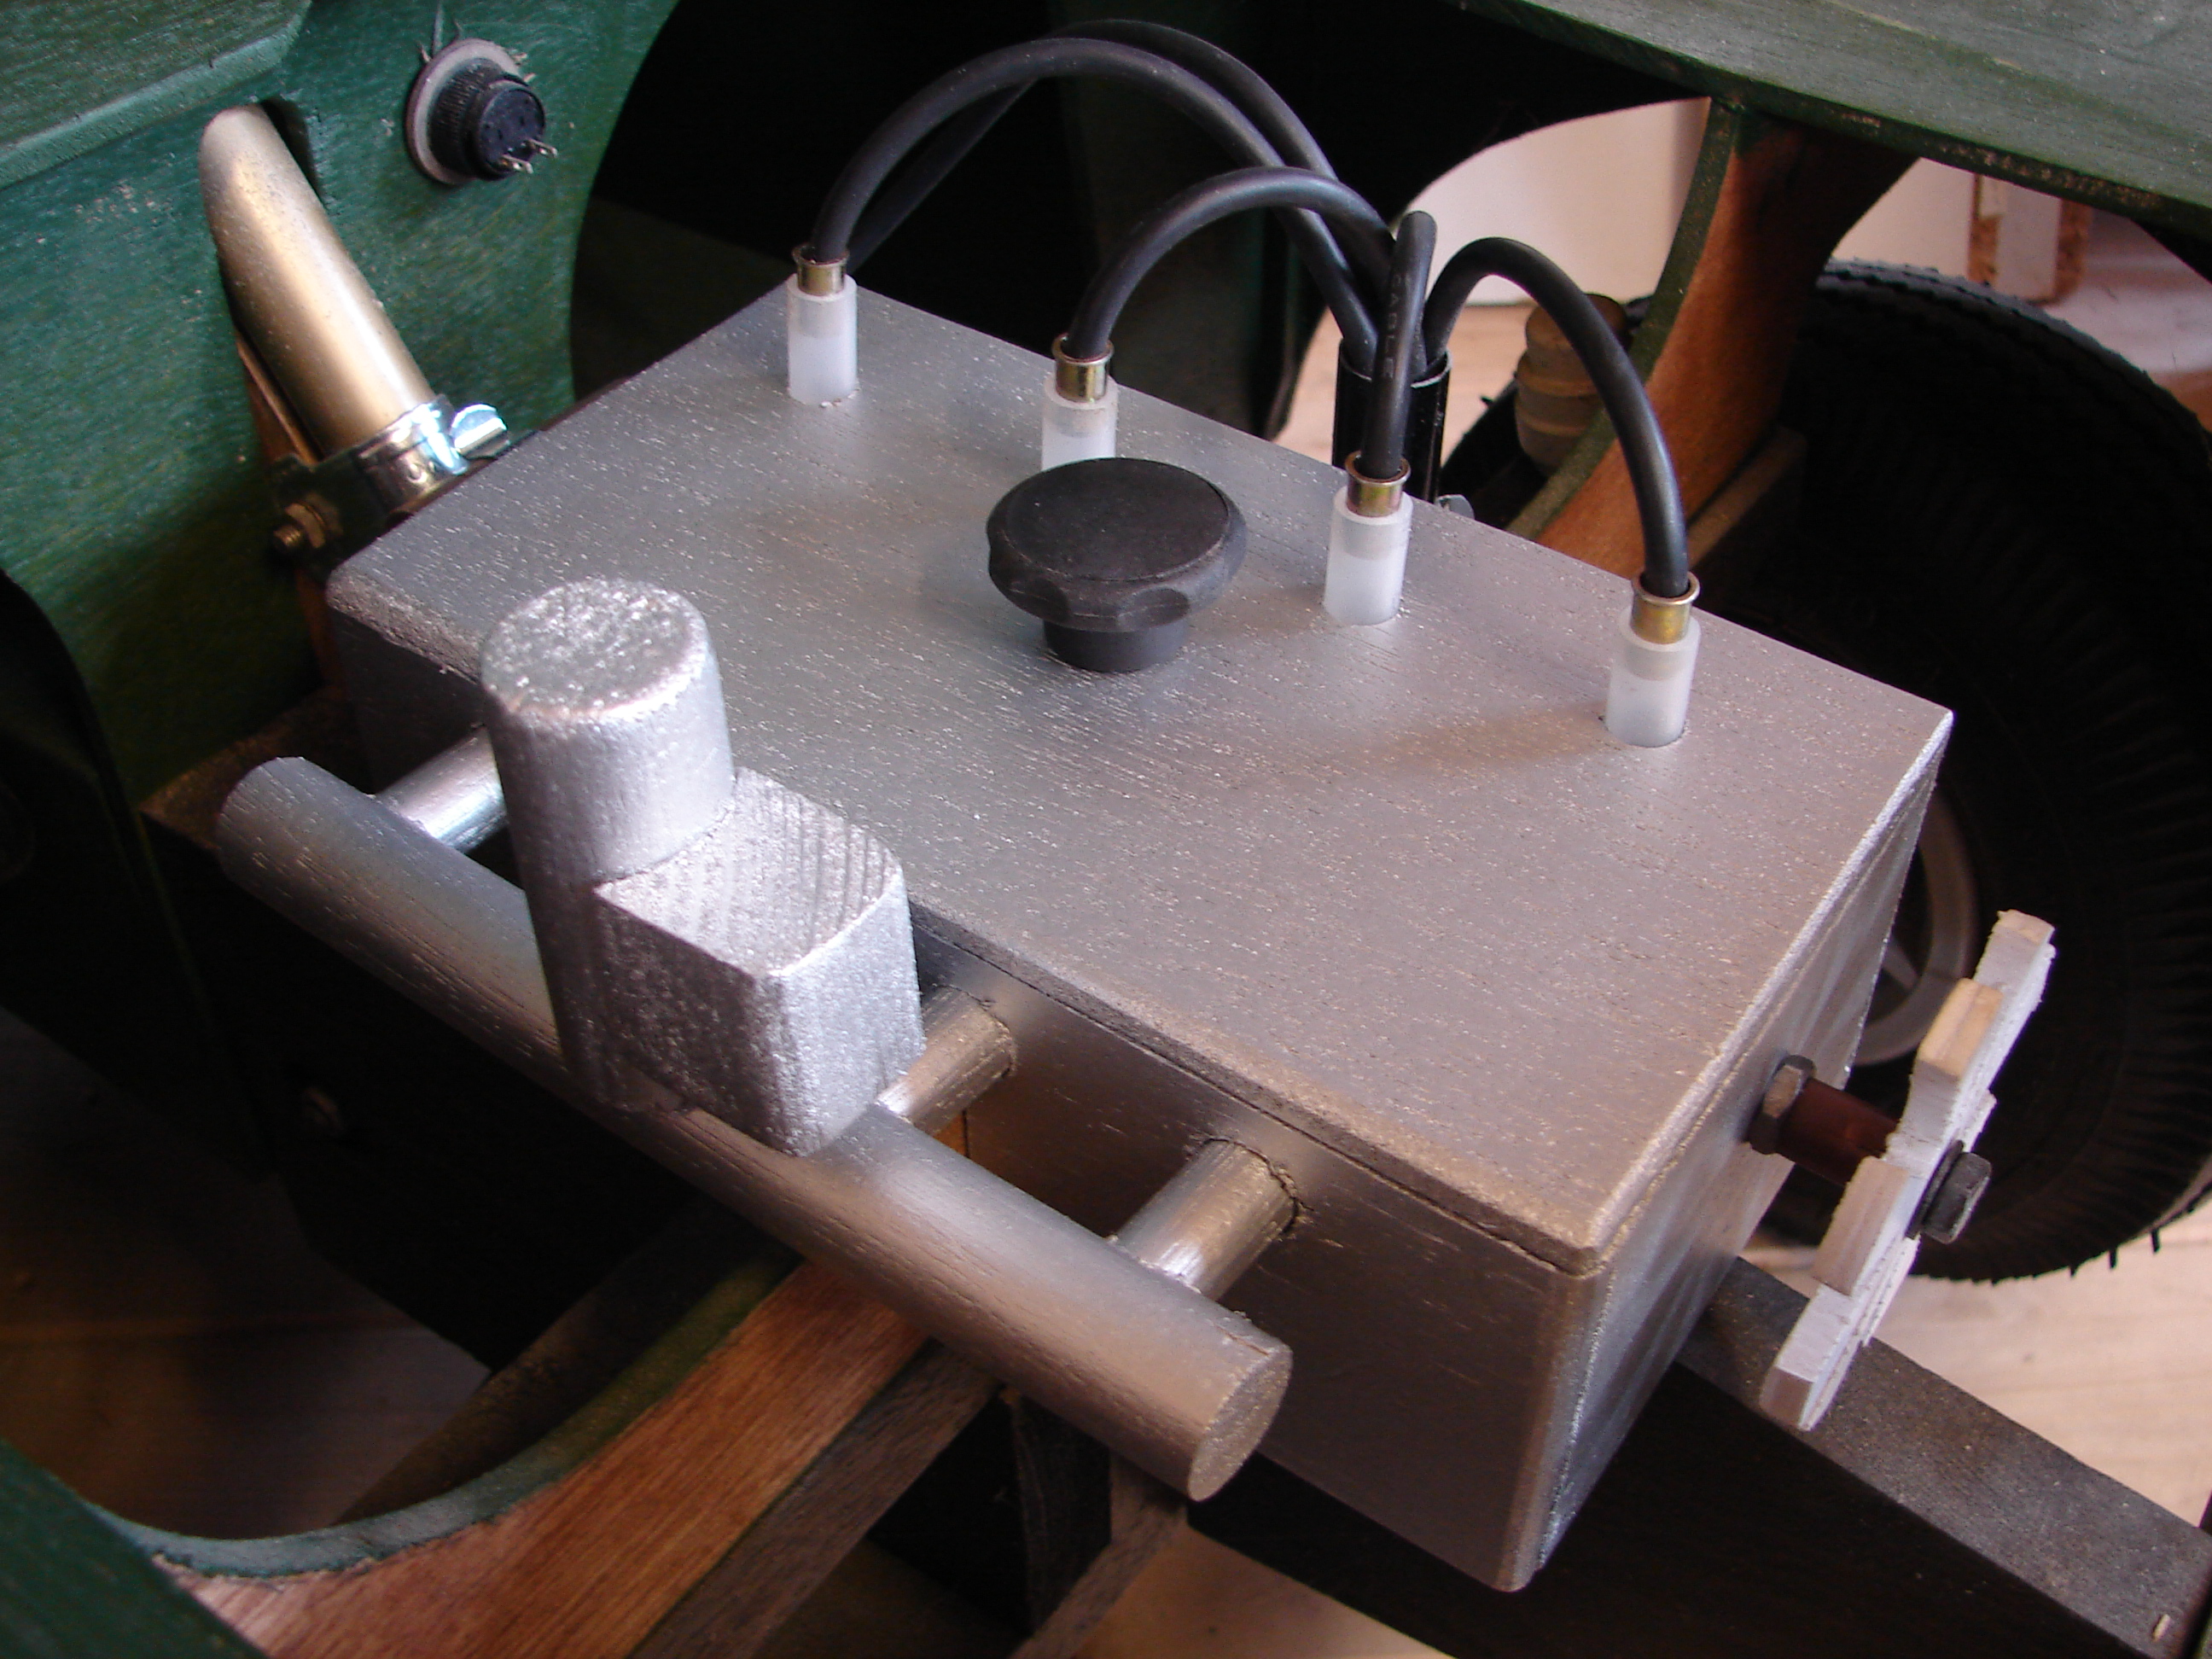
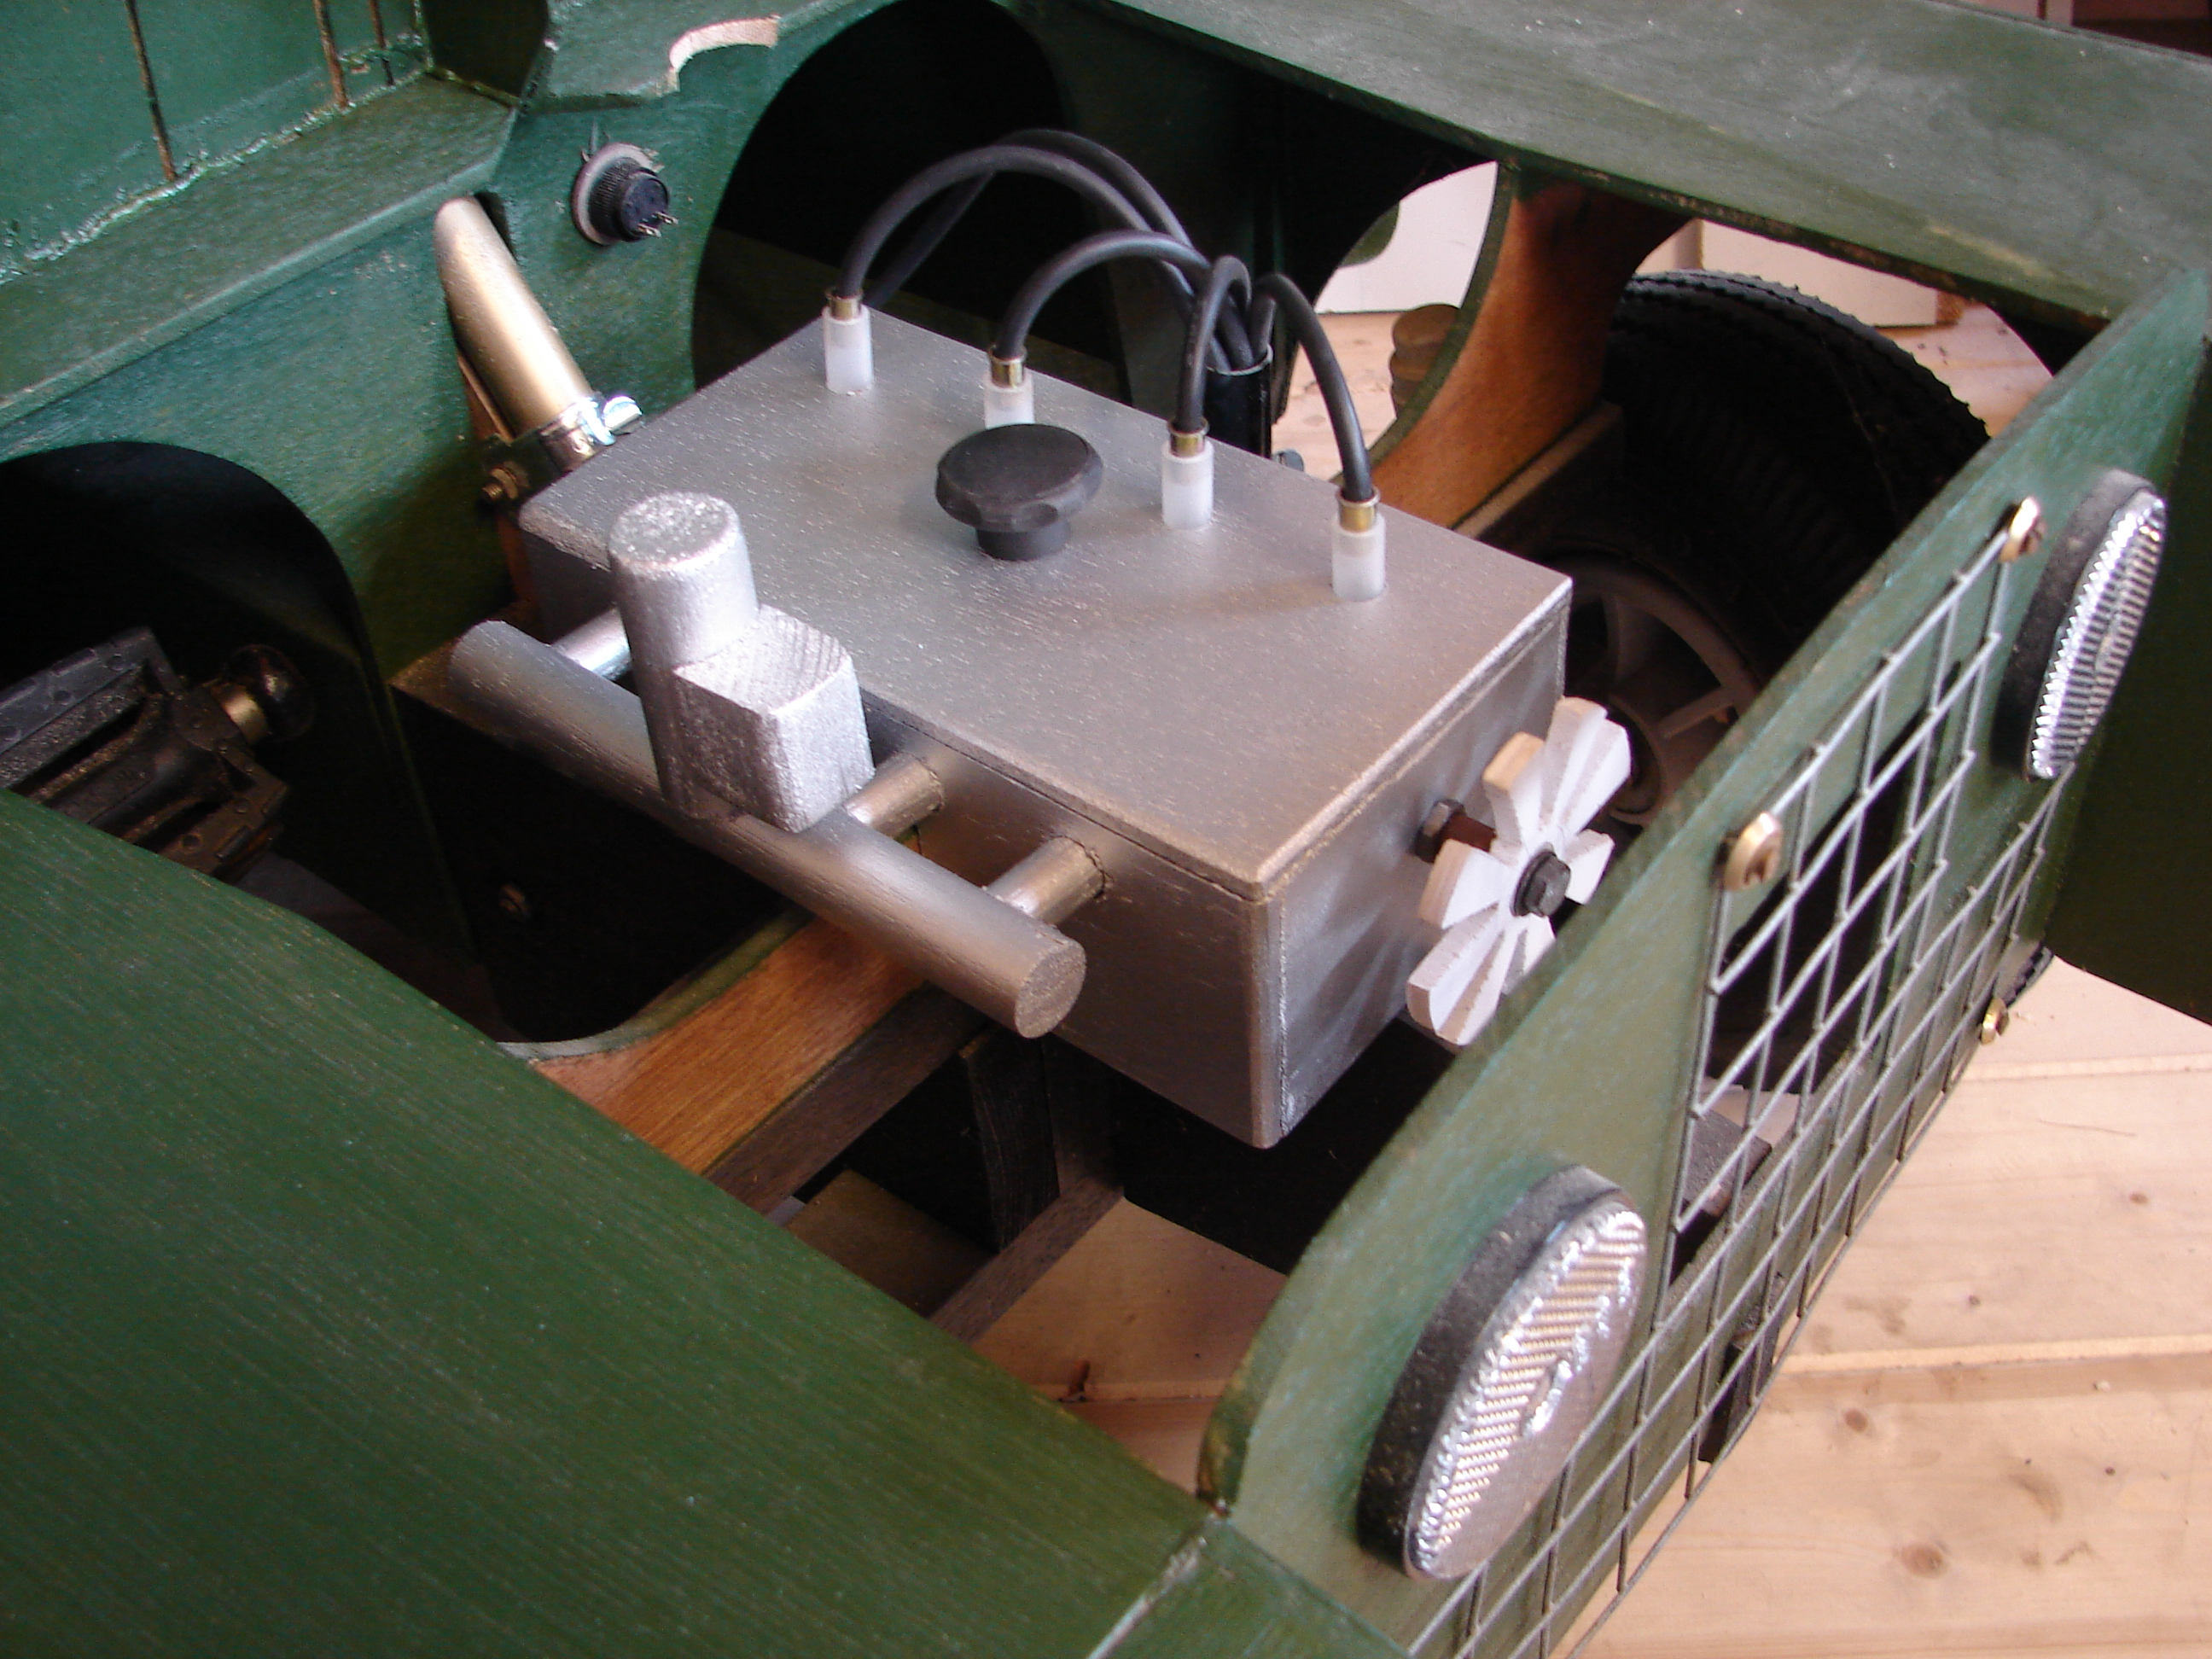
Returning home I set about making the “H” frame which forms the chassis. I hope you can see from the photograph’s how this was achieved but as the actual measurements will depend on the parts you have to work with I have not stated them here.
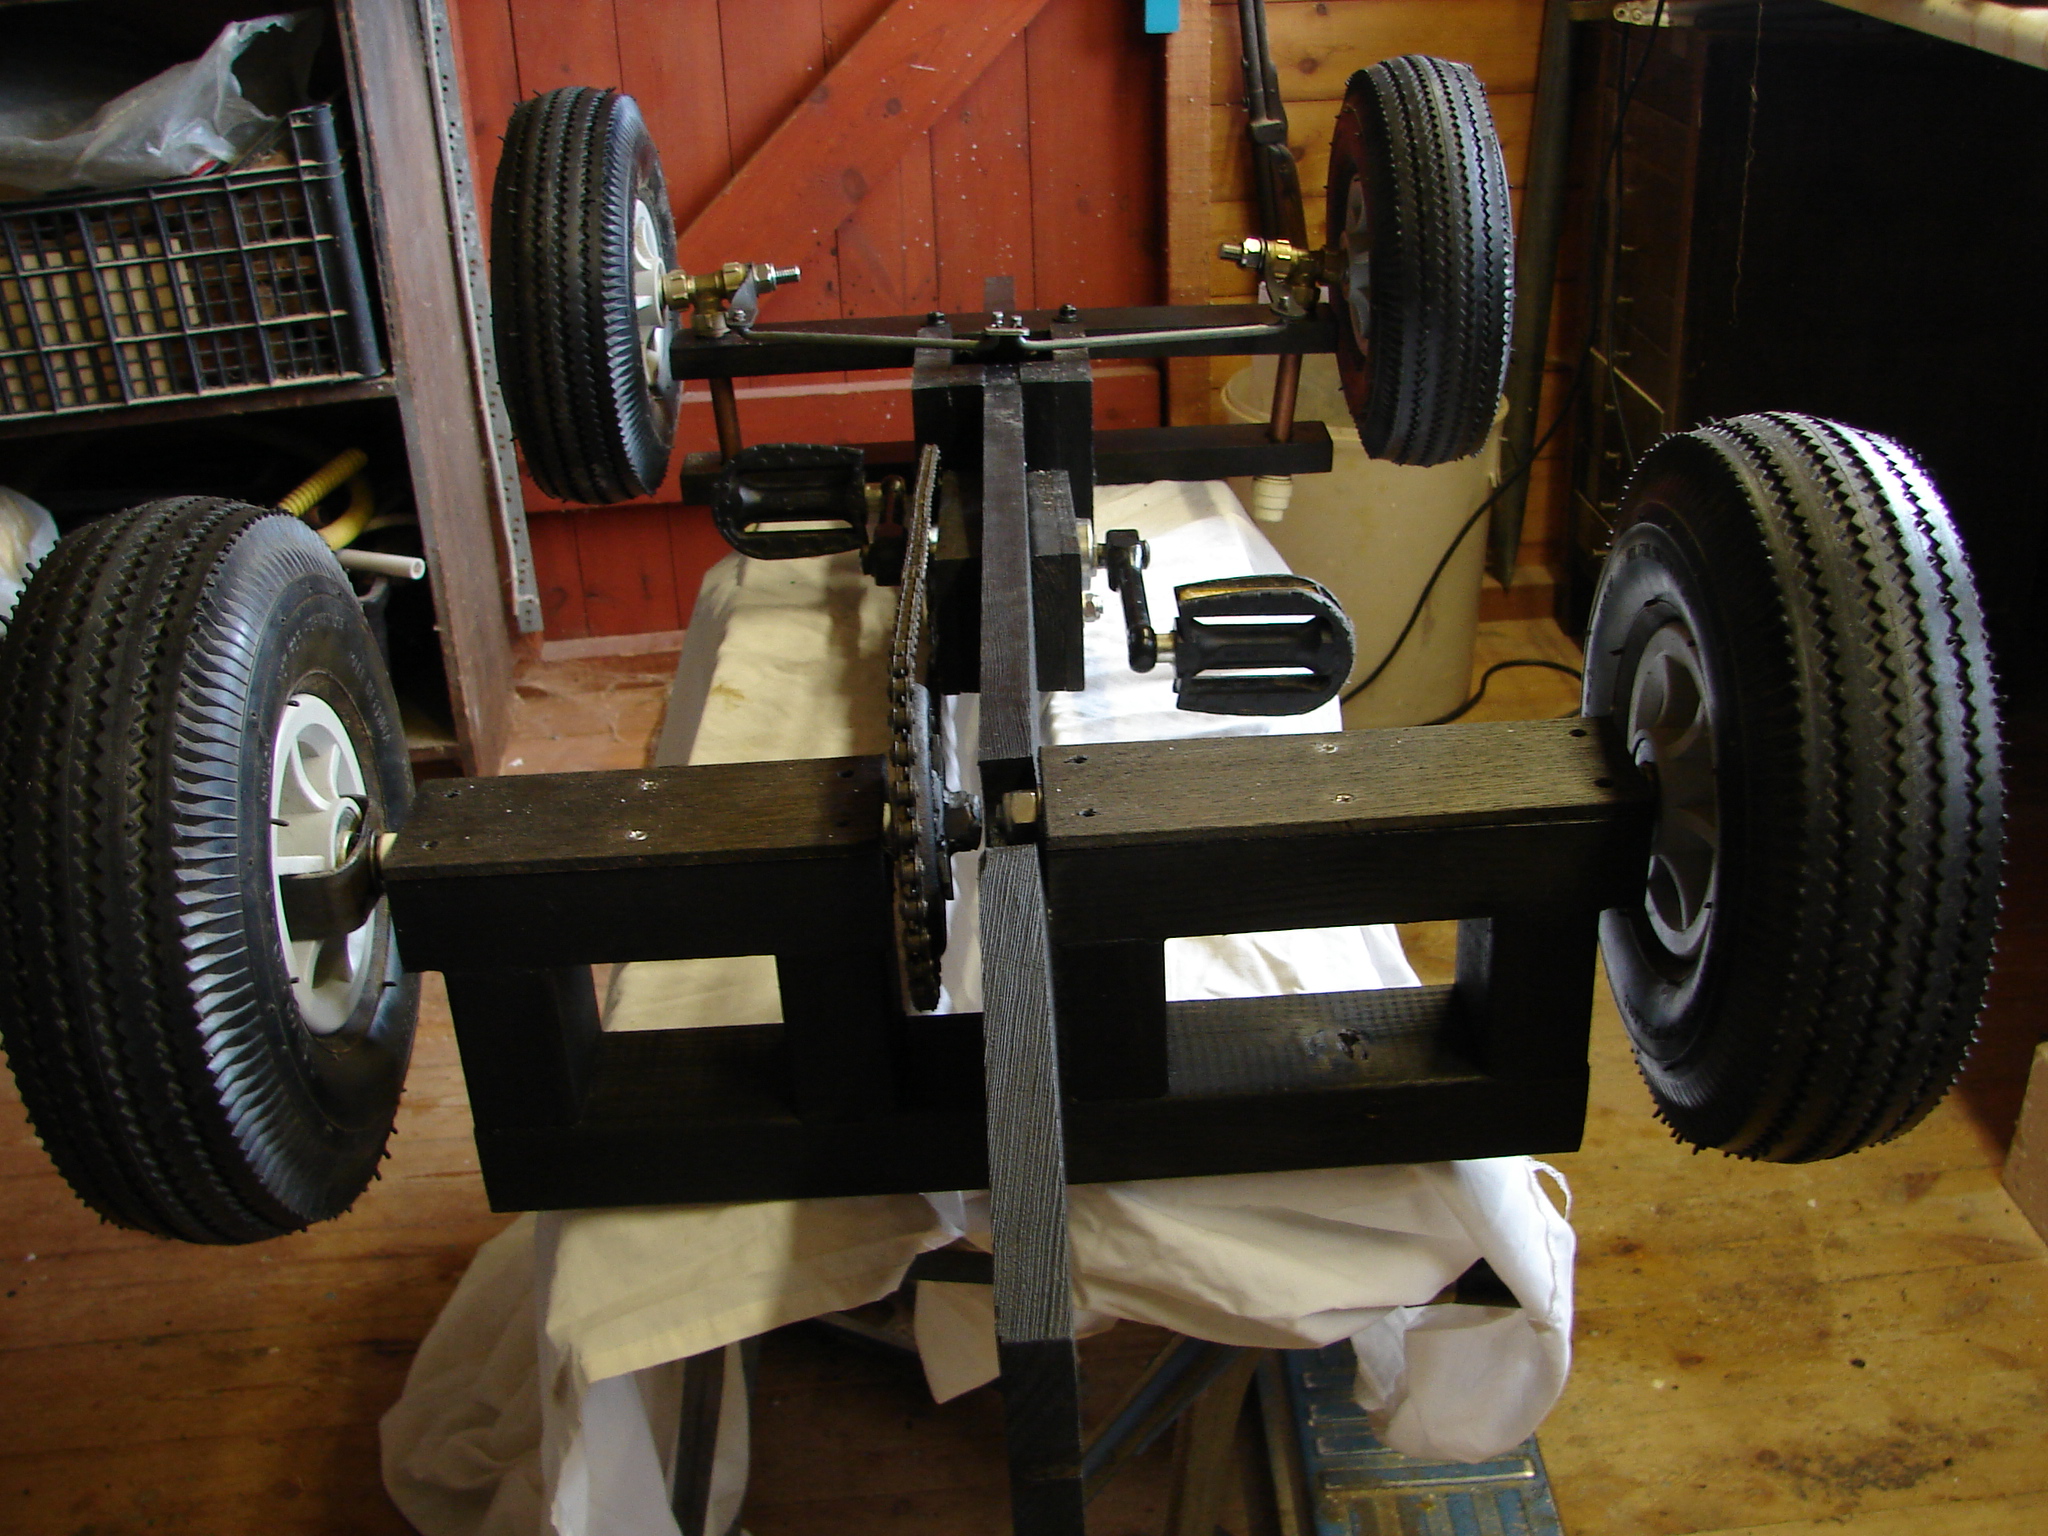
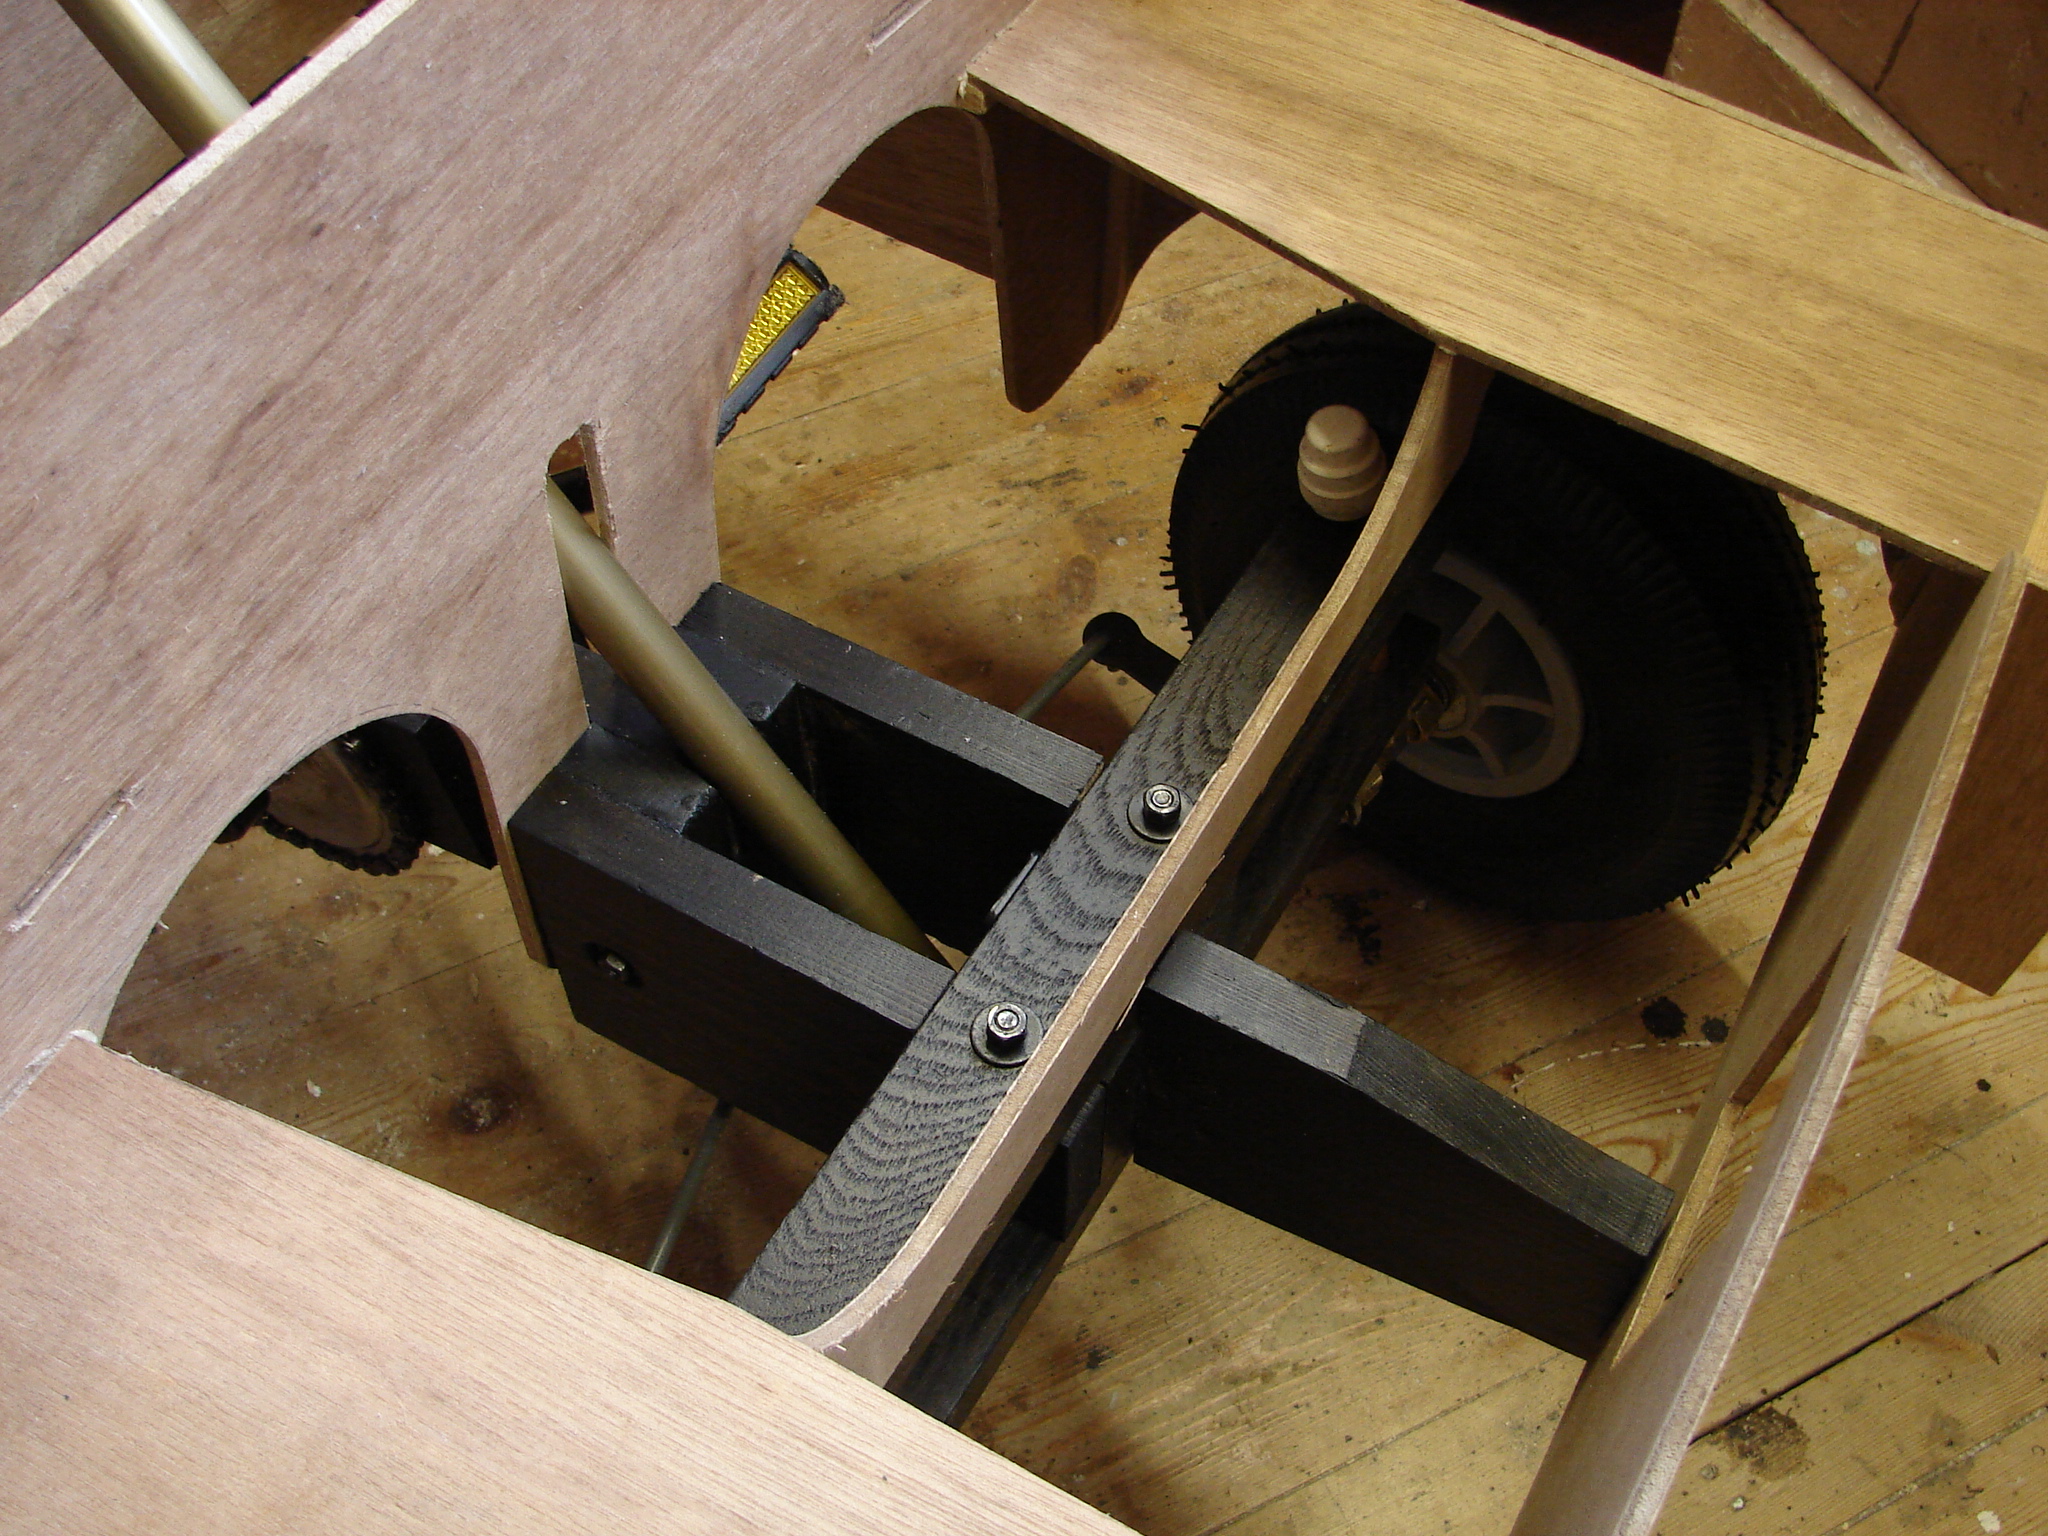
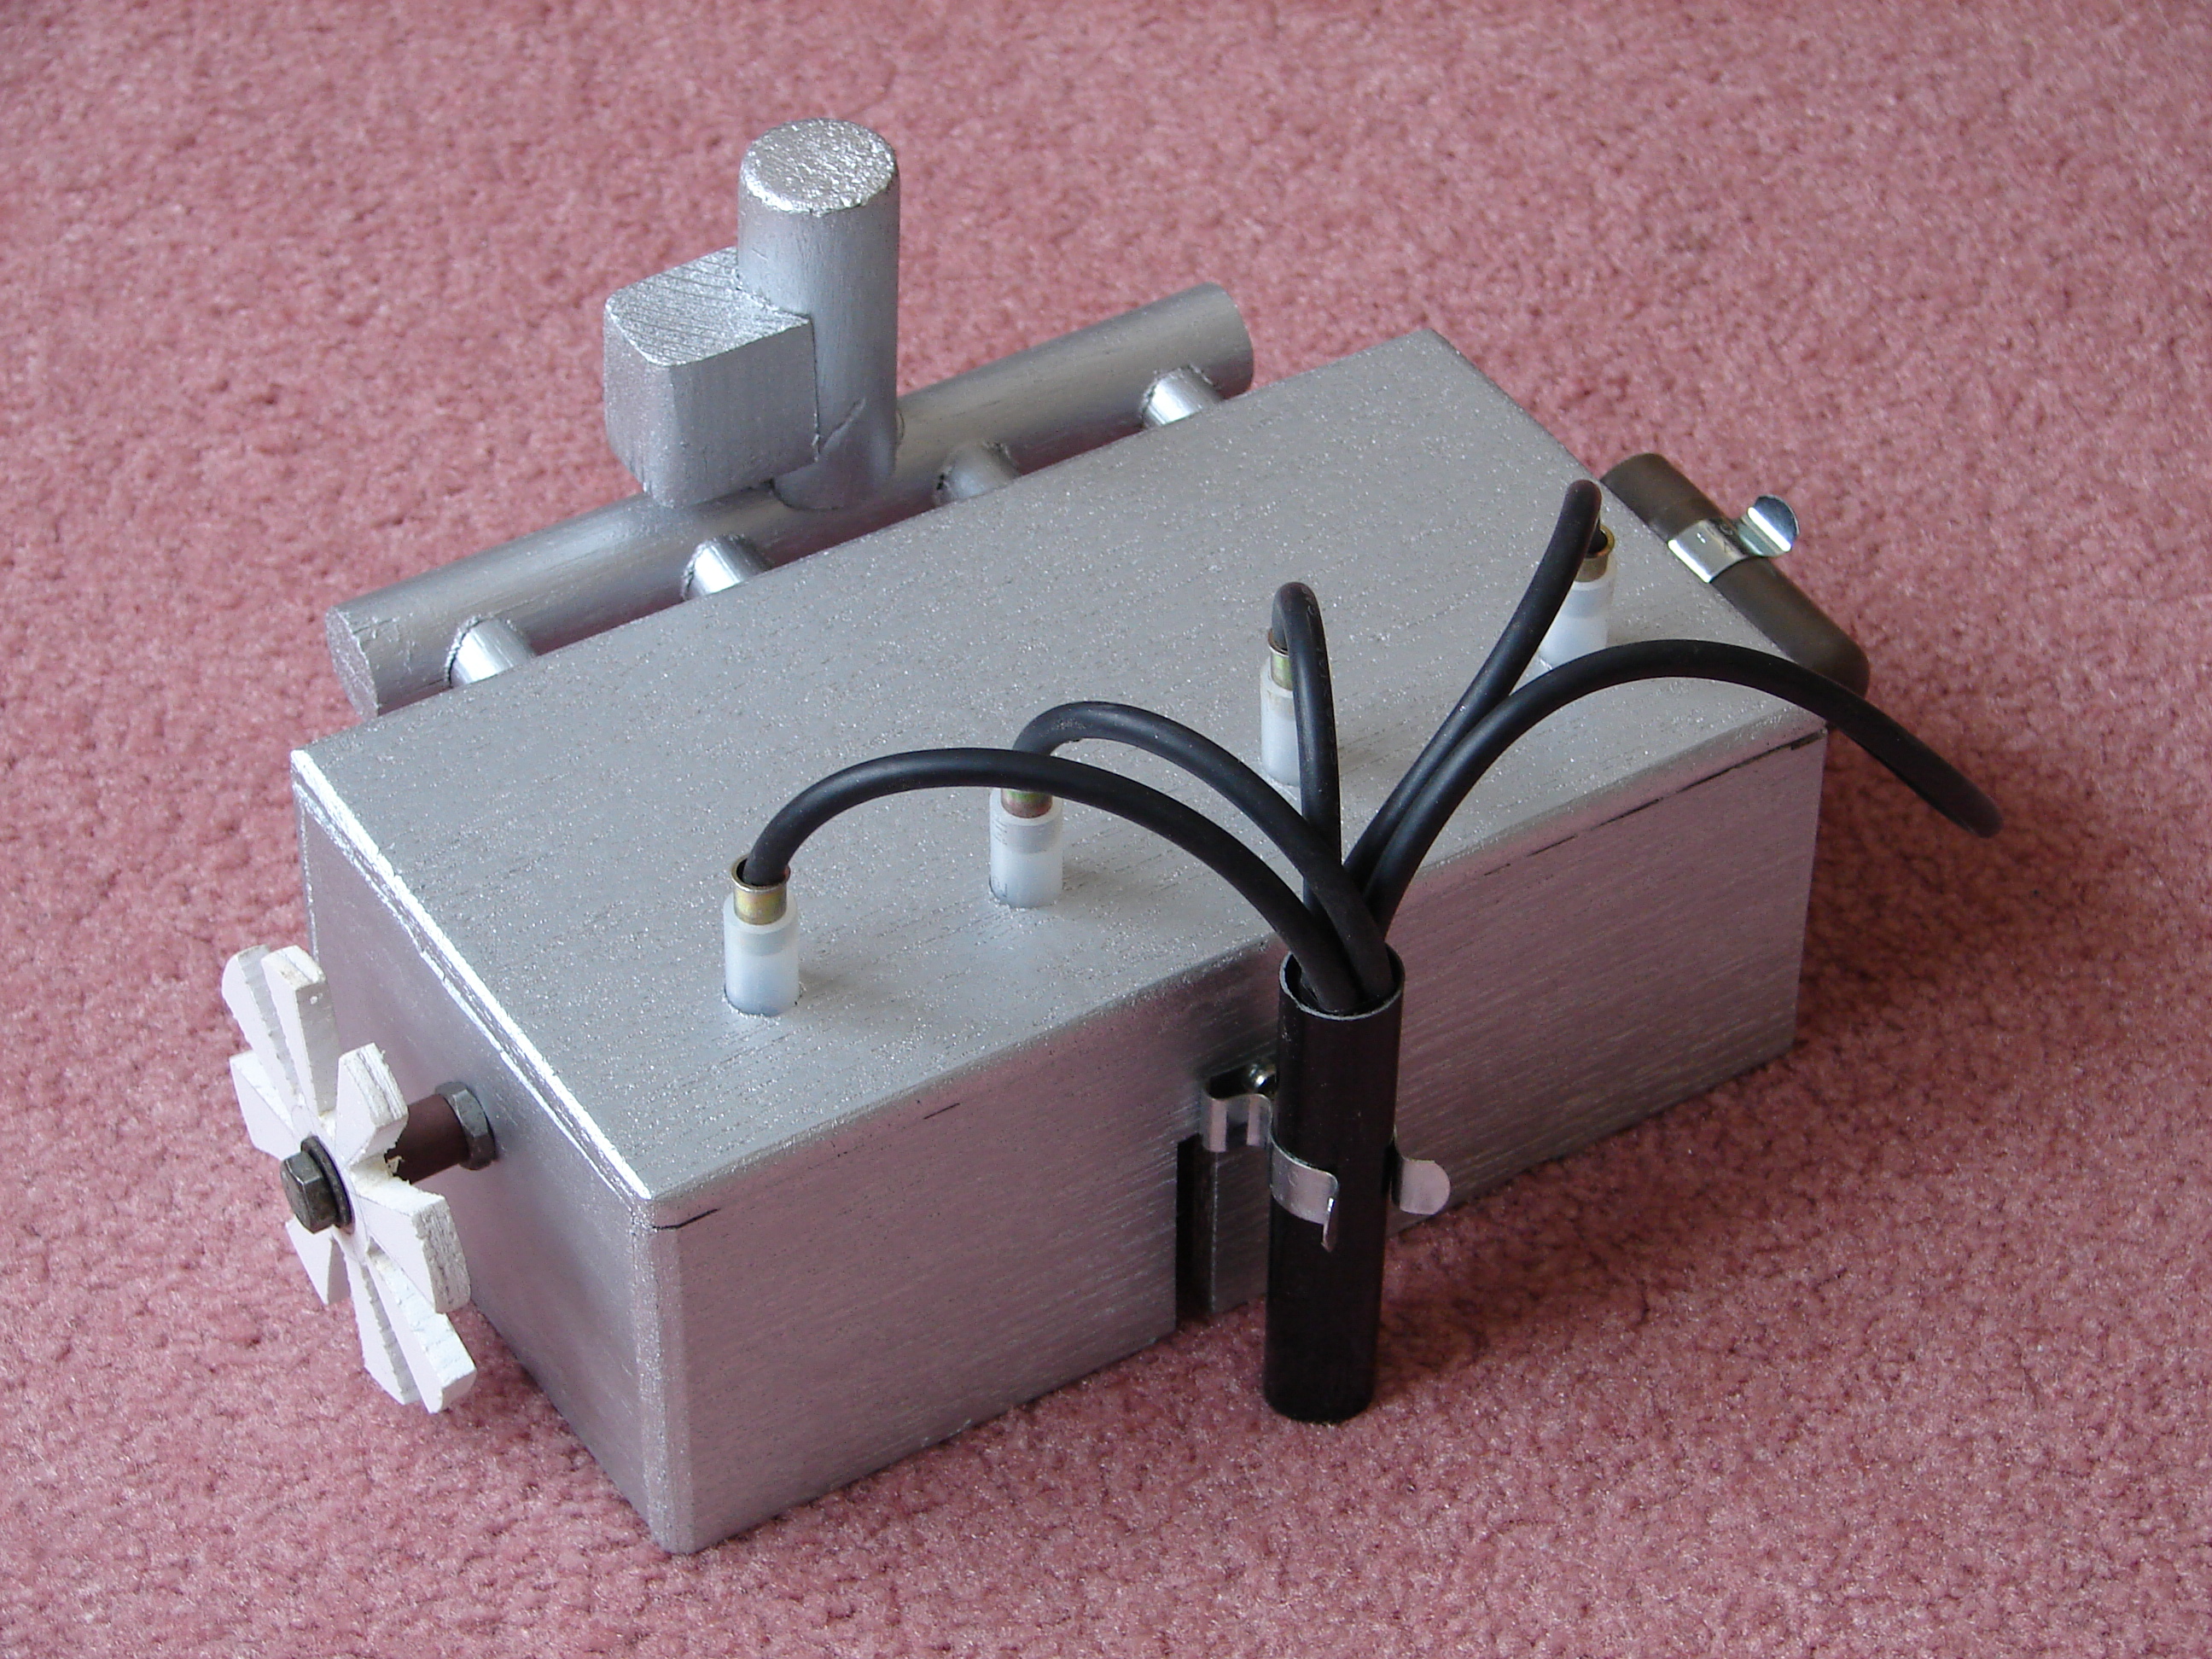
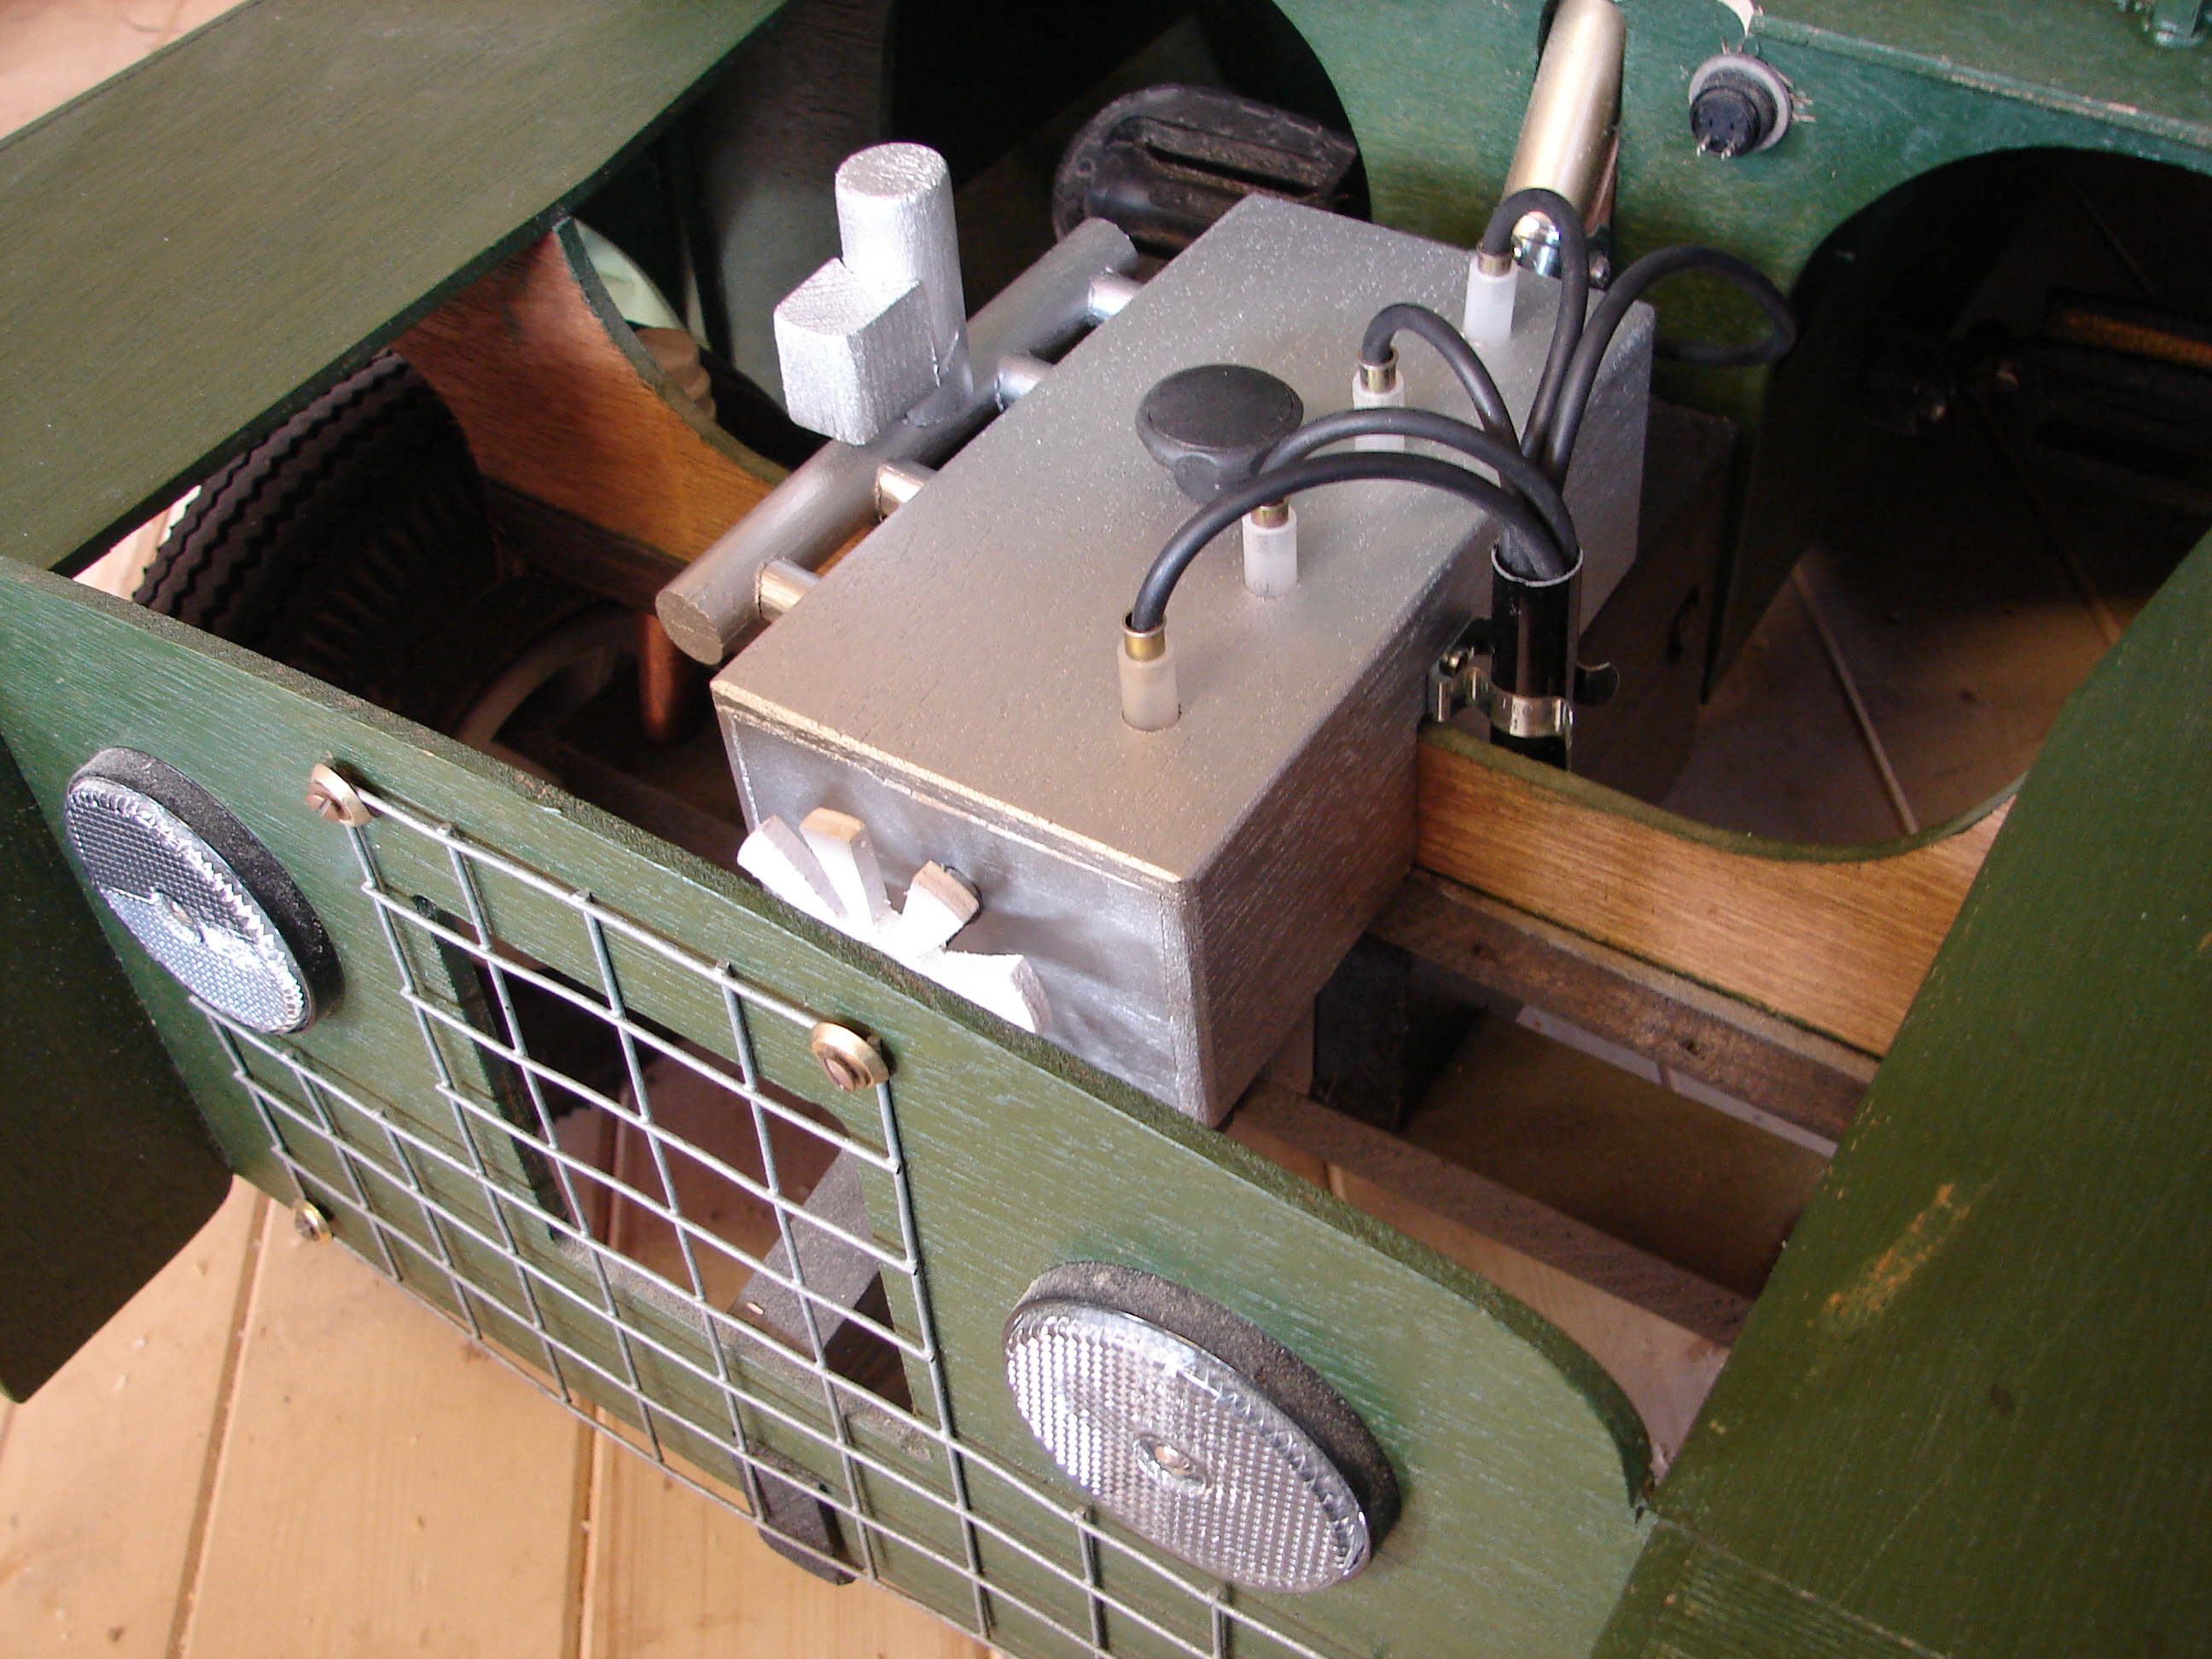
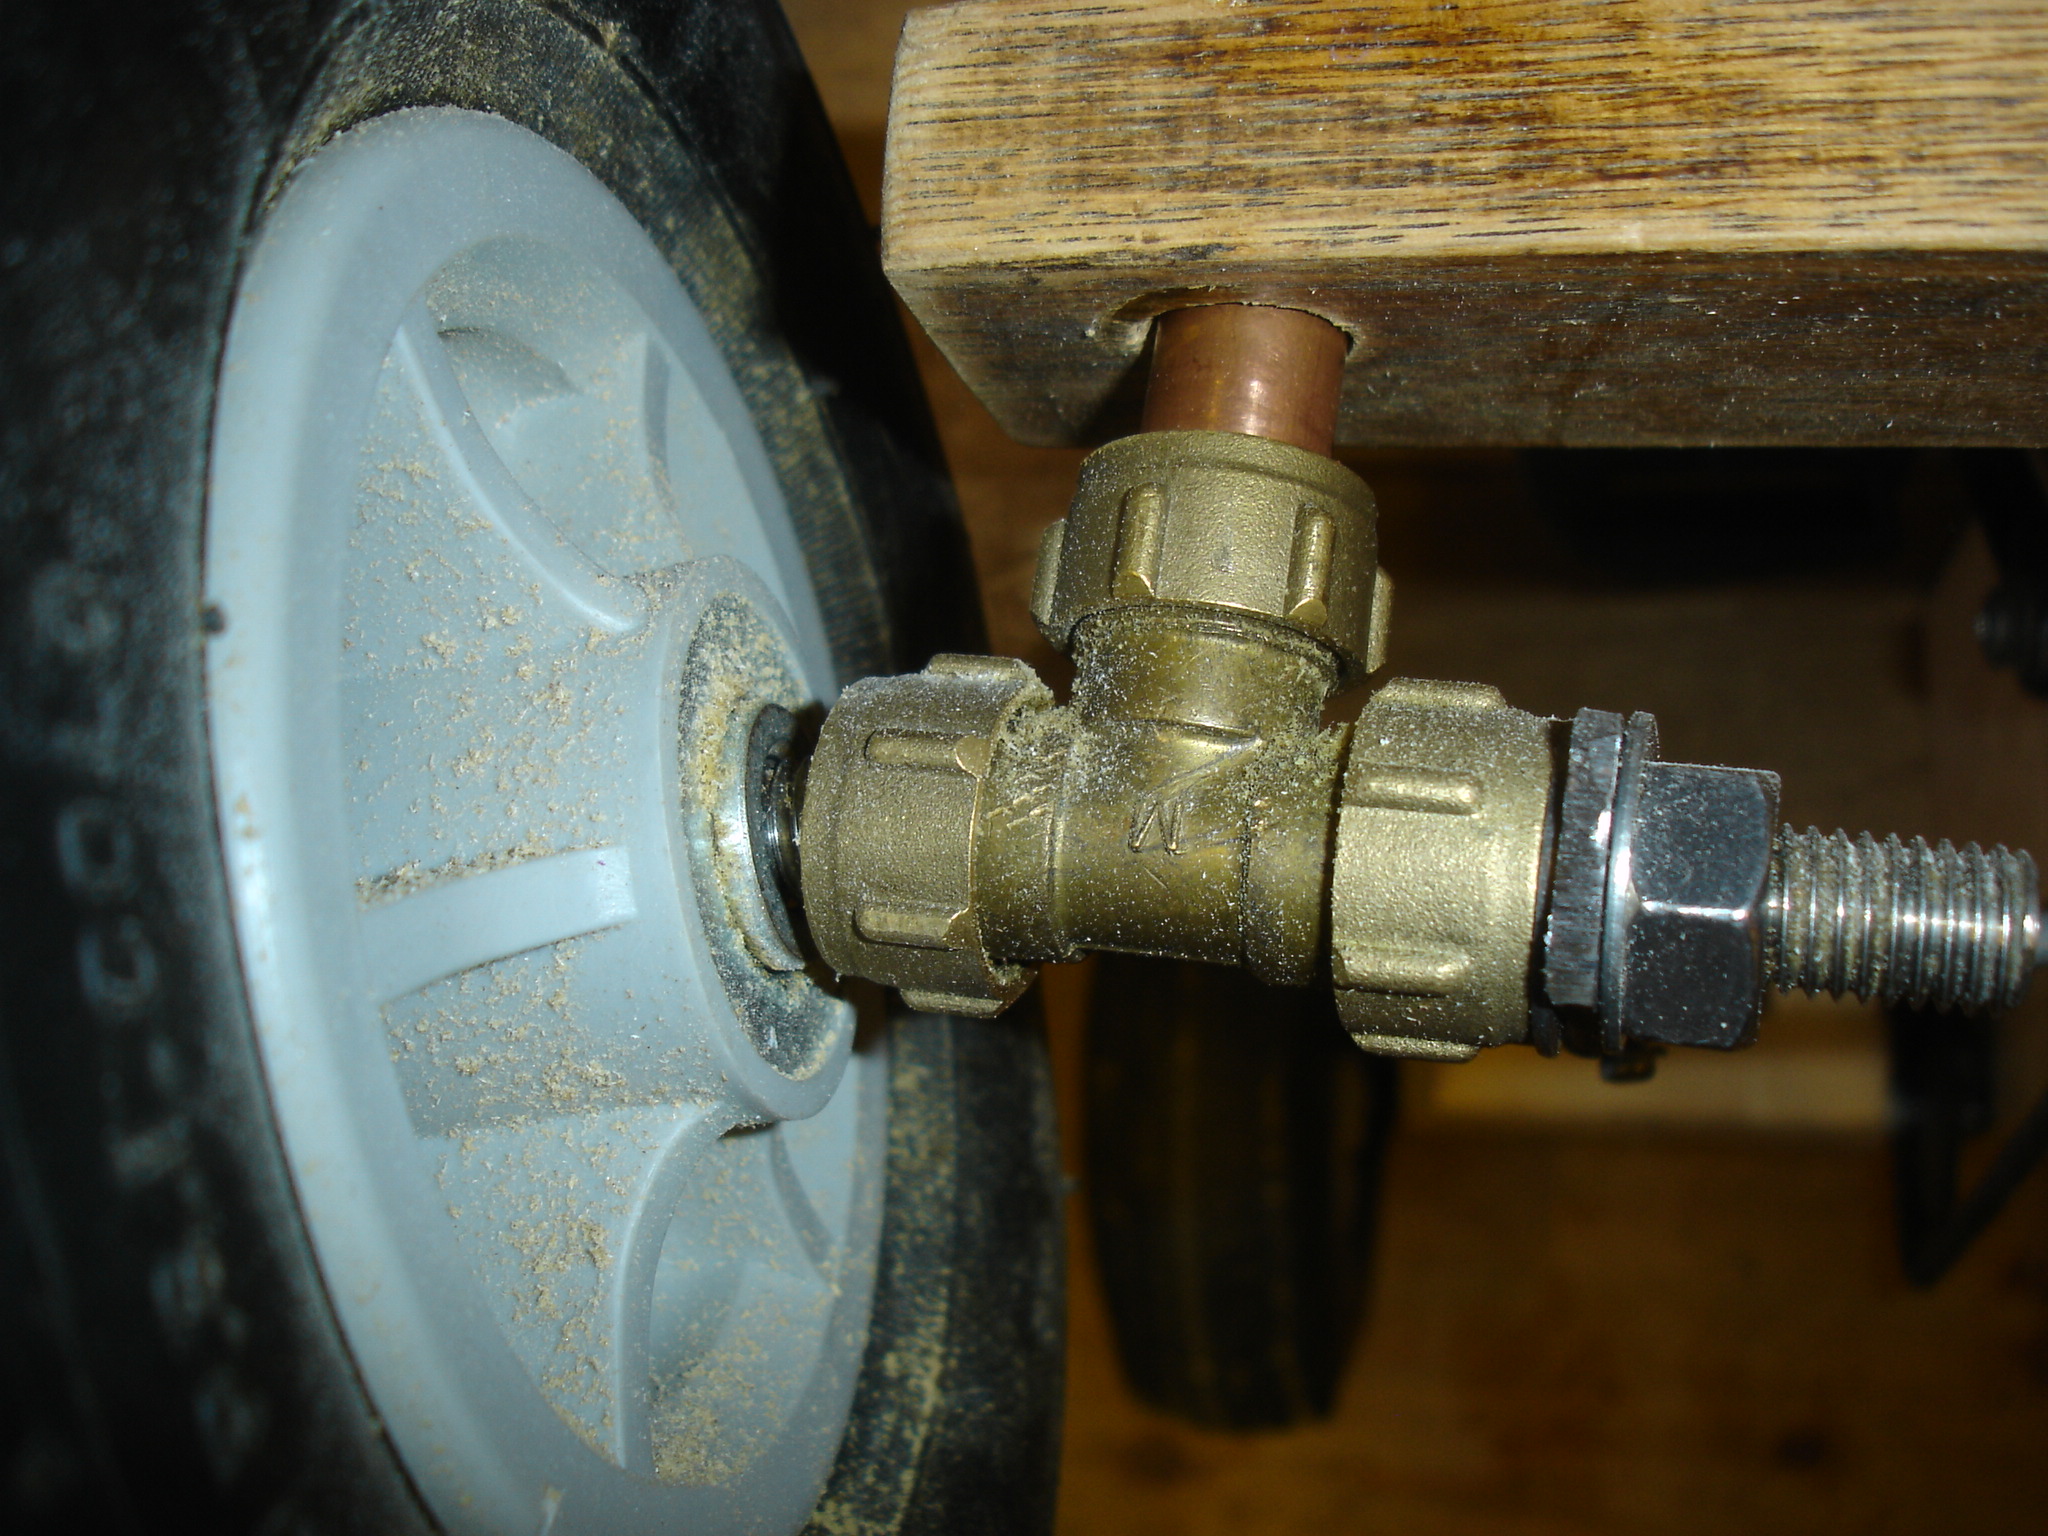
Probably one of the most complicated elements to get right is the steering and this was fabricated from readily available 15mm plumbing fittings and copper pipe work. The stub axles are made from 12mm studding with some mild steel track rods and tie rods.
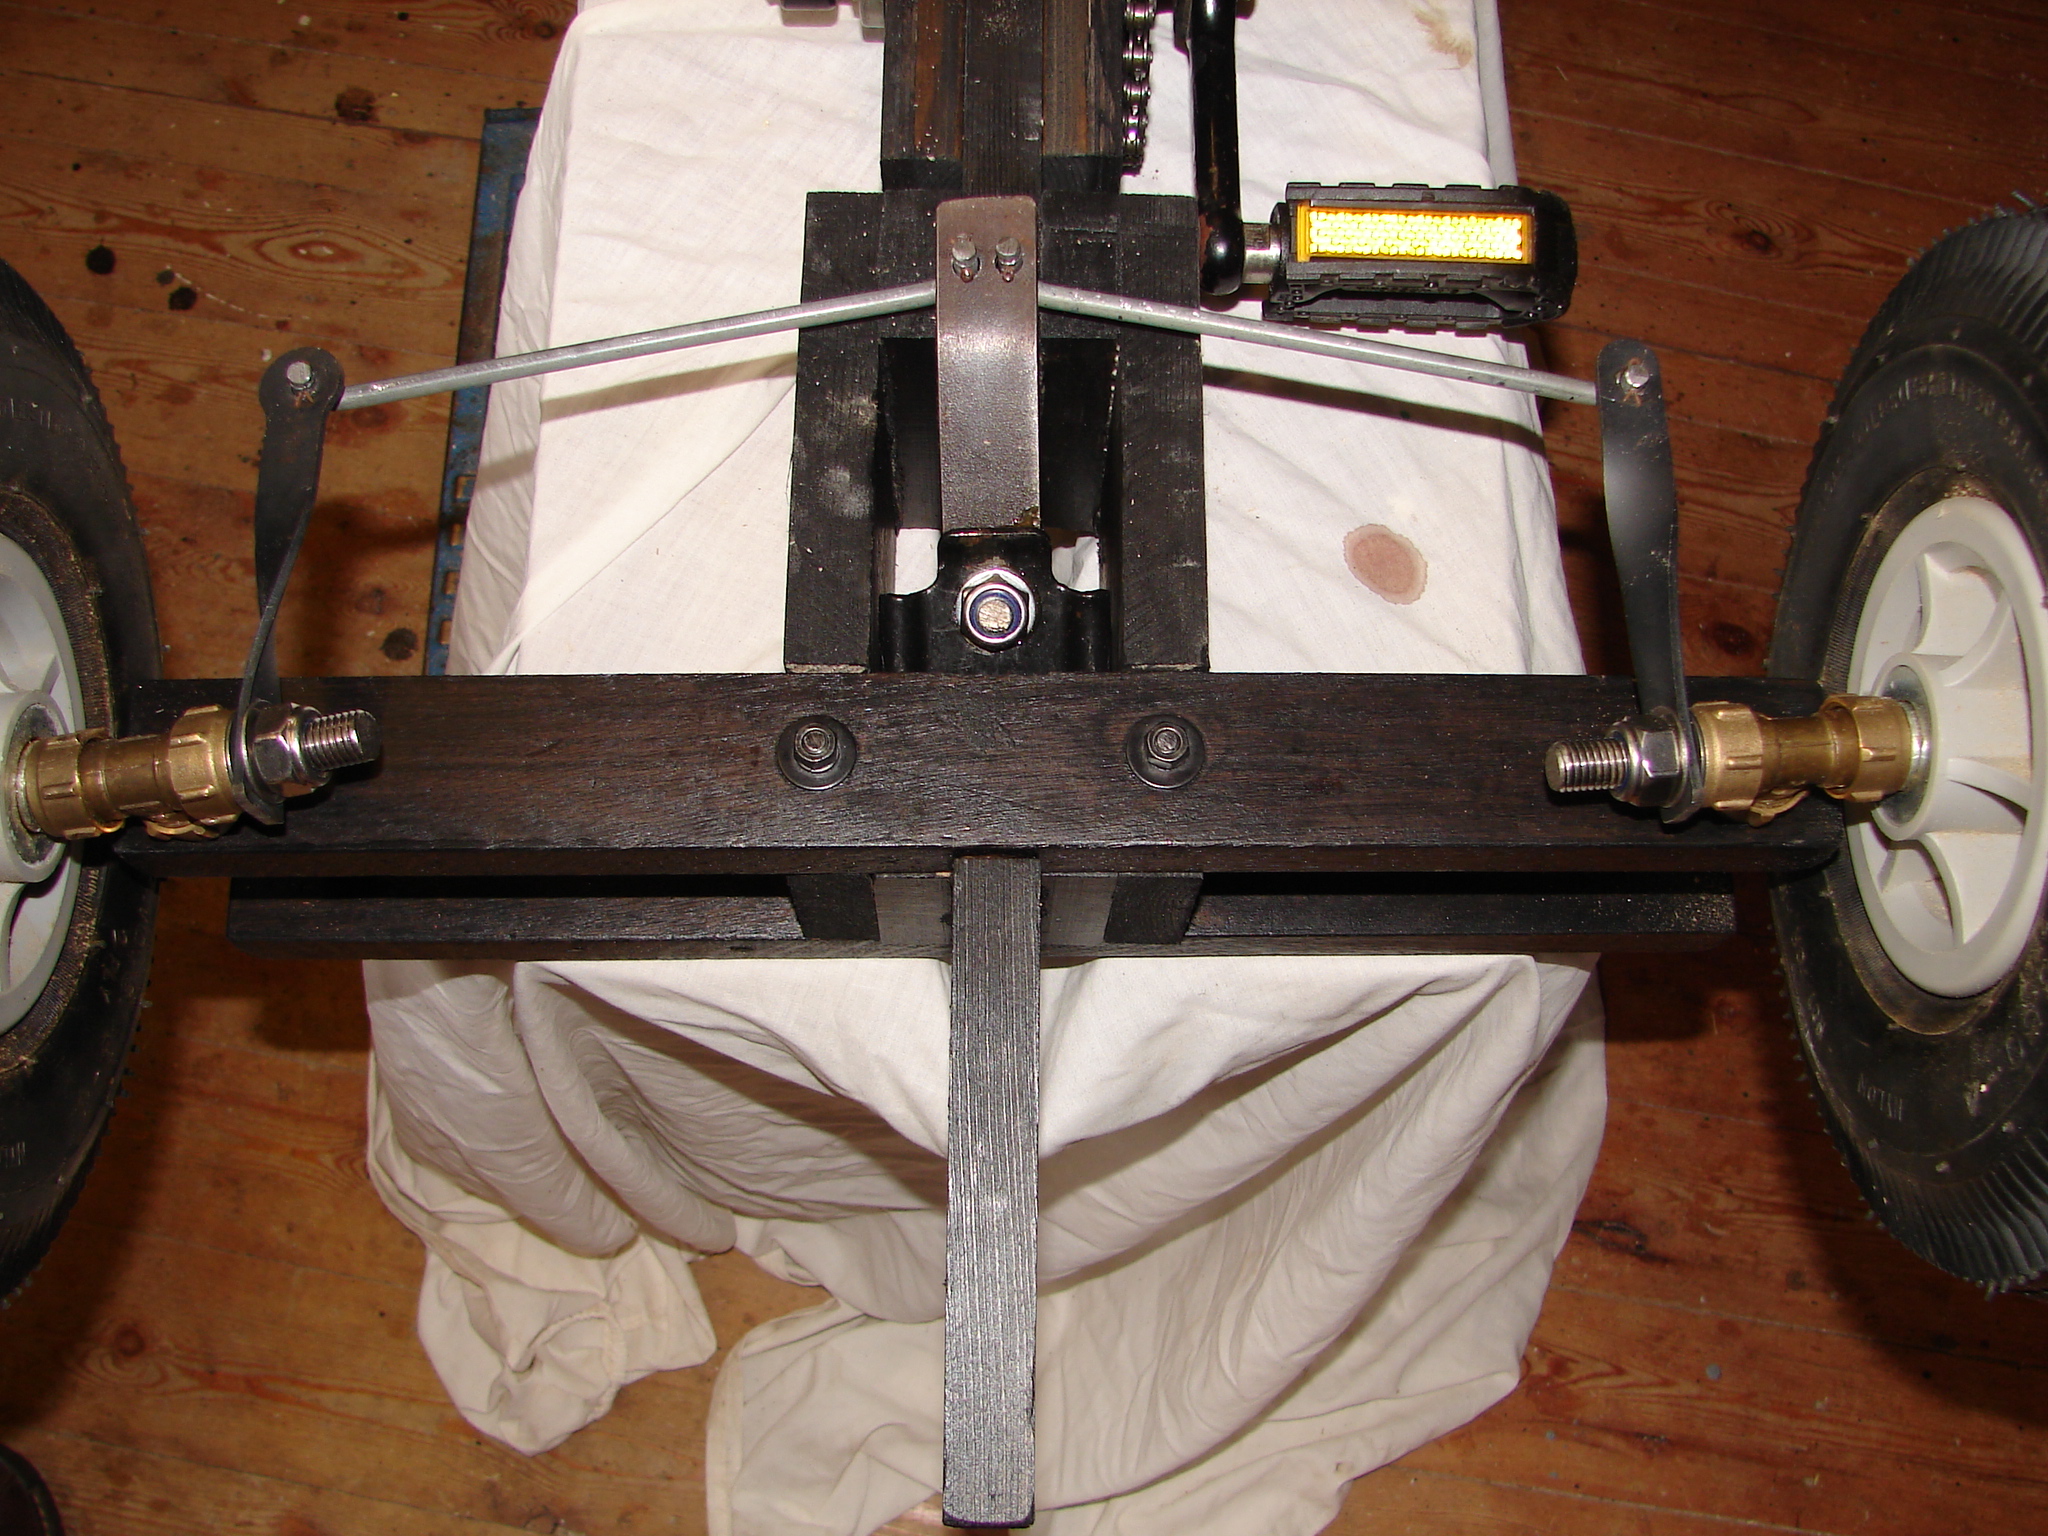
I think steering geometry is too vast a subject for this article but if you are able to create the key elements of castor, camber and king pin inclination so much the better. If not don’t worry too much, after all it is a toy.
The final part of the running gear is the rear axle and drive sprocket. The rear sprocket was disassembled from the “triple clanger” of an adult bike and has 30 teeth. The front sprocket also has 30 teeth and the length of each pedal crank is 100 mm